DIY Text Wall Art
This post may contain affiliate links. Please read my disclosure policy.
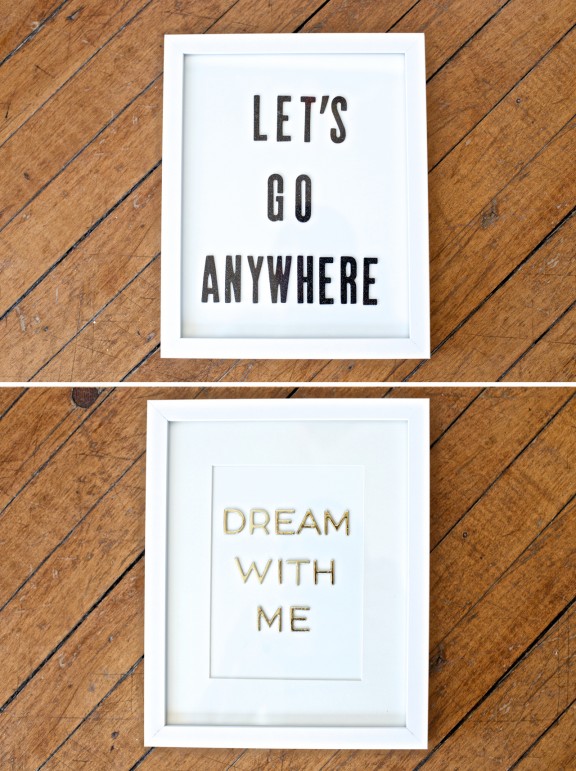
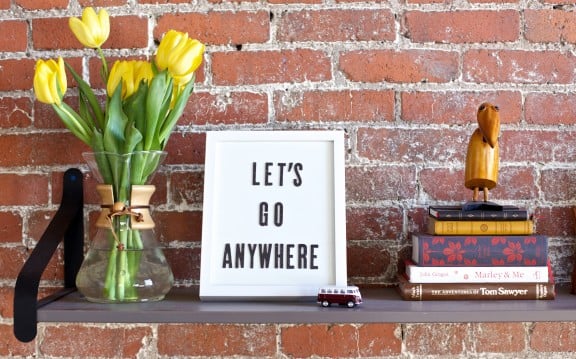
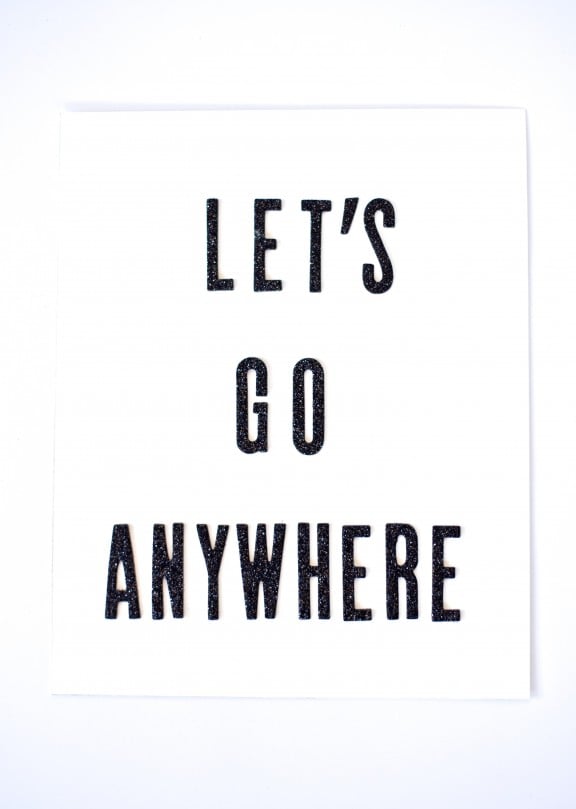
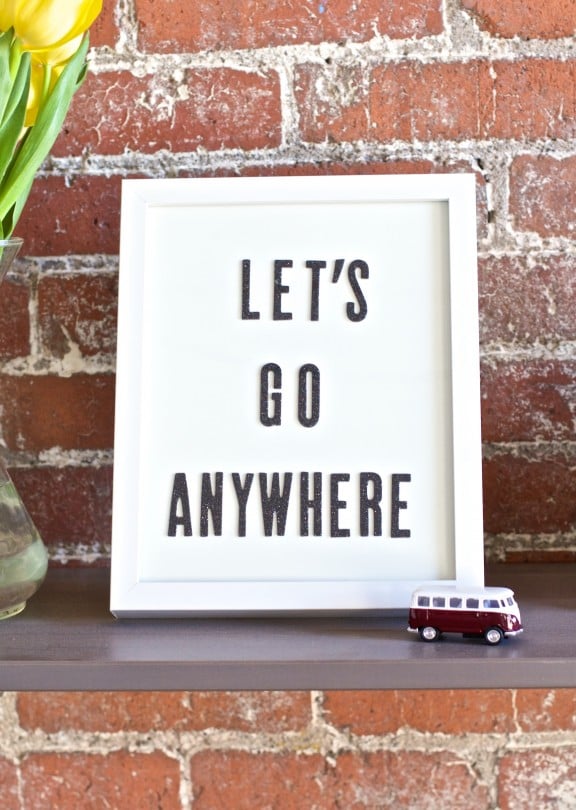
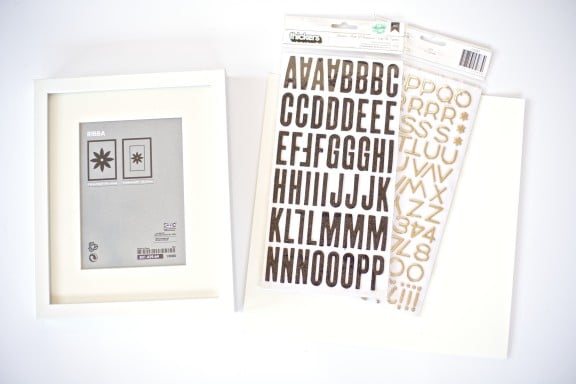
On a recent trip to Ikea I decided on a whim to buy a few 8×10 frames. I have heard so many great things about Ikea’s frames and decided at 5 dollars a piece I could spare the 20 dollars and give them a try. I actually didn’t have a plan for them when I bought them, but I knew that with a simple white frame anything was possible! I have always been a fan of text art, and am currently loving a simple black and white look in our home. This project was so easy — and for two new pieces of art it cost me less than $15.00. You can’t beat that! “Let’s Go Anywhere” art:

Materials:
- 8×10 frame (mine is from Ikea)
- White piece of cardstock–cut to 8×10
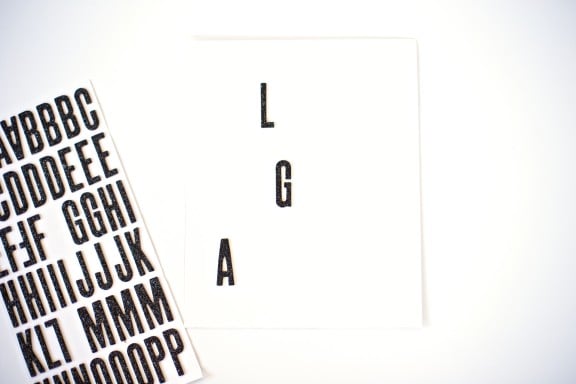
- Black alphabet stickers (I got mine from Hobby Lobby)
Instructions:
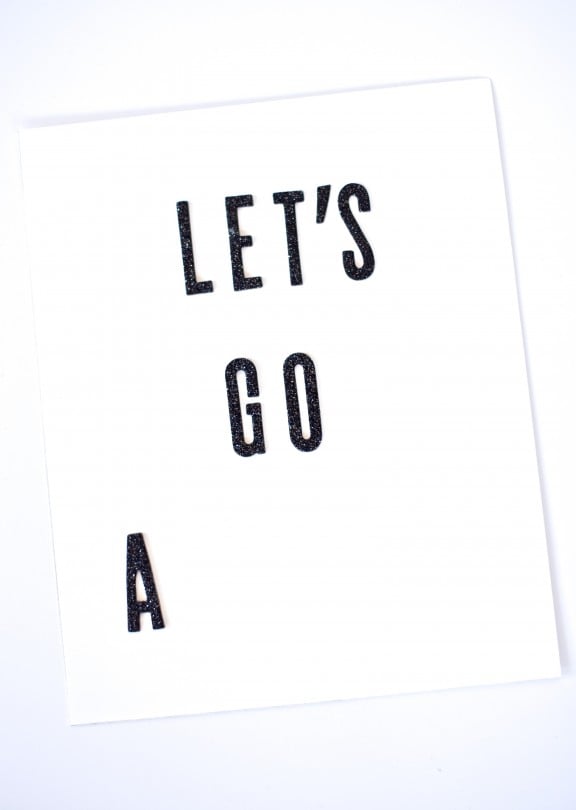
- Pick your phrase. I chose “Let’s Go Anywhere” for mine.
- Using your 8×10 cardstock layout how you would like the words to align. I found it easiest to put the first letter of each word on the paper and then lay the rest down from there.
- Make sure your letters are straight and lay the rest of them down to create your phrase.
- Place your new art in the frame.
- That’s it!
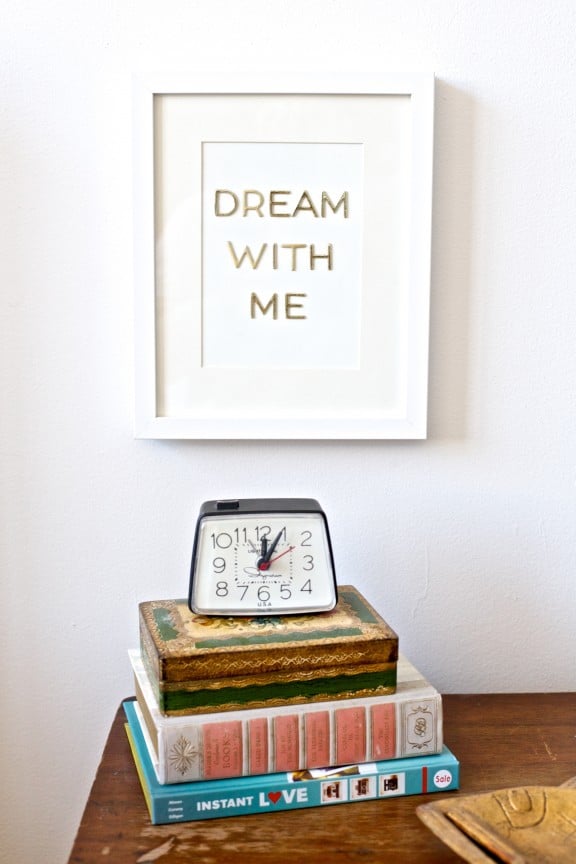
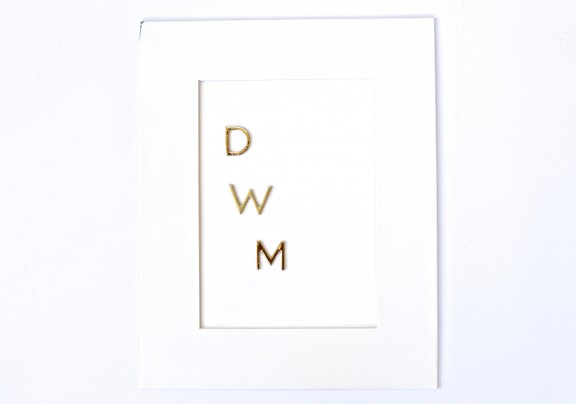
“Dream With Me” art:
Materials:
- 8×10 frame (mine is from Ikea)
- White piece of cardstock–cut to 8×10
- Gold alphabet stickers (I got mine from Hobby Lobby)

Instructions:
(Very similar to above directions!)
- Pick your phrase. I chose “Dream With Me” for this one.
- Using your 8×10 cardstock, layout how you would like the words to align. I found it easiest to put the first letter of each word on the paper and then lay the rest down from there.
- Make sure your letters are straight and lay the rest of them down to create your phrase.
- Place your new art in the frame.
- That’s it!
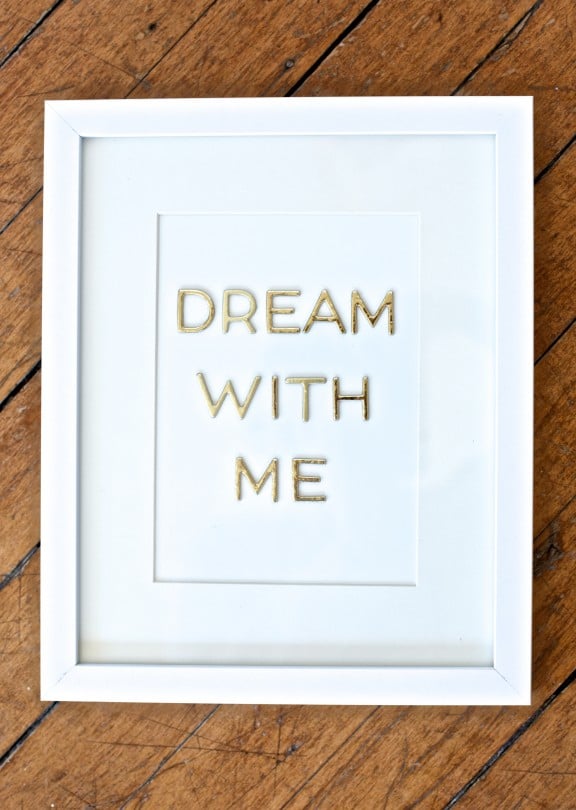

I love how versatile this project can be. I could see these being great gifts for weddings, baby showers, or just because! And at such a low cost, I’m thinking I’ll be changing out the text on the regular! Happy weekend friends!


Absolutely love these! I think I already have the supplies to make them! Might be a weekend project. Thanks for the great idea!
What a simple but elegant idea! Very easy, but sure to get noticed. :) Thank you!
Allison Katelyn @ Http://SimpleSilverLinings.blogspot.com