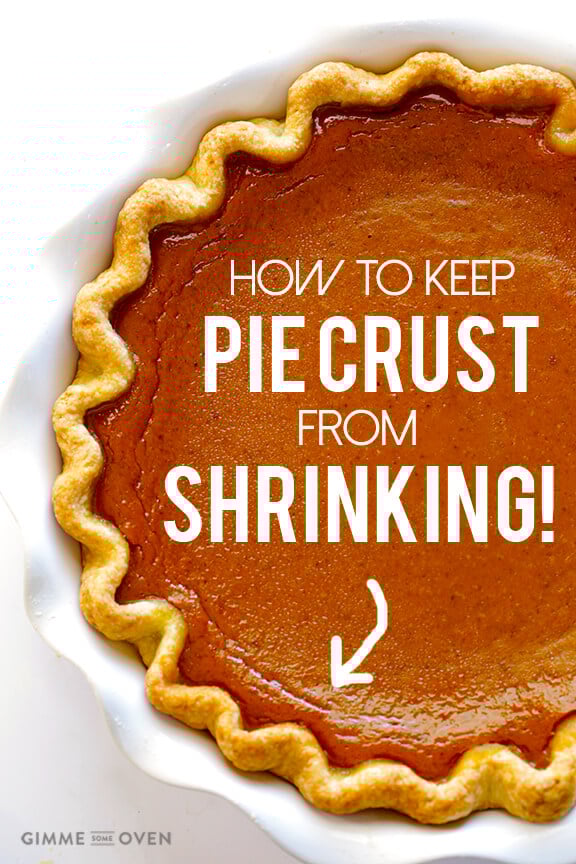
Greetings from Wichita! I’m back in my hometown this weekend, celebrating the holidays with my family. And we kicked things off yesterday with a mega baking day and made four pies. So much pie!!!
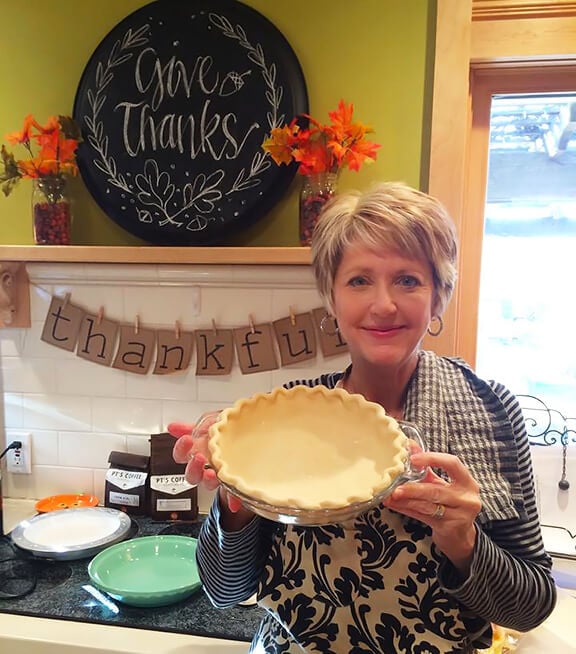
While whipping up 6 batches of my favorite homemade butter pie crust recipe, we did end up having quite a few conversations about pie crusts and how they work and why they so often shrink. And after receiving questions from some of you about the same topic, I thought I’d pop in with a quick list of tips to prevent your pie crusts from shrinking. Because after you go to all of that work to make them homemade, and then shape and crimp and lattice them to look pretty in the pan, who wants them to shrink?!?
Not this pie lover.
So without further ado, here are 7 quick tips to keep pie crust from shrinking. If you have more of your own, be sure to share them in the comments below!
1. Don’t forget to give pie crust time to “rest”
Probably the main reason that pie crusts shrink is because the dough is not given adequate time to “rest”. This resting time allows the gluten to literally relax at critical points in the pie dough process, and will play a big role in preventing shrinking once it is baked. There are 3 main times that the pie crust needs to rest:
- After mixing the dough: Once you have mixed the dough and shape it into a flat disk, wrap the dough in plastic wrap and place it in the refrigerator to rest until chilled, about 30 minutes.
- After rolling out the dough: Once you have rolled out the dough, let it rest for about 5 minutes before draping it into your pie plate.
- After adding the filling (optional): This is the least important time. But if you have an extra 10 minutes to spare, refrigerate the pie crust once more after adding the filling before you place it in the oven.
2. Poke holes and use pie weights in the bottom of the crust if pre-baking
When pre-baking (or “blind-baking”) a crust before it is filled, it’s super important that you literally weight the crust down with pie weights so that it will stay in place and not “slip” down into the crust. I actually don’t own any real pie weights, so I usually just gently line the pie crust with aluminum foil and then fill it with dried beans, which are a great and inexpensive alternative.
Before you weight the crust, though, use a fork to poke holes in the bottom of the crust. This will also keep the bottom from bubbling up. (And don’t worry — the crust will expand to fill the holes while baking.)
3. Avoid glass pans if possible
Glass pans are much more slippery than their metal or ceramic counterparts. They are perfect for graham cracker crusts and other crusts that do not require baking. But if possible, I recommend using metal or ceramic pie plates when baking pies with butter pie crusts.
4. Don’t overwork the dough
This is always, always, always a big rule of thumb when making pie crusts. (Especially if you use a food processor!) Try hard to only mix the dough as much as needed to get it to stick together. It’s ok if there are still a few tiny chunks of butter or fat visible. You just want to avoid overworking the dough as this causes it to get overly firm and also shrink.
5. Don’t stretch the dough to fit the pie pan
Rule of thumb: if you stretch the dough, it will stretch back while baking. So when you roll out the dough, be sure that it is large enough to drape into your pie plate and cover it without stretching.
6. Leave a little room around the edges
Following #5, I always recommend that people make their pie crusts slightly larger than you hope that they will look when baked. As in, give an extra 1/2-inch of so around the edge of the pie plate so that it has room to shrink very slightly while baking. You don’t want to make the crust too big. Just give it a tiny bit of extra wiggle room.
7. Use low baking temperatures if possible
Higher temperatures make the gluten in pie crusts tighten up and shrink a bit. So if your recipe requires pre-baking the pie crust, it will shrink less if you bake it “low and slow” (around 350 degrees F). But if you have a recipe that requires high temperatures, I wouldn’t worry. Just apply these other tips and they will help minimize the shrinking.
For more tips on pie crusts, be sure to check out my recipe and photo tutorial for How To Make A Pie Crust, and also be sure to check out some of my favorite pie recipes on the site!
What tips to you have for preventing pie crusts from shrinking?

I sm 82 years old. Have been baking pies for 60 years. Never had any problems with shrinking, never heard of it, until all of a sudden about 3 or 4 years ago my crusts started shrinking. Same recipe, same everything. Makes no sense. I have tried all the suggestions to no avail. I think the wheat has been genetically engineered or something about the flour is not the same. Have always used Gold Medal flour.
I love using glass pie plates & have never had a crust to shrink so I’m not sure what causes it. The only thing I do is make the dough, usually rest it for a few minutes, roll it out & place in pie pan then I put it in the freezer or fridge for 15 minutes. Thats it! I love your recipes & reading your blog. Take care.
Just tried it. Let the dough rest after mixing, after rolling, after placing in ceramic plate. Baked at 350 for a little over an hour (blind baked). Crusts came out beautiful! A little shrinking but just perfect for the pie plates they’re in. Thanks for all the tips! Tomorrow I’ll fill them with homemade chocolate pie filling and make a cherry pie as well.
Can anyone please provide suggestions on if I should blind bake a store bought pie crust? I am terrible when it comes to making pie crust from scratch so I gave up and just been using store bought ones. Problem is, I get mixed suggestions about whether or not blind baking should be done before making my pumpkin pie. I’ve tried both ways, blind baking and not blind baking and either ways, my crust will be soggy and my pumpkin pie will be very mushy. My son loves pumpkin pie and frustrates me that I can’t get the pie to come out right. Please anyone with suggestions, I would really appreciate it!
I bake my pies on the lowest rack in the oven (and I use glass pie pans without any problems). If you are using fresh pumpkin make sure you remove excess moisture by draining the pumpkin (put it in cheesecloth lined strainer for a a while) or smear it out on paper towels. If using canned pumpkin, you may not be baking long enough. If the crust is getting too brown cover the crimped edge with narrow strips of aluminum foil.
I rolled out my just-rol pastry and left it sitting on a marble block for 1 hr then lined my flan tin leaving a good 1 inch over lap I baked it on 150 for 20 mins with bake balls covering and I’d gently pricked the pastry, within 12 mins of cooking it had shrunk to less than half the depth of my flan tin ?? HELP!!!! why did it do this