
Ever since I saw Ina Garten make homemade fleur de sel caramels awhile back, I’ve been itching to give them a try myself. I have to admit that candy thermometers still make me nervous (always get so anxious waiting for candies to reach the right temperature!!), but these looked too good to resist!! And after conquering the homemade caramel sauce for this amazing buttercream earlier this year, I figured I could wait just a little longer for them to reach the “firm ball” stage for this recipe. :-)
So I dug out my candy thermometer, picked up an extra carton of heavy cream (somehow I always forget what’s behind the “creamy-ness” in caramel!), and decided to give these a go on my lunch break this week. And I’m pleased to report….
….SUCCESS!!!
Well, there was one fatality with my candy thermometer. After making it through the process, it accidentally got bumped and shattered in the sink. Oops. But the caramel was a total, and utterly delicious success. Again, I felt like the cooking part of it felt like a project in science class — watching (while not stirring) the caramel go from clear, to faint yellow, to “golden brown”. And then, as Ina says, watching the mixture boil up “violently” as the cream is added in. But overall, it really wasn’t that difficult! I took the extra step of making “rolled” caramels like Ina, but next time will probably just do simple cubes. (They get wrapped up anyway!)
So if you love caramel, and even if you’re not the best of friends with your candy thermometer, I completely recommend giving these a try! Especially with that yummy fleur de sel, these truly are a huge step up from anything you can purchase in the store. Classy. Cute. Delicious.

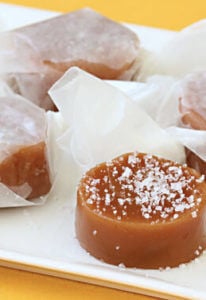
Fleur de Sel Caramels
- Prep Time: 5 minutes
- Cook Time: 15 minutes
- Total Time: 20 minutes
- Yield: 12-16 caramels 1x
Description
Sweet, simple and oh-so-delicious homemade treats! You will love this Fleur de Sel Caramels recipe!
Ingredients
- 1/2 cup sugar
- 1/4 cup light corn syrup
- 1 1/2 cups heavy cream
- 5 tablespoons unsalted butter
- 1 teaspoon fleur de sel, plus extra for sprinkling
- 1/2 teaspoon pure vanilla extract
- parchment paper or wax paper, for wrapping
Instructions
- Line the bottom of an 8-inch square baking pan (or loaf pan) with parchment paper, then brush the paper lightly with oil (or lightly cover with cooking spray), allowing the paper to drape over 2 sides.
- In a deep saucepan (6 inches diameter by 4 1/2 inches deep) combine the sugar, corn syrup, and 1/2 cup water and bring to a boil over medium-high heat. Continue to boil until the caramel is a warm golden brown color. Don’t stir – just swirl the pan to mix. Watch carefully, as it will burn quickly at the end!
- In the meantime, bring the cream, butter, and 1 teaspoon fleur de sel to a simmer in a small pan over medium heat. Remove from the heat, set aside and keep warm.
- When the caramelized sugar is the right color, very slowly add the cream mixture to the caramel while stirring – it will boil up violently. Stir in the vanilla with a wooden spoon and cook over medium heat for 5 to 10 minutes, until the mixture reaches 248 degrees F (firm ball) on a candy thermometer. Very carefully (it’s hot!) pour the caramel into the prepared pan and refrigerate until firm.
For rolled caramels:
- When the caramels are cool, use the parchment paper to pry the sheet from the pan onto a cutting board. Starting at 1 end, roll the caramel up tightly until you’ve rolled up half of the sheet. Cut the sheet across and then roll the second half tightly. You will have 2 (1 by 8-inch) logs. Sprinkle both logs lightly with fleur de sel, cut each log in 8 pieces. Cut parchment papers (or wax paper) in 6 by 4 1/2-inch squares and wrap each caramel in a paper, twisting the ends. Store in the refrigerator or at room temperature.
For square/cubed caramels:
- When the caramels are cool, use the parchment paper to pry the sheet from the pan onto a cutting board. Then use a large knife to carefully cut the caramel into squares of your desired size.
Ali’s Tip:
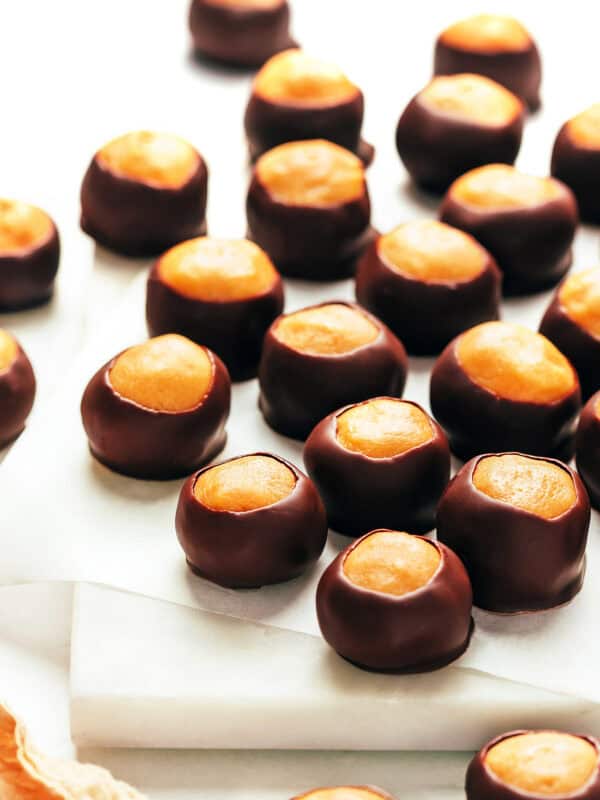
These would also be delicious dipped in chocolate!!!


I have made Ina’s version of this many times and always got great results. I hadn’t made them for several years and decided to try them again, but for some reason I used your version of “her recipe” instead of going to the original source. Your version failed both times for me. Like some other commenters, it took forever to reach 248, and then it split, with the butter rising to the top when I poured it into the pan to harden it. In looking back now at Ina’s version, the amounts of cream and sugar are very different. She uses 1 1/2 cups of sugar compared to your 1/2 cup sugar…and 1 cup cream compared to your 1 1/2. I’m going to return to hers and hope for better results because homemade caramels are just so, so good. I’m a pretty experienced cook, so I’m really not used to having recipes not turn out…especially not twice…
I made this before and it turned out great. This time it started to burn before it got even to the soft ball stage. What did I do wrong? Should I stir constantly once I add the cream, butter and salt? Should I lower the temp of the burner? I cooked on gas just above medium heat.
Any assistance would be appreciated!
This recipe originally calls for 1 C cream. I followed your version and it didn’t turn out, all of the butter and the cream separated. Hoping trying it again with a different measurement will work?
These are AMAZING!!!! They are easy enough to make even for those inexperienced in candy making. I would definitely recommend that you give making these a go!
I just use your recipe but I cook all ingredients together except for the vanilla and salt that I add to the end. It’s much easier this way. You just stir occasionally cook to 248°F , pour cool, cut and enjoy!! Try it , you won’t miss the extra steps. Have a great day.
Looks delicious, can’t wait to make these, especially the rolled ones. Thanks for the recipe.??
So I just tried making these and there were on for over half an hour and we’re just getting to 230. I noticed they were starting to separate so I stirred it and there was a bunch of black bits all in it…am I supposed to stir whole time??
Oh no, we’re sorry! Yeah, you don’t want to stir at all until you add the cream and vanilla. :( That’s really important, so that’s probably why your caramel separated and didn’t cook evenly. It helps to shake the pan periodically to prevent burning since you’re not stirring.
May I know how long is the shelf life for this homemade caramel candy?
Hi Cheryl! We think if you have them in a tupperware container or wrapped up really well, they should last for around three weeks or so (you can store them at room temperature). We hope this helps!
Where do you buy the fluer de sel?
We’ve found it at Williams-Sonoma, Sur La Table, and other specialty cooking stores or gourmet groceries. Whole Foods should have it as well we believe.
I’ve been boiling mixture for ten minutes and won’t get above about 215 degrees ??? What to do? Will it burn??
Hi Stefanie, it shouldn’t burn, sometimes it just takes a little longer. Let us know how these turned out, we hope you enjoyed them! :)