DIY Corkboard Map
This post may contain affiliate links. Please read my disclosure policy.
This post for DIY corkboard map contains affiliate links.
My husband and I married young. I remember in those sweet months before we were married getting comments like “Well kiss your freedom goodbye!” or “Don’t you wish you would have seen the world?” These comments always through me off guard a bit. You see, to me marriage is one of the greatest journeys a person can take in their life. I have always seen marriage as more of a freedom when it comes to traveling. I truly believe if I wasn’t married I would probably have traveled less than I do now. Tanner has pushed me to try new things, explore different places and love new experiences. Before we were married we dreamed of the places we would see together and the people we would meet. We have grown together and learned more than we could have imagined through our love of travel.
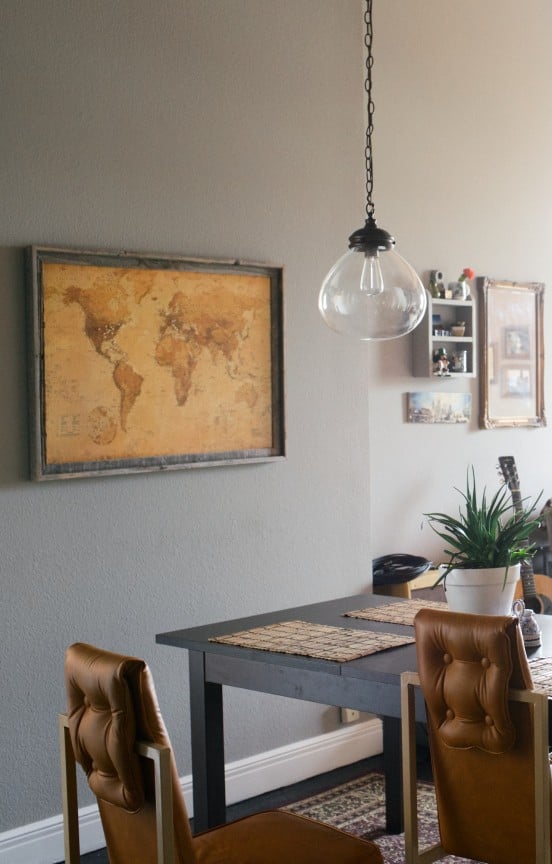
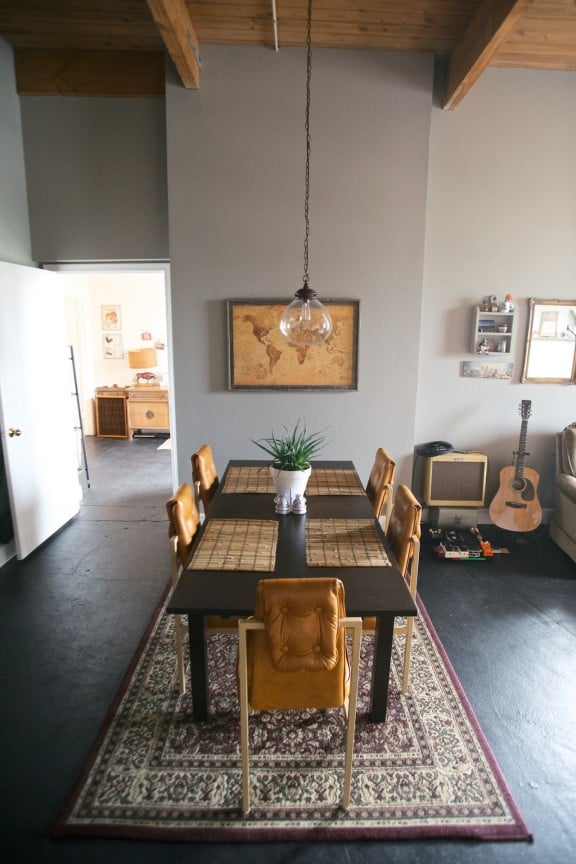
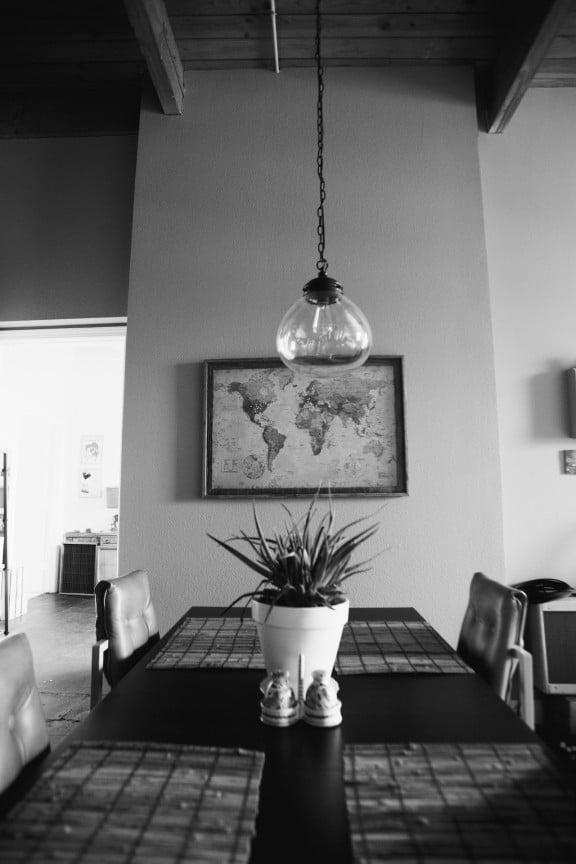
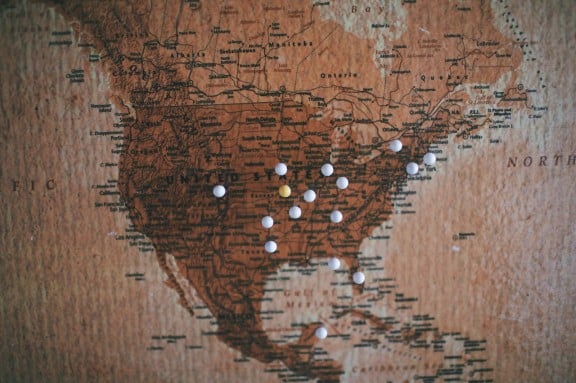
A few Christmas’s ago, when I realized that traveling was most likely going to be a very important part of our lives, I made a cork map for Tanner. It has become one of our favorite pieces of art in our home. Sometimes at dinner Tanner and I will talk about all the places we would love to see someday and I immediately get up and look at our map. It is a great reminder of how big the world really is. There is so much to see! Someday I hope it will be full of pins!
What you’ll need:
- Poster Map
- 24×36 frame–no glass (mine is from hobby lobby)
- Cork board cut to 24×36
- Modge Podge
- Pins
What you’ll do:
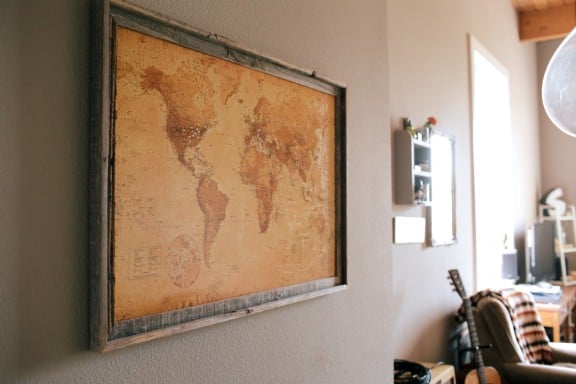
- Purchase your map that you would like to use. I wanted mine to have an antique feel. I ordered it off of Amazon.com and it cost me a little over $5.00. Prior to modge podge the map had a very shiny cheap look to it. (It is just a standard poster) The modge podge + cork board really transformed the look of the poster!
- Take you map and modge podge it to the piece of corkboard. I bought my corkboard at a hardware store and had them cut it to size.
**I found that creating a sticky surface before putting your poster down is best. The cork really absorbs the glue so you want to make sure the cork is tacky to the touch before you put the poster down. - Stick your poster to the corkboard and put two layers of modge podge over the poster letting it dry completely between coats.
- Since this was a Christmas gift I chose to have my map framed professionally at hobby lobby.
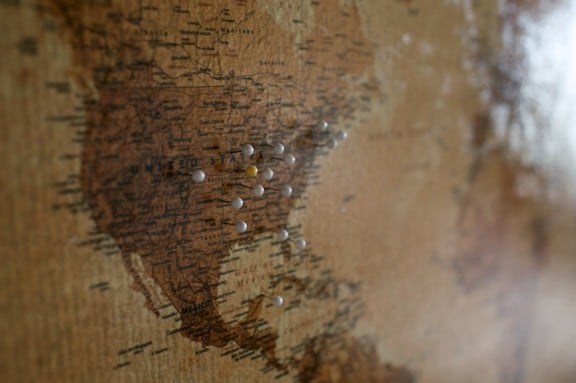
- Determine your pinning system: I chose to only pin places we have been together. Since this was a documentation of our travels together that just seemed like the right choice for us. I then marked our home with a yellow pin and all of our travels with white pins. Someday I would love to add a new color when we have children! :)
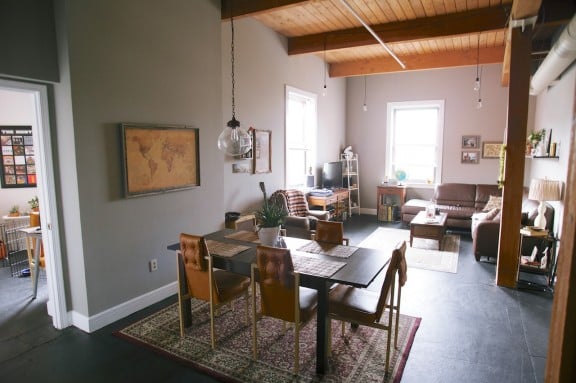
This map has become such an important piece of our home. One of my favorite things to do after getting home from a trip is to add a new pin!
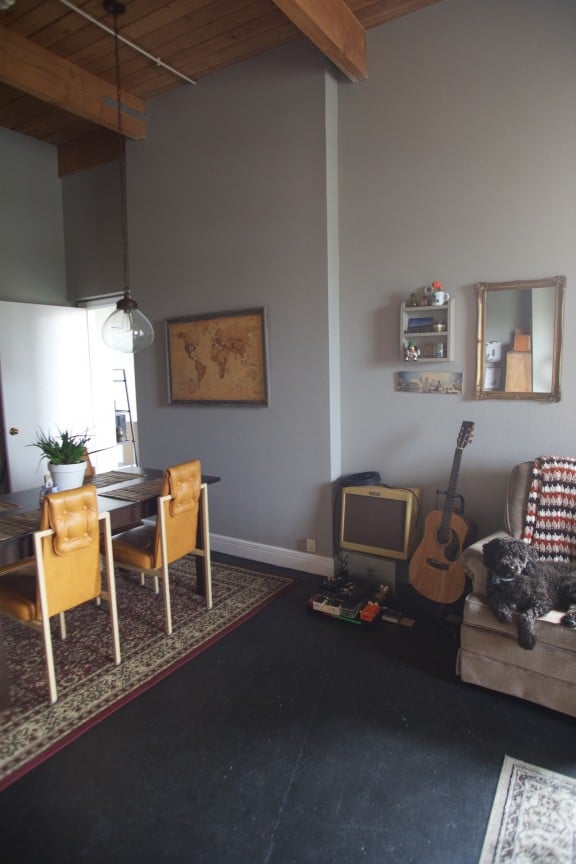
I think Veda’s goal in life is to be apart of all of my blog posts :)
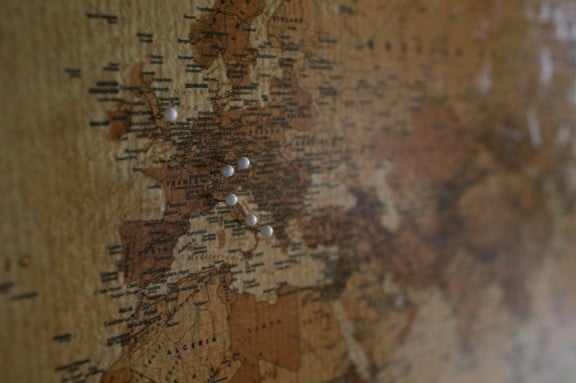
I’m excited to pin up the West Coast after our trip in the fall! Portland and Cali here we come!


So, so, SO cool! Love the idea of adding a different color when you have kids.
Thanks Rachel! :)
Love it! I really want to do this! I’ve thought about doing a color for each of us separately, too. Because he’s been to cooler places than me (cough.. SOUTH AFRICA..cough)!
Seriously so cute. Great idea for adding a different color when you travel with kids! Get on it ;).
Looks great! We just did this project in our house and I LOVE it! I am super excited to fill it up more now! I also blogged about it here: https://lovinghere.com/diwyatt-custom-framed-map-pinboard/
I love this idea! We have a HUGE map in our basement – well 2 actually. One of the US and one of the world since I’ve done a lot of travel abroad. For now they’re just taped to a giant piece of cork board but I love the idea of modge podge. We have different color pins for myself, the hubs, trips together (as just a couple), and trips as a family (now that we have 2 girls). Heck, even the dog has his own pin color (course he’s only been to 2 cities…).
Oh man I forgot about our dog! Maybe she can get a color… she doesn’t get out much though :)
Love this idea!!
Such a cute idea- totally doing this! Just curious how thick was the cork board you used? Minnesota DESPERATELY needs a Hobby Lobby!
It wasn’t very thick at all, maybe 1/4inch? Just thick enough to stick a pin through it! I don’t know what I would do without Hobby Lobby! Hopefully one will get to you soon!
Do you put a layer of modge podge on the cork board then put the map over it and then do two more layers of modge podge??
Tina,
I put a layer of modge podge onto the corkboard and let it soak in and almost dry, then put one more layer on after that to make sure it was extra tacky. I then put the map over it and added two more coats. Since you are applying the modge podge onto a porous surface it is better to add a second layer. :)
This is awesome! How much would it cost me to get it framed at Hobby Lobby if I decide to replicate this?
Jessica, If I remember right it was about 10 dollars to get it framed. Not too bad! :)
Great project and classic look. Be sure to add the Lake Chapala, Mexico area to your wish list. We live here and it’s paradise. Don’t believe all the stuff you read in the news!
Quick question: What type of Modge Podge did you use? Gloss? Satin finish?
Jessica,
I used a satin finish… I was afraid the gloss would be too shiny. I think the satin turned out perfect–it still gave off a nice shine but didn’t over gloss the poster. :)
Liz,
Help! How did you keep the map from bubbling all over? My first attempt looked pretty terrible. Did you let both coats of modge podge dry almost completely on the cork board before applying the map?
Lindsey,
Mine bubbled up too the first attempt! I thought it was ruined but I carefully pulled the map off and let the modge podge become tacky to the touch and then put down another coat onto the cork and laid the map down again. I had to smooth it down carefully but it did get smooth! Once you get it on there the way you want go ahead and seal it one more time with another coat of modge podge! It does end up working, it is just hard to get that cork saturated enough to coat it. Let me know if that helps!
Did you seal the front right after you got it to tack onto the cork or did you let the cork paper dry completely before putting on the top coat?
Lisa,
I let it dry at least to the touch before I put the top coat on. Let me know if you need anything else!
I am absolutely in love with this idea but I am so nervous to do it at the same time. I’m attempting it with one of each product (I know, horrible last minute idea) as a gift for my husband and I’s best friends. Wish me luck and thanks for this, Liz!
I am going to make this for my husband for Christmas! Was the map you bought glossy already? I’m trying to decide between laminated or plain. Also, what does the modge podge look like when you put it over the map? Is it still easy to push the pins in?
Thanks!
Dee,
The map was just a standard semi-gloss poster paper. If you are going to modge-podge it I wouldn’t use a laminated paper because I’m not sure how the modge-podge would take to the lamination. The modge-podge gives it a matte to semi-gloss texture and is very easy to push the pins through. I have been hearing that people are having trouble getting their poster to stick to the cork. I had that same issue so make sure that when you spread the modge-podge onto the cork you let it get a little tacky before you press the map down onto it and then seal the map with a couple coats of modge-podge. Let me know if you have any other questions! :)
Love your story and this great idea! I plan to do this for my daughter, who plans to marry at the nice young age of 20:)
I have finally gathered all the materials to start this project- I even found the exact frame at Hobby Lobby! I was planning to put the frame on myself, but realized there must be a stiff backing on yours?? How did they keep the cork board firm enough to fit inside the frame without lilting over? Is it attached to a board on the back?
I am so excited to put this together! Thanks for the wonderful idea!
Lisa,
I had mine framed at hobby lobby. They put a backing on it and everything for only about 10 dollars!
Did you purchase the frame at hobble lobby as well?
Yes I did! Gotta love hobby lobby!
What kind of cork board did you use when you framed it? The think flexible or thick board?? And do you know what frame you used at hobby lobby? I really like yours!
Let me know ASAP!
Thank you! Love your idea!!:)
So…I applied the map the other night and it went pretty well. I ran out of mod Podge and I sealed it today two days later and now it bubbled up on me. I can’t win I have failed 3 DIY projects in a row
Hi Liz, thanks for sharing this DIY project! What did you use to apply the Mod podge?
Hi Rachel! I just used a regular paint brush… a sponge roller would work great also!
I purchased all the supplies to make this and I was so excited to start when they all arrived in the mail! Unfortunately, I tried three times to get the map to be bubble free. It had no problem sticking but I just couldn’t get the bubbles out. I was trying to smooth them out with a cloth and then the map ripped right on top of Australia. :( I am so bummed out! I will be trying this again, any advice for avoiding bubbles?
Danielle,
I’m sorry you are having trouble with the map! It was tricky for me as well to get it smooth. Something I have done before when trying to get bubbles out of something is to use a credit card and gently smooth the bubbles out using the edge of the card. Let me know how that works!
Liz,
Thank you so much for responding! I have purchased a small decoupage roller and a smoother and purchased another map. I am so excited to give this a try again! I will let you know how it turns out :)
A trick I used to get the bubbles out was to use a warm (not too hot) iron to smooth them out. Seemed to soften the glue enough to help it stick better too.
I LOVE LOVE LOVE this – the look of the vintage map, and the frame style are exactly what I am looking to replicate! Two ?s:
1) the image above of Modge Podge is the matte finish. do you recommend the satin finish? is 8 oz enough or do i need 16oz size?
2) I can’t seem to find that frame on hobby lobby’s website. do you happen to have a link for it?
I love this! I already bought the map you recommend. This will be an amazing anniversary gift for my husband. I have to ask, is that frame one that you purchased at Hobby Lobby also? It is so similar to the frames we already use in our home and I’d love to stick with that style.
Hi Crystal! Yes the frame is from hobby lobby. They have them in all different sizes! :)
Love this. Was the frame one they sold or did they build it for you? There is no hobby lobby by me in NY. I thought I could order it order from them online but I don’t see ANY frames 24×36. I could buy another frame elsewhere but I love that old look. Do you know what the name of the frame was? Maybe I could call a store and ask them and have it shipped. Thanks!
Hey! I’m not sure what the name of the frame is, but I can check it out the next time I’m at hobby lobby. Michaels also has a gray wash frame collection as well if there is one close to you!
Beautiful! Did you by chance find out the name of the frame? I found one at hobby lobby called the “Barn Wood Open Frame.” Is that it or was it a different one? I love that frame!
That’s the one!
I am super excited. I have always wanted a map for my home. I happen to have a hobby lobby near my home. I took the map to them and they took care of attaching the map to a foam board except it had a few bubbles. I was told that the machine malfunctioned. They kept the map and are going to try to fix. I may need to purchase a new map though. Will foam board work just as well as corn board? All I would need to do is as the layer of modge podge to the map. I also found a nice frame that compliments the poster. I am hoping they can fix it for me. Thanks for sharing!
Liz! I am about to try this amazing DIY! Wish me luck :)I read through all the comments, so that should be very helpful! ~
Hi there:
Thanks for posting this! I, like many others, completed this on my second attempt. Yes, round 1 included a crease, followed by an attempt to smooth, which resulted in a rip.
Alas, I have a recommendation for those who experienced bubbling/creasing after the application of Mod Podge on the front of the map…instead of using the original Mod Podge by brushing or rolling onto the map, use the Mod Podge spray acrylic sealer! This results in a smooth application. No overly wet sticky map, no bubbles, no creases! Results in a perfect map with the perfect look – voila!
Hi Lindsey,
I am in the process of buying the supplies to make this really nice DIY map. :) However, I have two questions for you:
– The cork board that you used, was it flexible (like a roll of cork board) or like a rigid board?
– Regarding the bubbles, you said in the posts that when you thought your map was ruined, you carefully pulled the map off and let the modge podge become tacky to the touch and then put down another coat onto the cork and laid the map down again. When you applied the second coat of modge podge, did you wait for it to become tacky again before laying the map down?
Thanks in advance !
Sorry not Lindsey but Liz! :S
Love this. Bought my stuff a few months ago and finally did it tonight. I bought the map from amazon as suggested and a roll of cork as well (both super cheap). Here are my tips: The spray Modge Podge does NOT work to stick the map to the cork board. You have to use the regular glue like one (matte finish). Use a credit card to smooth out the bubbles.
I left the glue absorb a few minutes on the cork the stuck the map on. I let it dry a little and then I applied the first layer of mode lodge over it using a fat craft paint brush. I advise to just use a good amount-don’t try to spread it too thin or it will get tacky and you can rip the poster. Don’t touch the poster as the glue is drink. i did in one spot and the paper stuck to my fibers making a rip. (Its okay- it added to its authentic aged look.) Don’t worry that the mode lodge looks like its gong to leave a white finish-it doesn’t. It dries clear.
Let it dry a few minutes then apply the second coat.
I really don’t recommend the spray mode lodge. I tried it and felt it didn’t create the aged look we are going for here. It also really stinks and you have to open the windows. The glue version has very little smell.
I will post a picture soon once I pin and frame it!
Hi
I absolutely love this map idea! I am just about to start my travels around the world and want to create this map. What kind of finish Modge Podge did you use? I checked out their website and there are loads of different types!
Thanks so much – and thanks for such a great idea!
Samm
This project looks amazing! I’m from the UK and just starting to plan my travelling. I have ordered the parts needed for this and cannot wait to get started! Thanks so much for the tutorial!
Do you have a link to the frame you used? I love it!
Hi Liz was wondering if you had the link for the specific map you ordered on Amazon?
Thank you so much for this, off to buy supplies!
You’re welcome Jarkyn — we hope you have fun making it! :)
Hey Liz!
I am trying to do something similar to your map, but I was wondering how you managed to get the cork and poster to stay together without getting air bubbles trapped??
I’ve been looking for DIY’s because I’m making a map board of my own and just so happened to stumble across yours and see that you were from Kansas City which is where I live! Not only a great tutorial but reppin’ the city I love :) Thank you for the DIY.
Very cool, Lauren! And we hope you have fun making this! :)
Wow your map looks great!! Thank you for sharing!
Did you use a gloss Mod podge or regular or satin?
Good morning. Thank you for you post. I’m trying to figure out how I will adhere my map to cork. I’m wondering if the method you used has held up over time? Is it hard to push the stick pins into the cork after the modge podge dries? Would you have done anything differently.
Thank you,
Chetori Henson
Hi. My daughters family love to travel. I gave them once a printed map of the mountains in the United States. The map was on a cork board and so when they returned they used push pins to show where they were. Everyone loves it . Now I am looking for a similar map of Canada .Last year I ordered one which was totally not what I was looking for and tossed it out .
I made this map from your instructions for my husband 7 years ago. It’s been a huge part of our lives as we have traveled together ❤