This post may contain affiliate links. Please read my disclosure policy.
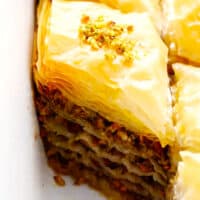
A step-by-step guide (and video) for how to make homemade baklava with perfectly crispy golden layers of phyllo, your choice of nuts, and lovely citrus honey syrup.
Homemade baklava has been on my culinary bucket list for years and years and years. So last December, I finally decided to have a little baklavathon and spent the whole month learning about the different baklava styles and food traditions from around the world, testing out various baklava recipes, and refining our own family’s favorites. And turns out — I enjoy making baklava so much. ♡
To be sure, baklava is a labor of love that will always require a few patient hours of your time to prep, assemble and bake. But as you’ll see in the video demonstration below, the process for how to make this particular style of baklava is genuinely quite simple. (No fancy techniques or equipment required.) And as someone who tends to find repetitive baking projects quite relaxing and meditative, I actually really enjoyed all of the chopping and brushing that goes into creating all 40 of those lovely, flaky, honey-soaked layers.
There are of course endless different ways that you can make baklava, depending on which food tradition you happen to be following. But the recipe our family loved best ended up being a bit of a mix between Greek and Turkish-style baklava, made with lots of buttery, golden, flaky sheets of phyllo, a mix of pistachios and walnuts, honey-sweetened syrup, plus a touch of warming spices and orange blossom water added in for extra depth of flavor. And my goodness, it is so decadent and SO delicious.
It’s the perfect project for easy weekend days or — now that we have a very active 8-month old around this holiday season — some blissfully uninterrupted solo baking time in the evening once the little ones finally go to sleep. And it also makes for a great gift if you feel like sharing some sweet treats with friends and family season. (Oohs and ahhs are guaranteed!)
If you’re new to making baklava, I would strongly recommend reading the notes and tips below before starting the recipe. But I promise that it’s truly easy to make and will be worth the time and effort. So grab your apron and let’s make some homemade baklava!
Homemade Baklava Recipe | 1-Minute Video
Homemade Baklava Ingredients:
Before we get to the full baklava recipe below, here are some important notes about the essential baklava ingredients you will need:
Phyllo dough: You will need a 1-pound package of phyllo dough, which should contain around 40 sheets. Also known as filo or fillo dough, these tissue-thin sheets of dough will need to be thawed according to package directions before use. (Please note that phyllo dough is not puff pastry. They are often sold side by side in stores, but they are completely different products so be sure to purchase phyllo!)
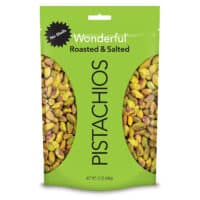
Nuts: I used a 50/50 mixture of pistachios and walnuts for this recipe, but you are welcome to use an equivalent amount of whatever varieties of nuts you prefer. It’s important to very finely chop the nuts so that the baklava will be easy to cut. I find it’s easiest to just blitz the nuts in a food processor, but you can easily chop them by hand too.
Ground cinnamon: We will mix a hint of ground cinnamon into the nut mixture for the baklava filling. If you happen to have ground cardamom on hand, I love adding in an extra 1/2 teaspoon to the nut filling too.
Melted butter: Baklava is often traditionally made with clarified butter (made by melting butter and separating out the extra water and butter solids), which I agree yields baklava with better flavor and a very even texture. That said, though, I’ve also made this recipe just using regular (unclarified) melted butter, and it still worked well too. See notes below for instructions depending on which variety of butter you decide to use.
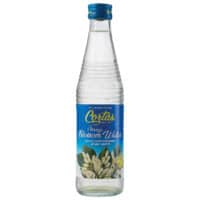
Honey syrup: You will need four main ingredients to make the honey syrup — honey, water, white granulated sugar and freshly-squeezed orange juice (or lemon juice). Then I also highly recommend adding in an extra 2 to 3 teaspoons of orange blossom water (and/or a hint of rose water), which adds the loveliest floral undertones. If you can’t track down a bottle of orange blossom water, you’re welcome to leave it out, but it’s my favorite ingredient in this recipe and adds an irresistible depth of flavor.
How To Make Baklava:
Very detailed instructions for how to make baklava are included in the video above and the full baklava recipe below. However, here are a few tips and tricks I’ve learned along the way that I find helpful too…
Pre-portion the nuts. I find that it’s easiest to pre-portion the nuts into 5 equal amounts before you begin to assemble the baklava. It makes them extra-easy to grab and sprinkle on, and also ensures that the layers of nuts will be more or less even.
Chill the honey syrup. Cold syrup poured over very hot baklava is the key to crispy baklava! So once your syrup is ready to go, I recommend immediately refrigerating it in a shallow-ish bowl so that it can chill completely before it’s time to pour it over the hot baklava. You can also pop the syrup in the freezer for the first 30 minutes if you would like to speed the process up a bit.
Trim the phyllo to the size of your pan. Most store-bought packages of phyllo are slightly larger than a 9 x 13-inch pan, so you will need to trim the sheets down a bit to fit the pan. Be sure to save your scraps, though, just in case a sheet has a major tear and needs to be patched up a bit.
Keep the phyllo moist. Phyllo dries out quickly, so it’s important to keep it covered while assembling the baklava so that it can stay nice and moist. I just loosely draped a damp (not soaking wet) kitchen towel over my stack of phyllo, but damp paper towels would work well too.
Clarify or stir the melted butter well. For the best baklava, I recommend taking the time to clarify the butter. (Here is a simple tutorial. And please note that you will need a yield of 1.5 cups clarified butter in the end, so you will need to start with an even larger amount.) But if you choose to skip this step, just be sure to periodically whisk the butter while assembling the baklava so that you’re not left with only the watery part of the butter at the very end.
Don’t over-butter the phyllo. Please note that each sheet of phyllo does not need to be 100% brushed with butter! The sheets will naturally moisten one another as they are layered together, and the baklava will be too soggy if you completely brush every single sheet. (Plus, you’ll likely run out of butter.) Just lightly brush each sheet — especially the edges — and you’ll be good to go.
Make a checklist. It’s not hard to make baklava…but it is easy to accidentally lose track of where you are in the process along the way. ;) I recommend jotting down a little note to yourself each time you complete a layer so that you can know what steps still remain.
Slice the pieces all the way through before baking. Don’t forget to slice the baklava all the way through before baking. And also don’t forget to sprinkle any extra nuts on top after baking, otherwise they will burn.
Store baklava at room temperature. If you want your baklava to stay as crispy as possible, it’s best to store baklava at room temperature in a loosely-covered (not airtight) container. I just loosely place a sheet of aluminum foil on top of my baking dish or food storage container, but you could also cover yours with a kitchen towel. Alternately, you can store the baklava in the refrigerator, but just know that it will be considerably less crispy.
Don’t worry about perfection. At the end of the day, every single slice of baklava does not need to be perfectly layered or even, so don’t stress about perfection. :) Just be patient and have fun with the process and I promise the results will be deliciously worth it!
Different Baklava Variations:
There are many, many different ways that you are welcome to customize this baklava recipe and make it your own. Here are a few simple variations to consider…
Use different nuts: Pistachios and/or walnuts are typically the most popular kinds of nuts used in baklava. But almonds, pecans, hazelnuts and pine nuts are all delicious options that you’re welcome to add in too. You will just need 1 pound of nuts in total, so feel free to choose one or mix together a few different kinds of nuts.
Use less (or zero) honey: This baklava recipe definitely has a notable honey flavor. So if you prefer less of a honey flavor, you are welcome to substitute granulated white sugar for part or all of the honey.
Make it less sweet: If you would like your baklava to be less sweet in general, feel free to use less of the honey syrup.
Use different spices: Feel free to also experiment with mixing different warming spices in with the nuts or simmering them into the honey syrup. Cinnamon is most often added, but cardamom, cloves, allspice, nutmeg and/or ginger would also be absolutely delicious in this recipe.
Slice the baklava differently: Instead of slicing the baklava into diamonds as shown here, feel free to slice it into squares, rectangles, or whatever fun shapes or patterns you prefer.
Baklava FAQs
Finally, a few questions about baklava and potential troubleshooting tips…
How do you pronounce baklava (and spell it)? Pronunciations and spellings vary significantly between the different regions and traditions that make baklava around the world. Turkish baklava, one of the most well-known examples, is pronounced BAH-klah-vah.
Where did baklava originate? According to Wikipedia, “the pre-Ottoman origin of the dish is unknown, but, in modern times, it is a common dessert of Iranian, Turkish, and Arab cuisines, and other countries of the Levant and Maghreb, along with the South Caucasus, Balkans, and Central Asia.”
How do you prevent soggy baklava? Soggy baklava is often caused by either over-brushing the phyllo with too much butter (just use the amount listed in the recipe), not chilling the syrup (cold syrup hitting the hot baklava helps the steam to evaporate), or storing it tightly sealed and/or refrigerated (you don’t want to seal in the moisture).
How finely-chopped should the nuts be? The texture of the nuts is up to you. I like mine to be pretty finely-chopped as shown in the photos here, which makes it easier to slice the baklava. But if you prefer a chunkier texture, you can chop the nuts a bit more coarsely.
Should you cut baklava all the way through? Opinions vary on this topic. I like to cut the baklava all the way through, which lets the honey syrup soak more deeply into the bottom layer. But if you want the honey more evenly spread throughout, you can cut the baklava almost all the way through, just lightly scoring the bottom layer.
A step-by-step guide (and video) for how to make homemade baklava with perfectly crispy golden layers of phyllo, your choice of nuts, and lovely citrus honey syrup. See notes above for possible ingredient variations.
Ingredients
Scale
Baklava Ingredients:
1 (16-ounce, 40-sheet) package frozen phyllo dough, thawed to room temperature (see thawing instructions below)
1 pound your choice of nuts (I used half walnuts and half pistachios)
3 tablespoons freshly-squeezed orange juice (or lemon juice)
1 tablespoon orange blossom water (optional*)
Instructions
Thaw the phyllo dough. For best results, transfer the package of phyllo dough to the refrigerator overnight. Then let it rest on the counter (still in its packaging) at room temperature for 1 hour before working with it.
Make the honey syrup. Meanwhile, combine the honey, water, sugar and orange juice in a small saucepan. Heat over medium-high heat until the mixture nearly reaches a simmer, stirring occasionally. Reduce heat to medium and continue simmering for 5 minutes. Transfer the syrup to a heat-safe bowl, stir in the orange blossom water (if using), and refrigerate the syrup until ready to use.
Finely chop the nuts. Pulse the nuts in a food processor until they are finely-chopped. (Alternately, you can chop them by hand with a chef’s knife, or place them in a ziplock and pound them with a mallet.) Pulse or stir the nuts together with the cinnamon until combined. Set aside a few tablespoons of nuts to use later as a topping, then divide the remaining nuts into 5 equal portions (roughly 3/4 cup per portion) and set aside.
Trim the phyllo dough. Unwrap and transfer the thawed phyllo sheets to a cutting board and use a chef’s knife to slice them into a 9 x 13-inch rectangle (to fit the baking dish). Discard the scraps, then lightly cover the stack of phyllo sheets with a damp towel so that they do not dry out.
Arrange your assembly line. Heat oven to 325°F (162°C). Place a 9 x 13-inch baking dish on your work station, followed by the bowl of melted butter, followed by the phyllo sheets, followed by the chopped nuts. Time to begin!
Butter the baking dish. Use a soft pastry brush to lightly brush the inside of the baking dish with butter.
1st layer. Carefully lay 1 phyllo sheet in the baking dish and brush it lightly with butter. (No need for it to be perfectly brushed!) Repeat with 9 more sheets, brushing each with butter, until there are 10 sheets total. Sprinkle approximately 1/5 of the nut mixture evenly over the top layer of phyllo.
2nd layer. Repeat with 5 more phyllo sheets, each lightly brushed with butter, followed by another 1/5 of the nut mixture.
3rd layer. Repeat with 5 more phyllo sheets, each lightly brushed with butter, followed by another 1/5 of the nut mixture.
4th layer. Repeat with 5 more phyllo sheets, each lightly brushed with butter, followed by another 1/5 of the nut mixture.
5th layer. Repeat with 5 more phyllo sheets, each lightly brushed with butter, followed by another 1/5 of the nut mixture.
6th layer. Finally, repeat with the remaining 10 phyllo sheets, each lightly brushed with butter. Brush any remaining butter on the top and final layer.
Cut the baklava. Using a very sharp paring knife, slice the baklava all the way through into your desired shapes/sizes. (I sliced mine into diamonds.)
Bake. Transfer the baking dish to the oven and bake for approximately 1 hour and 15 minutes, or until the top layers of the baklava are golden brown and crispy.
Drizzle with syrup. Transfer the baking dish to a wire cooling rack. Then immediately drizzle the cooled syrup evenly over the top of the hot baklava. (It will sizzle and crack, which is what we want!) Sprinkle a pinch of the reserved chopped nuts on top of each piece of baklava as a topping.
Cool to room temperature. Let the baklava sit out uncovered for 3-4 hours until it has completely cooled to room temperature, then serve and enjoy! Storage instructions included below.
Layers: Here is an easier to read checklist for the baklava layers:
10 sheets + nuts
5 sheets + nuts
5 sheets + nuts
5 sheets + nuts
5 sheets + nuts
10 sheets
How to thaw frozen phyllo dough: For best results, remove the sealed package of phyllo dough from the box and let it thaw in the refrigerator overnight, followed by 1 hour on the countertop. Or for faster results, let the sealed package of phyllo dough thaw on the countertop for 2-3 hours until chilled but no longer frozen. I do not recommend defrosting it in the microwave.
Clarified vs unclarified butter: You are welcome to use either for this recipe, but the advantage to using clarified butter (or ghee) is that it will be more evenly browned and will last a bit longer. You can purchase clarified butter or make it yourself. Or you just melt a few sticks of (unclarified) butter to use in this recipe, which will still work great. Just be sure to regularly whisk the butter while assembling the baklava so that it does not separate.
Orange blossom water: Its flavor is quite strong, so I recommend starting with 1 or 2 teaspoons and then adding more to taste. Alternately, you could use rose water or a mix of the two. Or leave the orange blossom/rose water out of the recipe altogether.
Storage instructions: To keep the baklava as crispy as possible, it’s best to store it at room temperature in a lightly covered baking dish or food storage container. (I loosely cover mine with aluminum foil.) It will keep for between 8-10 days at room temperature, but will be crispiest the first 5 days.
I, too, have always wanted to try making baklava!! You have inspired me to try it!! The step by step instructions are so clear and precise, so thank you for taking the time! Merry Christmas to you and your family!!
Hello! I cannot find the link to the video. I see someone else could had trouble as well, and I read your response. Still cannot locate it. Can you please tell me where to find it. Thank you!!
Jodi
This was my first time making baklava! Thanks for the detailed instructions! It turned out amazing and now my kids are requesting I make it for our Christmas Eve party. I couldn’t find orange blossom or rose water in time but it still turned out! I’ll have to try it with it next time:) oh and we used ghee. Thanks again! Great recipe!
I’m amazed at how good this turned out! Can’t wait to try it again and play around with the glaze ingredients. For what it’s worth, I also just used plain old melted butter and it worked perfectly. Thanks!
I’m thinking of making this recipe, it’s been years in the making as well!
I just have a question regarding the nuts. Do you use raw or roasted pistachios and walnuts? If they are roasted, are they salted or just plain?
This is fabulous! I make this every Christmas and have tried several recipes. I have found a keeper! I used clarified butter and the note for the syrup to be cold created crispy perfection. I’m no longer looking the best recipe, I’ll be making this one from now on.
Hey, I’m Ali!
My favorite thing in life is time spent around the table. And all the better with some seriously tasty food to bring us all together. more about me »
 for how to make homemade baklava with perfectly crispy golden layers of buttery phyllo, pistachios and walnuts (or your choice of nuts), and lovely orange honey syrup. Always such a delicious treat! | gimmesomeoven.com")
 for how to make homemade baklava with perfectly crispy golden layers of buttery phyllo, pistachios and walnuts (or your choice of nuts), and lovely orange honey syrup. Always such a delicious treat! | gimmesomeoven.com")
 for how to make homemade baklava with perfectly crispy golden layers of buttery phyllo, pistachios and walnuts (or your choice of nuts), and lovely orange honey syrup. Always such a delicious treat! | gimmesomeoven.com")
 for how to make homemade baklava with perfectly crispy golden layers of buttery phyllo, pistachios and walnuts (or your choice of nuts), and lovely orange honey syrup. Always such a delicious treat! | gimmesomeoven.com")
 for how to make homemade baklava with perfectly crispy golden layers of buttery phyllo, pistachios and walnuts (or your choice of nuts), and lovely orange honey syrup. Always such a delicious treat! | gimmesomeoven.com")
 for how to make homemade baklava with perfectly crispy golden layers of buttery phyllo, pistachios and walnuts (or your choice of nuts), and lovely orange honey syrup. Always such a delicious treat! | gimmesomeoven.com")
 for how to make homemade baklava with perfectly crispy golden layers of buttery phyllo, pistachios and walnuts (or your choice of nuts), and lovely orange honey syrup. Always such a delicious treat! | gimmesomeoven.com")


Hello! I didn’t see a link to the video, did I miss it?
It’s up near the top of the post. Hope it’s helpful! :)
I, too, have always wanted to try making baklava!! You have inspired me to try it!! The step by step instructions are so clear and precise, so thank you for taking the time! Merry Christmas to you and your family!!
I think the link may be broken?
Even though I can’t eat wheat, I keep coming back to look at this recipe and video – looks so yummy!
Hello! I cannot find the link to the video. I see someone else could had trouble as well, and I read your response. Still cannot locate it. Can you please tell me where to find it. Thank you!!
Jodi
Hi Jodi! It’s near the top of the post underneath the heading Baklava Recipe | 1-Minute Video. Hope that the video is helpful!
This was my first time making baklava! Thanks for the detailed instructions! It turned out amazing and now my kids are requesting I make it for our Christmas Eve party. I couldn’t find orange blossom or rose water in time but it still turned out! I’ll have to try it with it next time:) oh and we used ghee. Thanks again! Great recipe!
One pound box of phylo only comes with 18 sheets. Can this recipe be made with only 18 sheets of phylo?
I don’t see the video either. The 1-min video heading is there, with a giant photo under it, but neither contain a link.
Ok, I’ve had this tab open on my screen for weeks and finally gave it a try and it was wonderful! Thanks for all of the specific instructions!
I’m amazed at how good this turned out! Can’t wait to try it again and play around with the glaze ingredients. For what it’s worth, I also just used plain old melted butter and it worked perfectly. Thanks!
Are you taking a break? I’ve not seen any posts for a while? How’s that little guy?
Hope to see more soon!
From NW Missouri
Hi Ali, everything going okay? We miss your recipes and life posts!
Hello,
I’m thinking of making this recipe, it’s been years in the making as well!
I just have a question regarding the nuts. Do you use raw or roasted pistachios and walnuts? If they are roasted, are they salted or just plain?
Thanks you!
Sophie
This is fabulous! I make this every Christmas and have tried several recipes. I have found a keeper! I used clarified butter and the note for the syrup to be cold created crispy perfection. I’m no longer looking the best recipe, I’ll be making this one from now on.