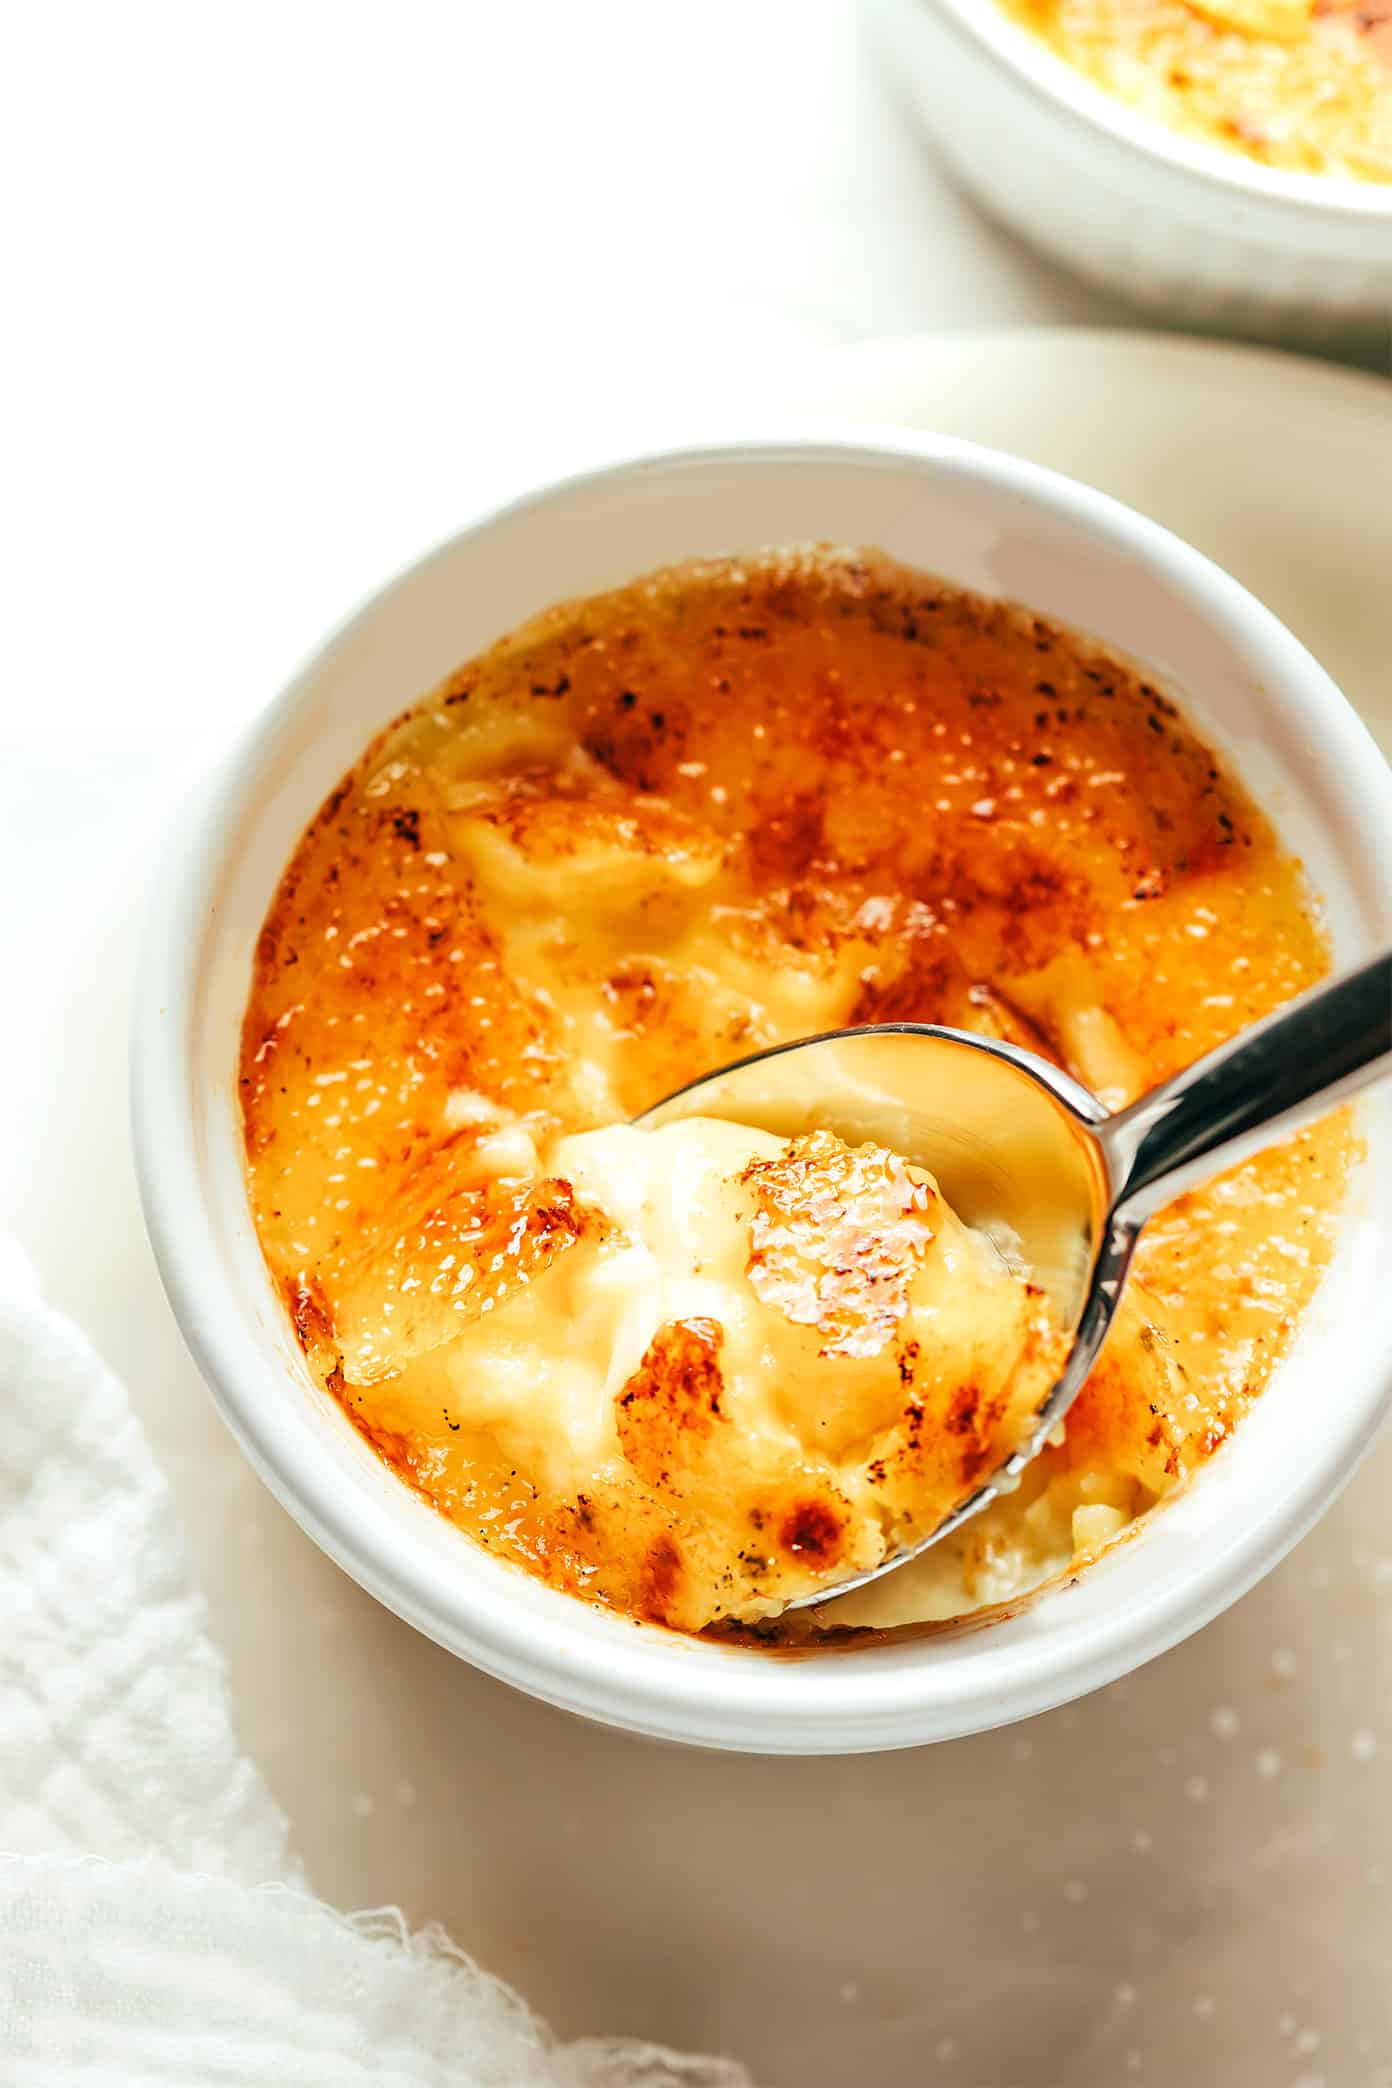

Description
This classic crème brûlée recipe is much easier to make homemade than you might think!
Ingredients
Scale
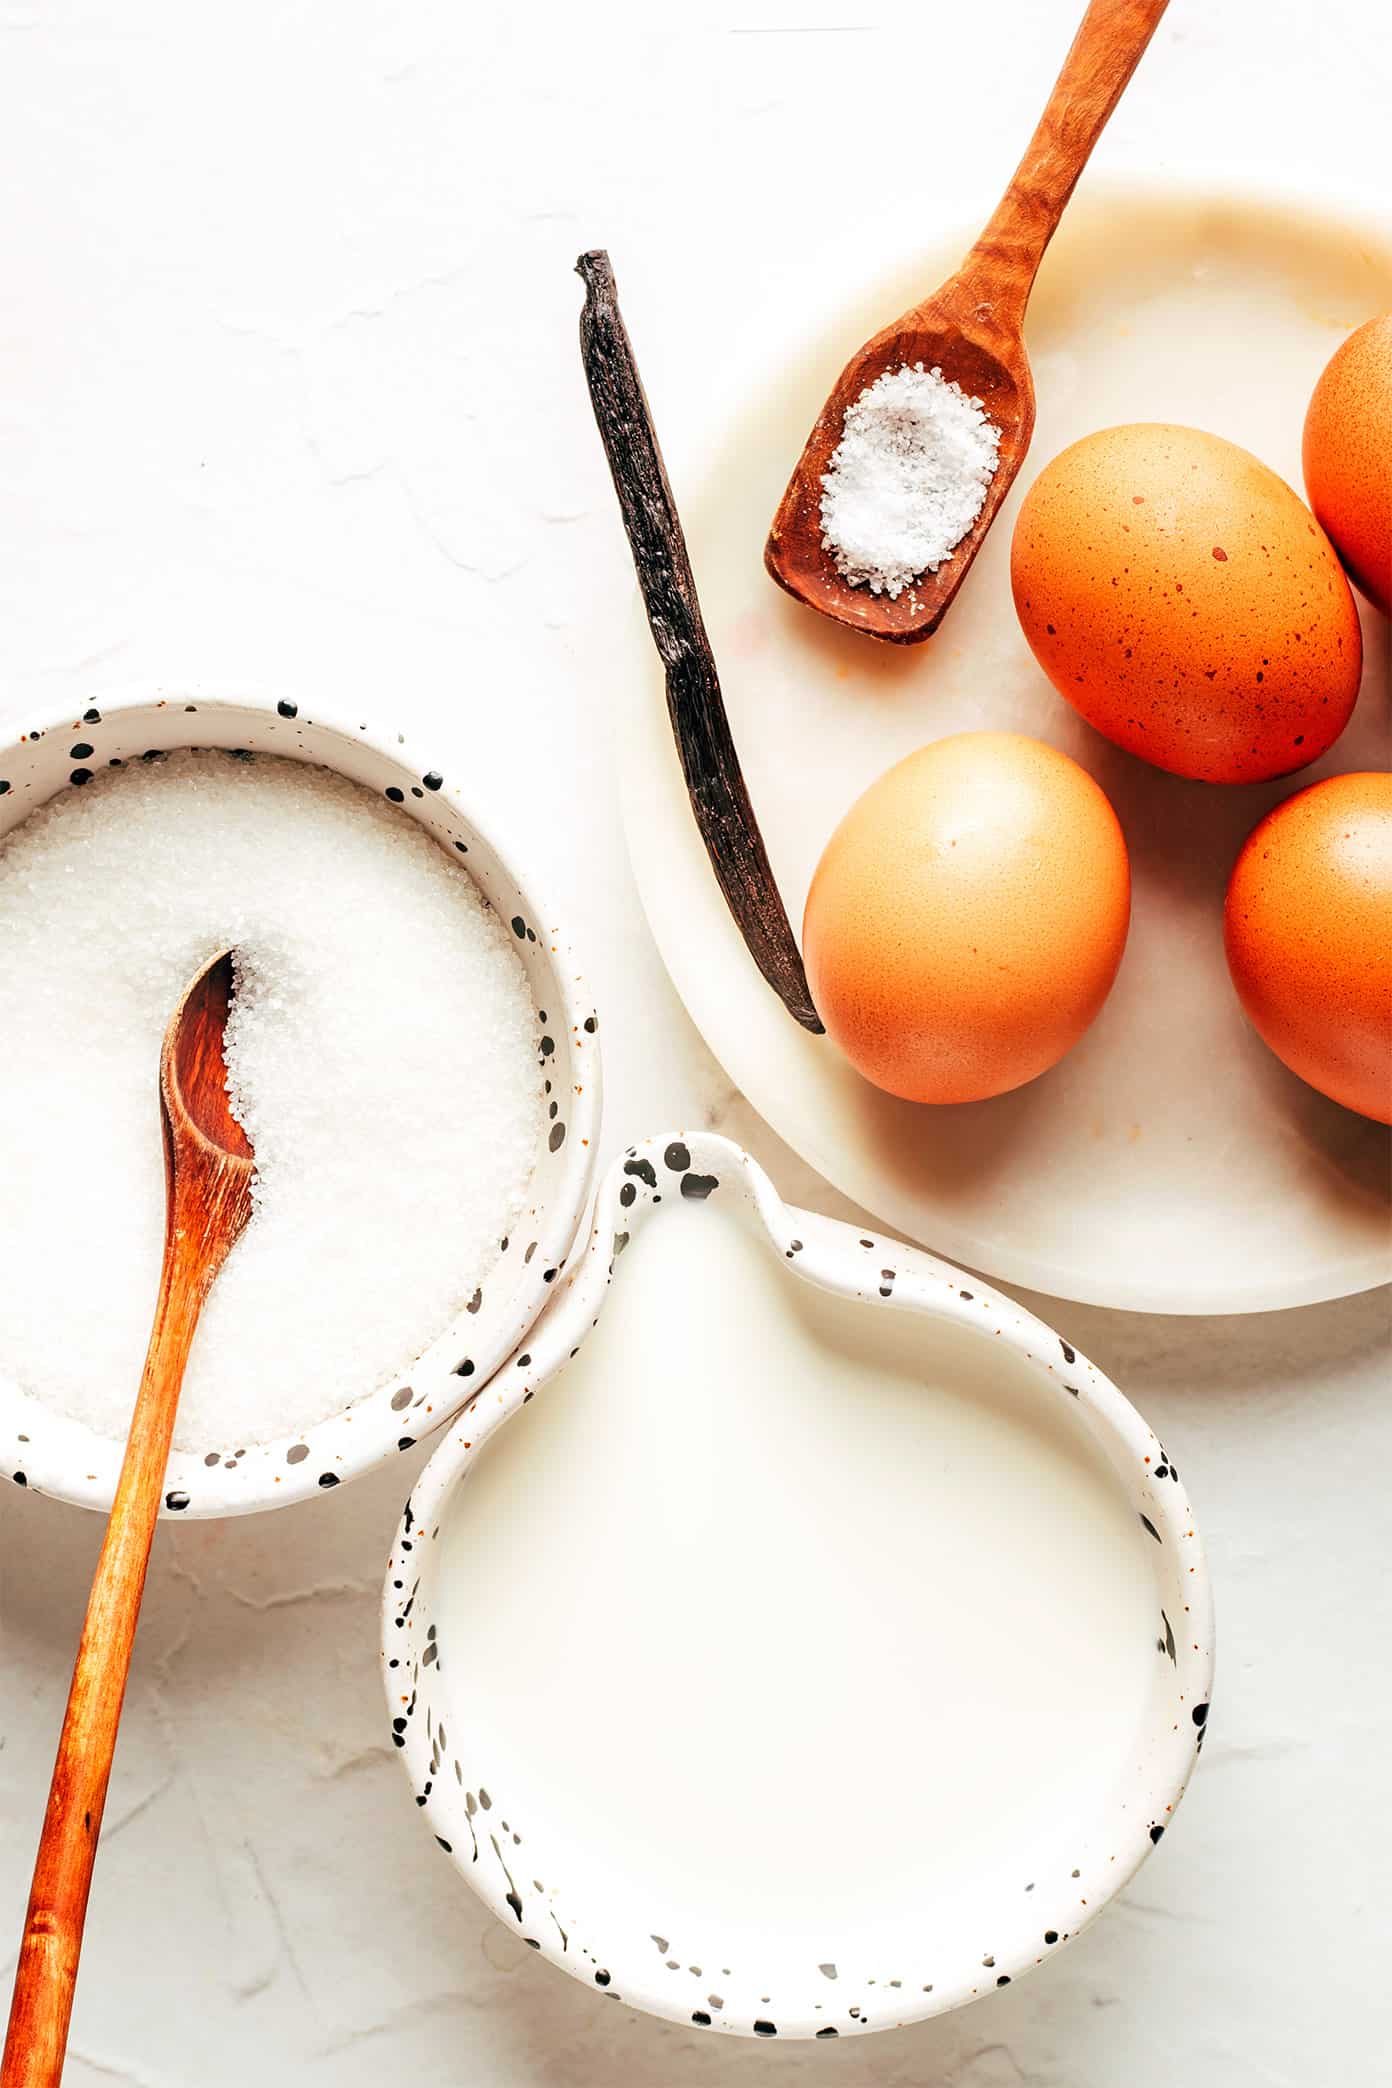
- 2 cups heavy cream
- 1/8 teaspoon fine sea salt
- 1 vanilla bean, split lengthwise (or 1 teaspoon vanilla extract)
- 1/2 cup granulated white sugar, plus extra for topping*
- 4 large egg yolks
Instructions
- Prep oven and ramekins. Heat oven to 325°F. Place 4 (6-ounce) ramekins side by side in a large baking dish. Place a kettle of water on the heat to boil.
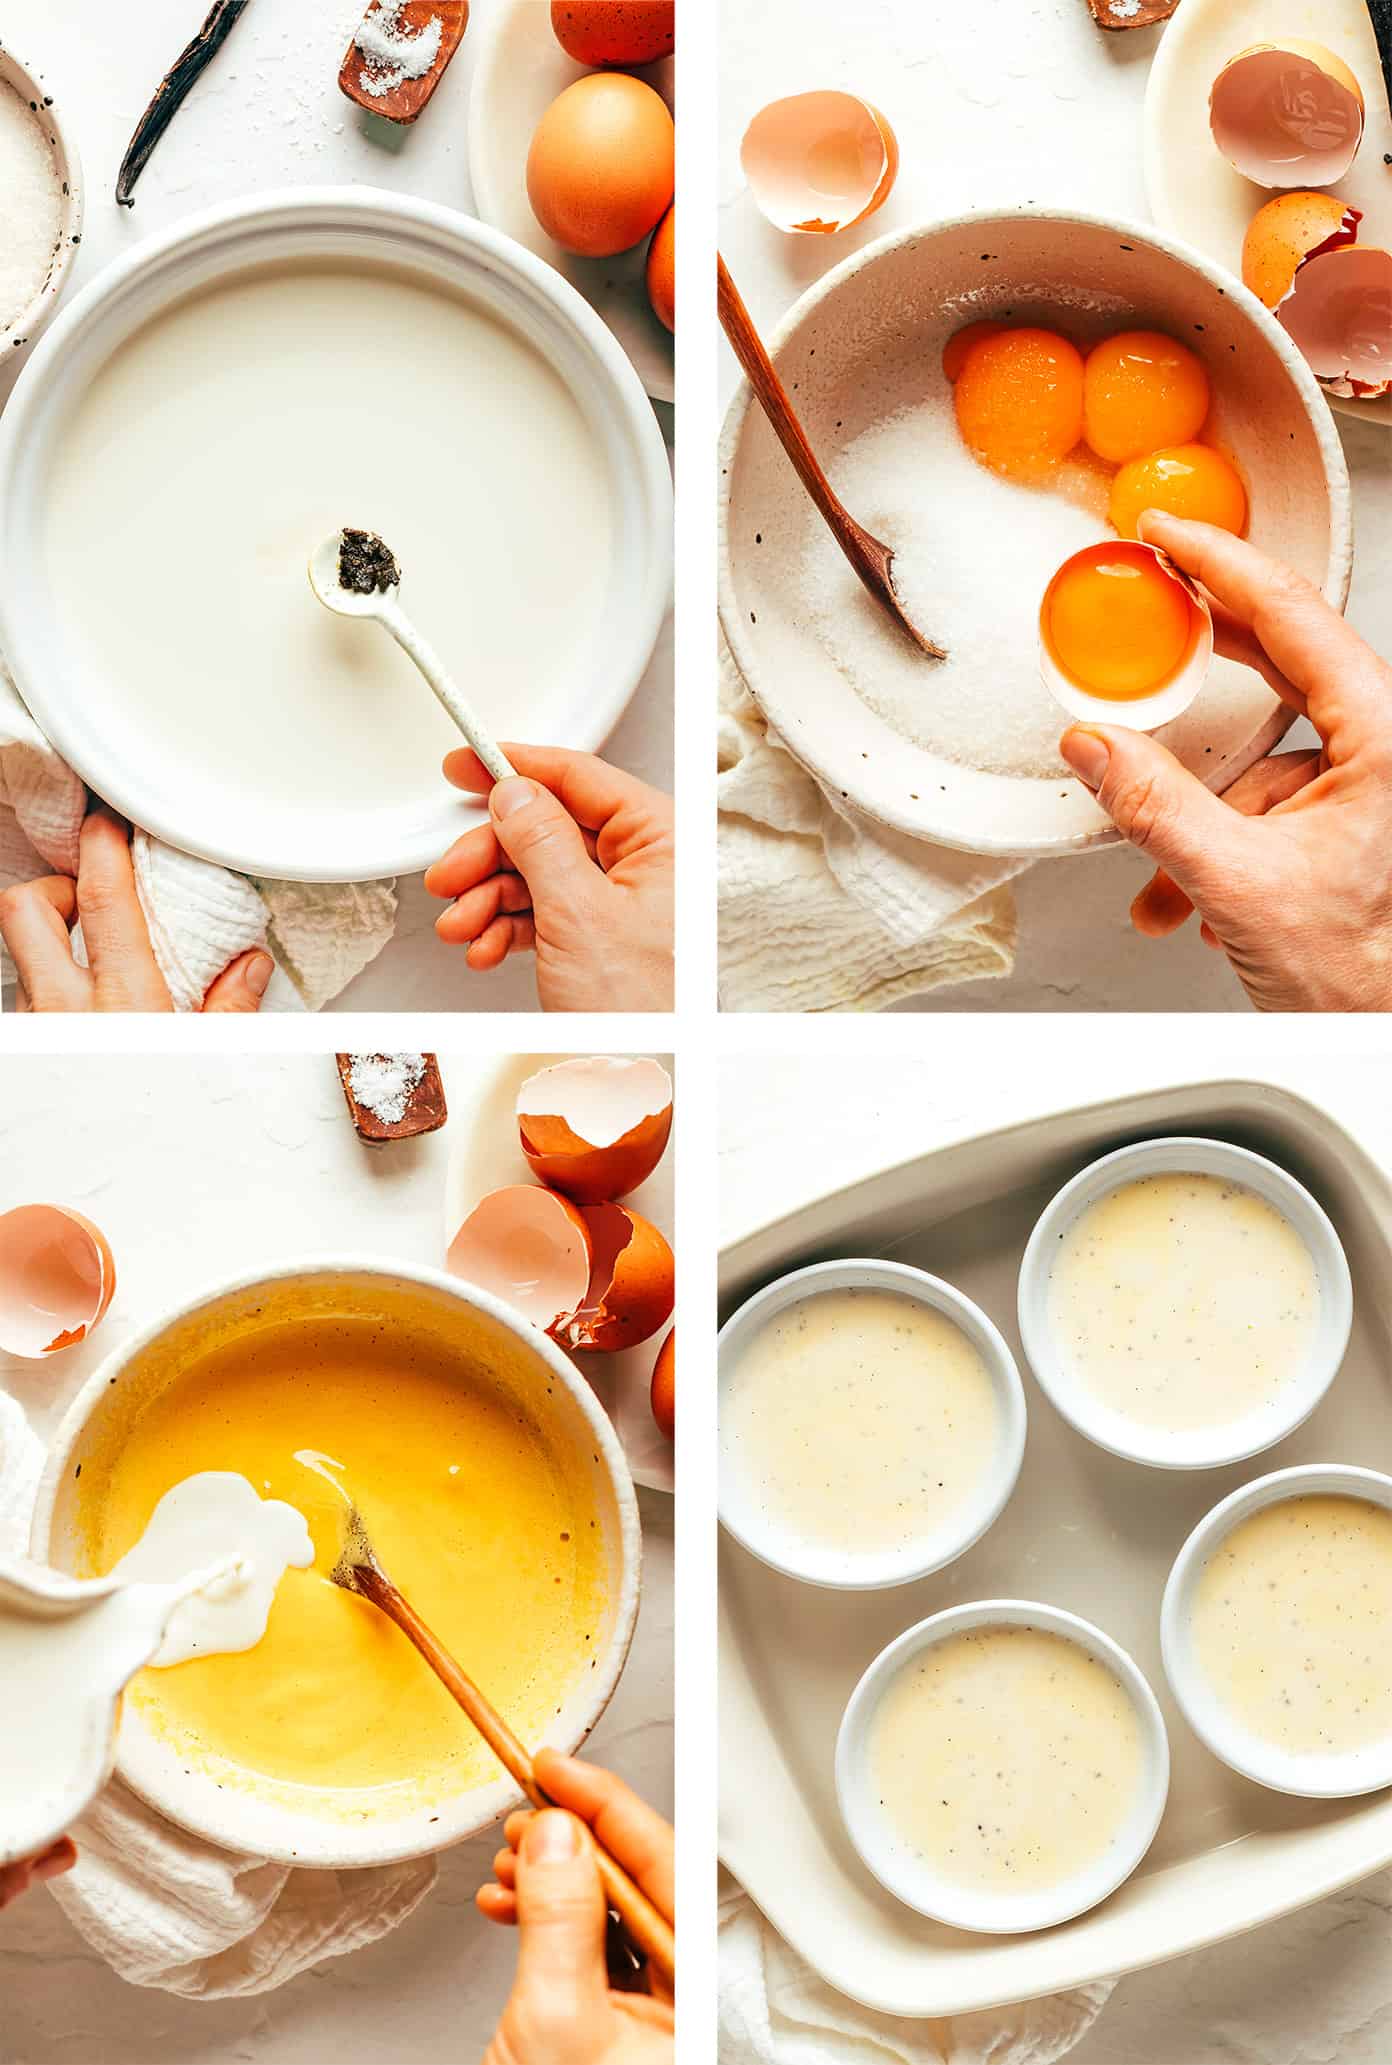
- Heat the cream. Add the cream and salt to a small saucepan. Scrape the seeds from a vanilla bean into the cream and briefly whisk to combine. Heat over low heat until the cream is hot but not simmering, then remove from heat.
- Whisk the sugar and egg yolks. While the cream mixture is heating, combine the sugar and egg yolks in a separate medium mixing bowl. Whisk by hand for 30 seconds to combine.
- Temper the eggs. While whisking the egg mixture with one hand, use your other hand to slowly add in ½ cup of the cream mixture. Repeat with an additional ½ cup while whisking. Then pour in the remaining cream and whisk to combine.
- Strain. Strain the entire mixture through a fine mesh strainer into a clean bowl to catch and discard any clumps that might have accidentally scrambled.
- Fill the ramekins. Pour the mixture evenly into the ramekins so that they are nearly full. Pour the hot water from the kettle carefully into the baking dish surrounding the ramekins (avoid pouring water into the ramekins) until the water reaches halfway up the sides of the ramekins.
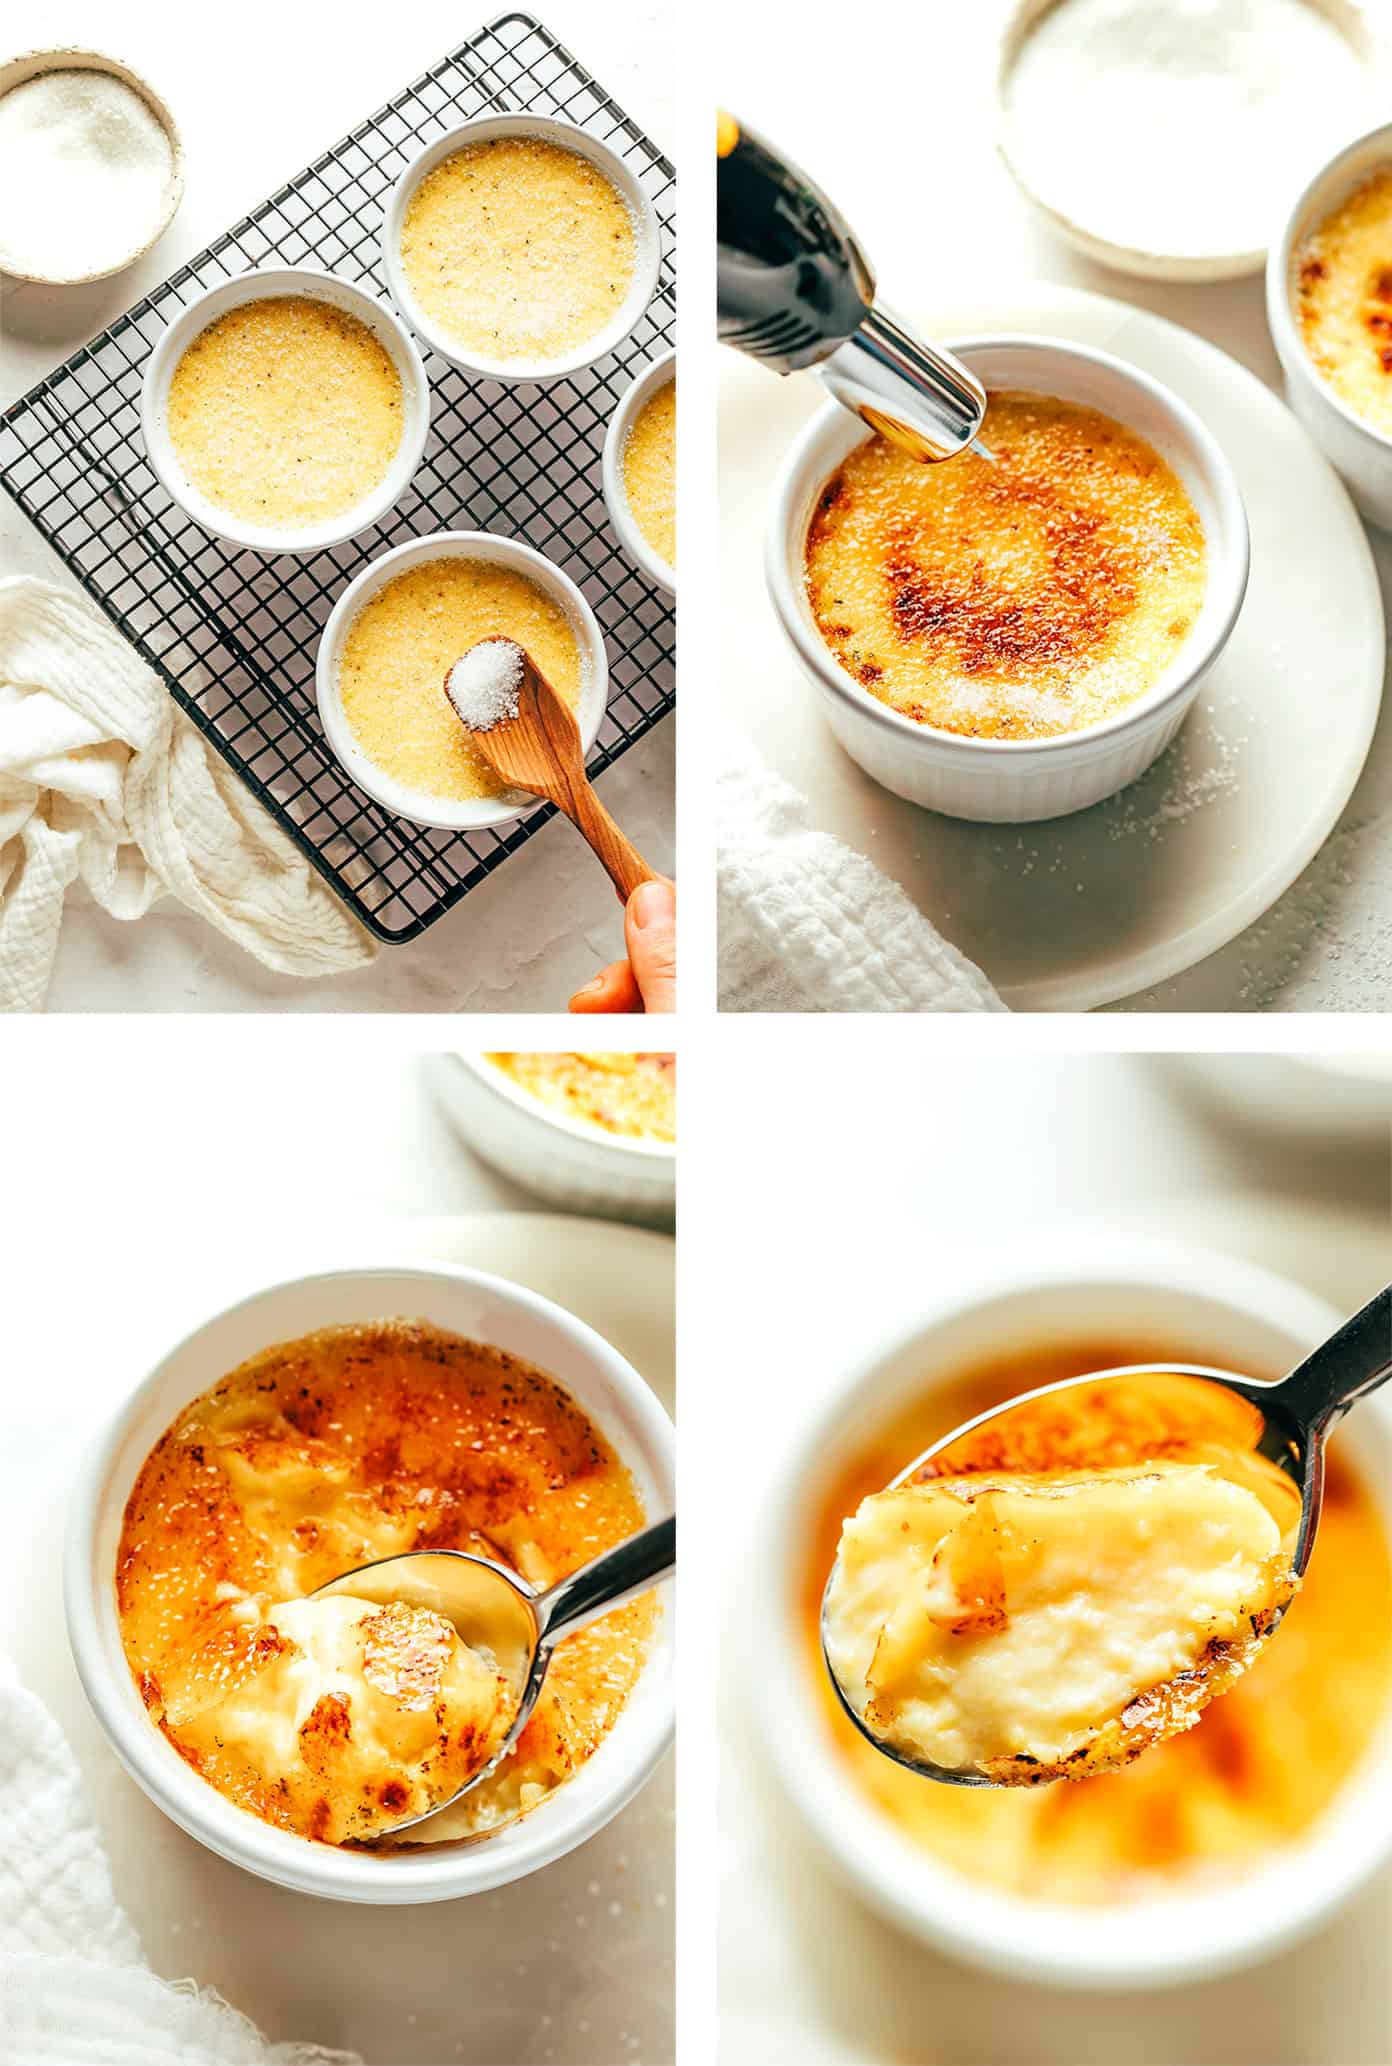
- Bake. Very carefully transfer the baking dish to the oven. Bake for 30 to 40 minutes, or until the custard is still slightly jiggly but the centers are barely set. (If you’d like to double-check doneness using a cooking thermometer, the centers of the custard should measure 165°F.)
- Cool. Very carefully remove the baking dish from the oven (remember that the water is very hot), then carefully remove the ramekins and transfer them to a heatproof surface. Let the ramekins cool to room temperature, then transfer them to the refrigerator and cool for at least 4 hours or until completely chilled.
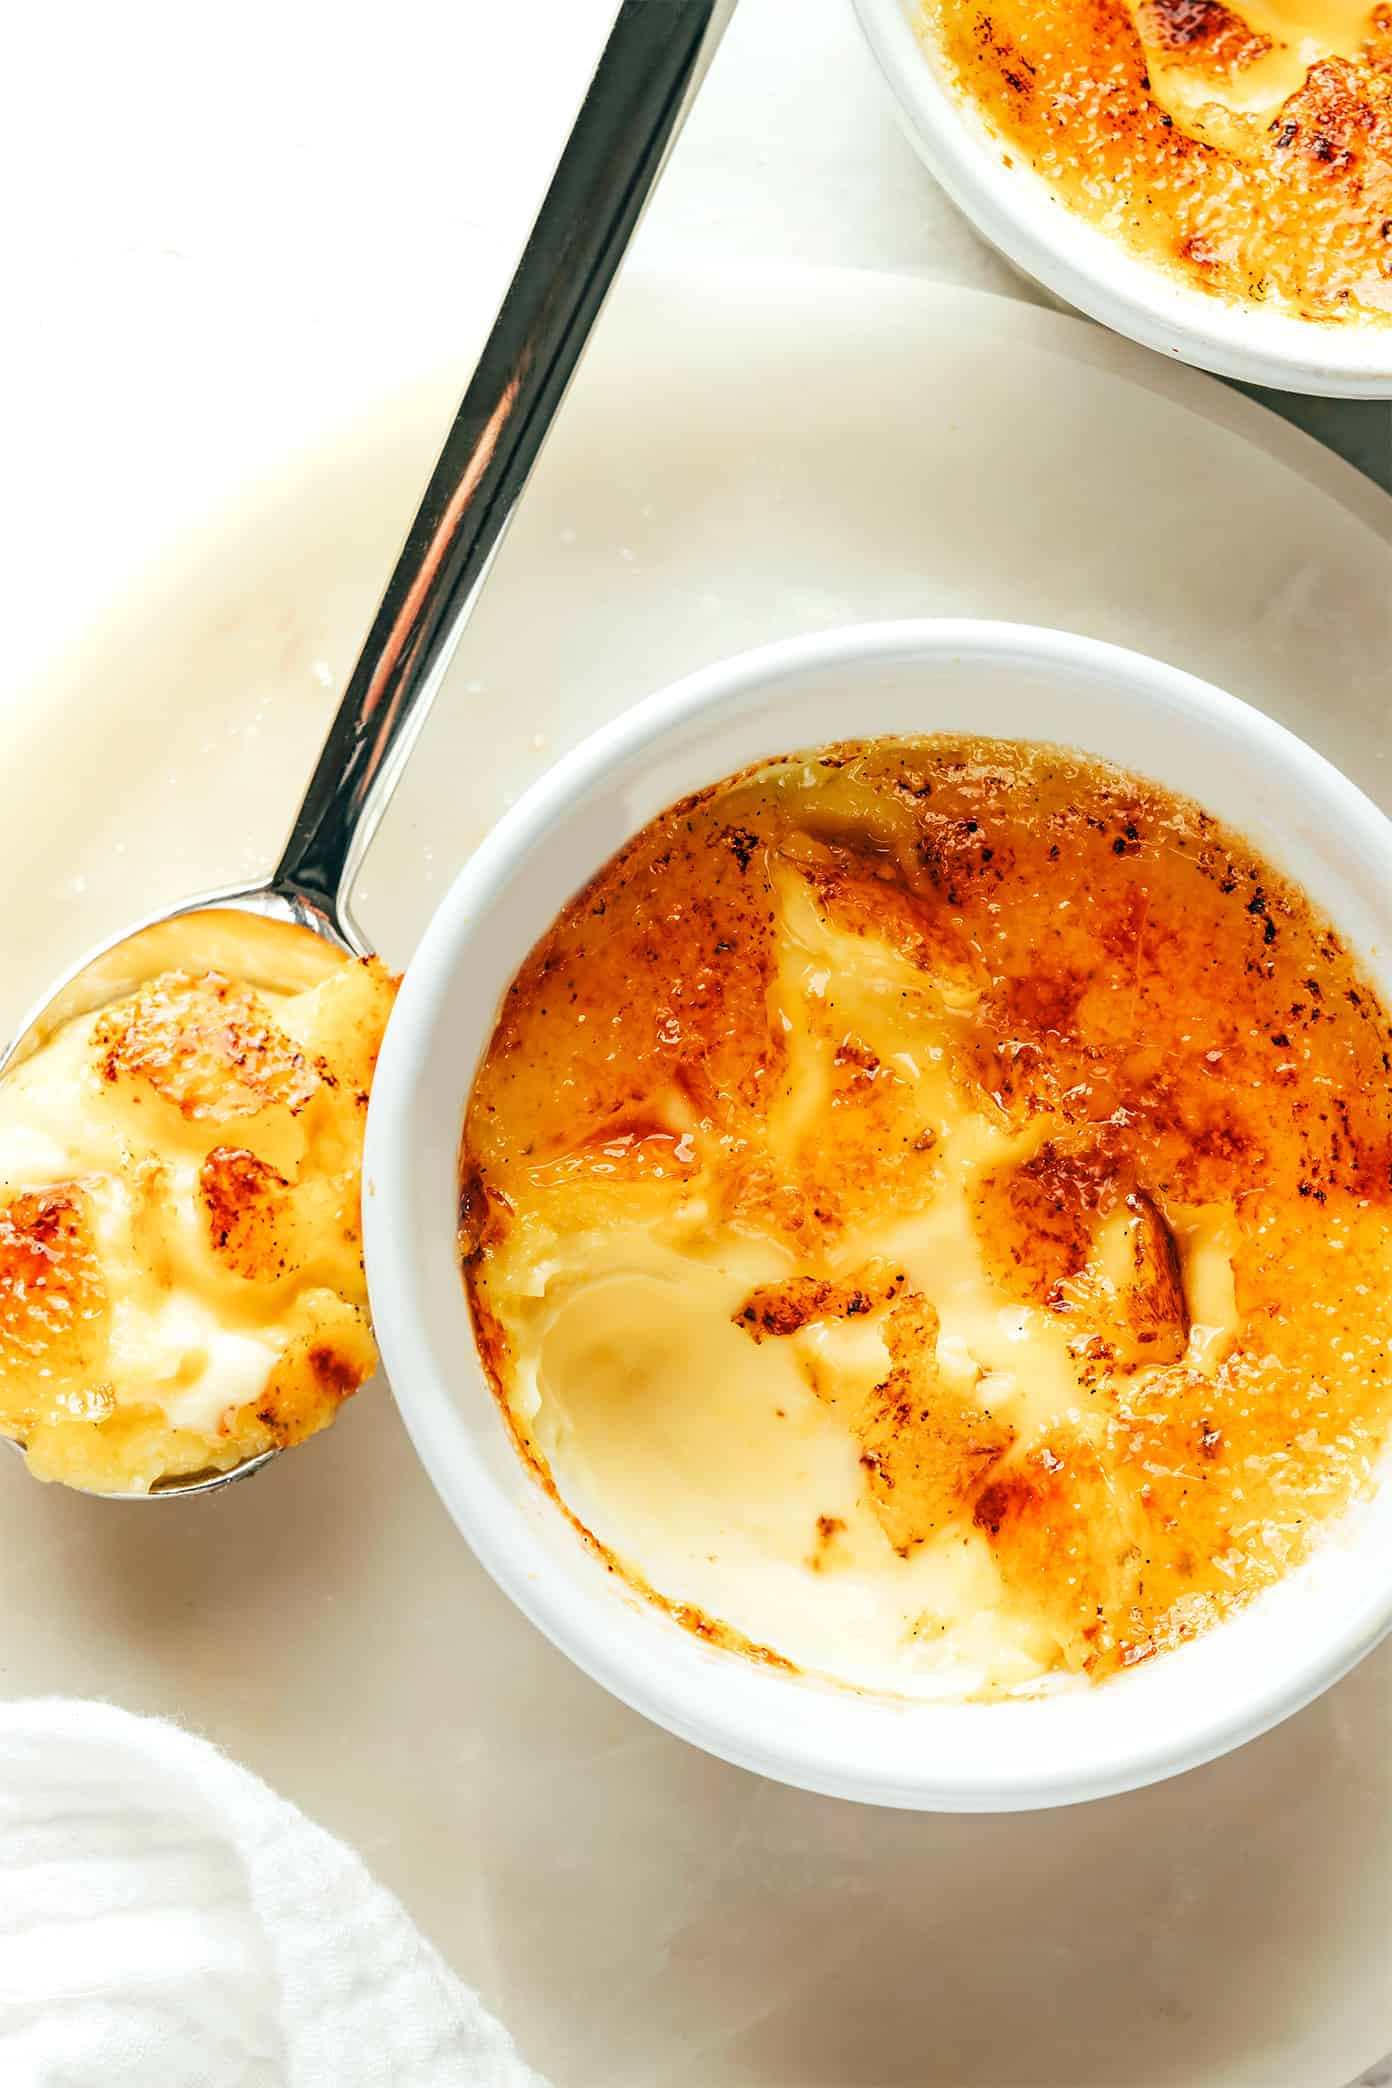
- Brulêe. Once the custard is chilled, remove the ramekins from the refrigerator. If you notice any condensation on the surface of the custards, blot it away gently with a paper towel. Add a very thin layer of sugar on top of each custard, swirling it around so that the sugar is distributed evenly. (I used a scant teaspoon per custard.) Use a kitchen torch to caramelize the top of each custard, holding the torch 2-3 inches from the top of the custard and very slowly moving the flame across the surface until it is a deep amber color and bubbly. Let the custard rest for at least one minute.
- Serve. Serve immediately, topped with additional berries or toppings if desired.


I love creme bruleee! Plus it’s a dessert that you can make ahead of time so it’s great for dinner parties! Thanks for sharing and your pictures are gorgeous!
This looks like so much fun to make!! And I totally have a torch…just haven’t figured out how to use it yet. I am so making this!!
So simple and delicious – that blow torch looks like such a fun part too haha!
I wanna make this so I can look as awesome as you holding a torch!! Your cream brulee look great.
omg, YUM. I love creme brulee!!
You are sooooooo beautiful!!!!!!
I have a torch I’ve never used before! Pretty sure this creme brulee should be its first victim ;-)
I started cooking at my mothers side at the age o four. She started letting me cooking our version of chili {with beans,YUKK!} She told me to learn to cook as it would pay off later in my life. I did understand then but she was RIGHT!
Thanks, JohnB
Hi there! I’m trying to track down the directions for this creme brulee recipe, but the links to the other blog does not work. Any recommendations? Thanks!
Hi I have been using this recipe for years and it’s suddenly gone
The associated link no longer works. Is there any chance you can share the original recipe? I’ve made it before, and it was my favorite homemade creme brulee.
I love creme brulee and decided to try making it today.
Absolutely delicious, I ate 2 ramekins 🤣
Came out perfectly for me, Thanks
I have made this dessert a few times and have always had great success. It is easy to make and is a great ending to a romantic dinner with my life partner. Thank you.
Thank you for this straightforward recipe! I just added extra sugar on top to get a nice and thick, crunchy brulee. That’s what makes it so much better in my opinion.
Perfect and easy. Using the thermometer takes the guess work out..we have two ovens and one takes 30 and the other longer.
I made creme brulee for the first time a couple weeks ago, and this recipe was perfect! Thanks for your great directions and encouragement.
My desserts turned out great. The sugar even cracked!
I appreciate your great recipes! My other favorites are your homemade croutons, and potato soup.
Take care
What if I make a quarter of the recipe for just one ramekin and make it in the toaster oven. How long in 350 should I put it in for? Thank you
This creme brûlée recipe is super good thanks for sharing it also my name is GEOFF
It is also really good if you make it with half and half