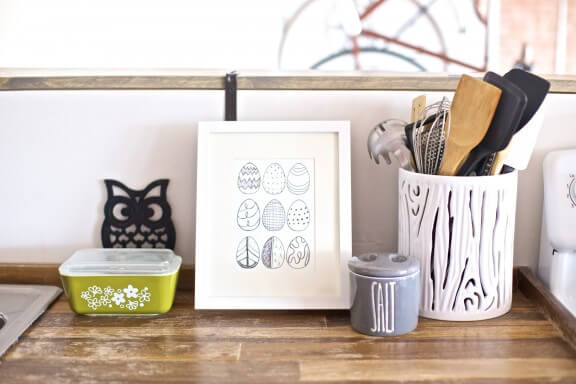
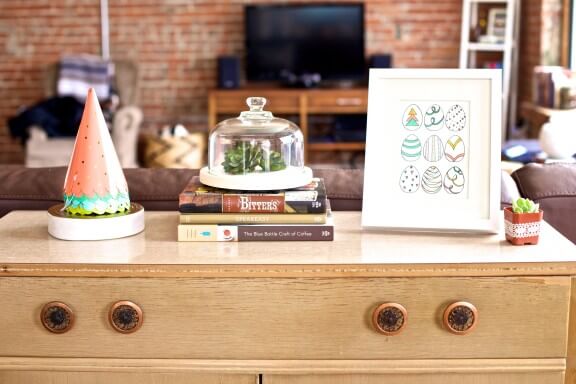
Easy DIY Easter Egg Art Prints
This post may contain affiliate links. Please read my disclosure policy.
Easter is quickly approaching! Can you believe it is only a week away?
I am usually not one to go all out for holidays when it comes to decorating. (Well, with Christmas being the exception!) In fact, I wasn’t planning on decorating for Easter at all this year. But when I saw Ali’s 4-Ingredient Easter Egg Oreo Truffles, I felt inspired to not only indulge in some delicious Easter treats, but also make a few egg art prints to brighten up my home!
These prints were simple, took very few materials, and were also so much fun to make! I haven’t gotten around to dying Easter eggs at all this season, and most likely with the way things are shaping up with a busy spring, I probably won’t get to this year. But I went all out decorating these “paper” Easter eggs!
So if you are feeling the itch to decorate eggs this year or if you’re looking for some last-minute decor for Easter, maybe try making a few egg prints! They sure do last longer than a boiled egg! ;)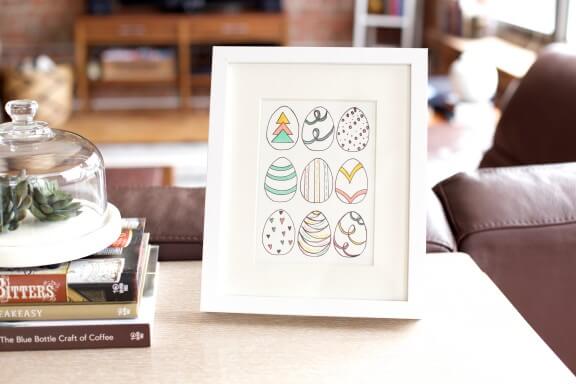
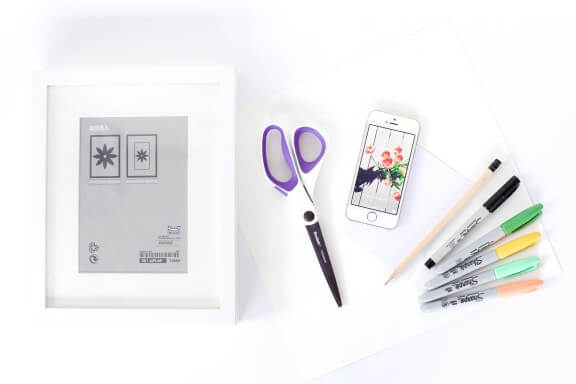
What You’ll Need:
- Picture frame (Mine is from Ikea and has a 5×7 matte)
- Scissors
- Black sharpie pen
- Sharpie’s of your choice (any colored markers will do)
- Pencil
- White paper
- Tissue paper or tracing paper
- Small piece of white cardstock
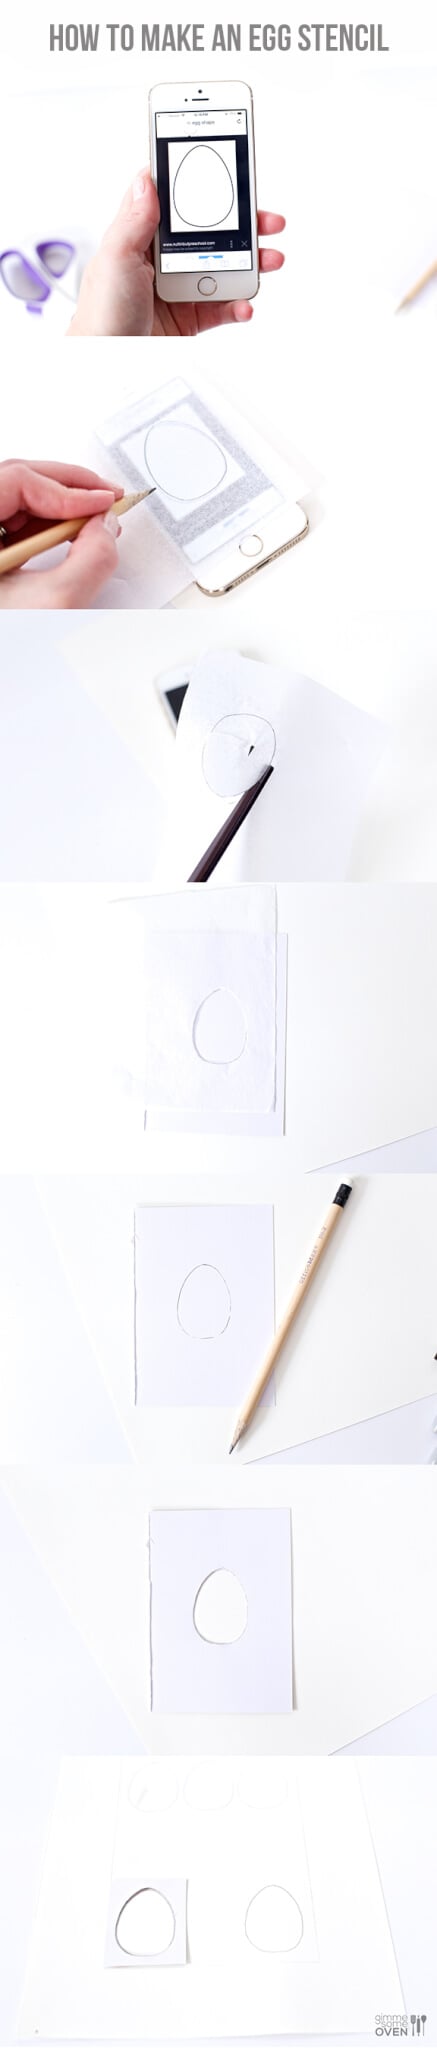
To Make Egg Stencil:
- Using your phone, find an egg shape using google images, I used this shape. (I used my phone specifically because the egg was the perfect size on my iphone’s screen) If you would like a larger egg feel free to print your shape out from the computer and trace it.
- Take your tracing paper or tissue paper and trace the image carefully with a pencil
- Following your pencil markings carefully cut out the egg shape
- Transfer the egg shape onto a small piece of cardstock and cut the image out again. (The cardstock should be sturdy enough to use as a stencil)
- After I made my stencil I chose to cut around the stencil to make it a small rectangle to work with.
To Make DIY Easter Egg Art Prints:
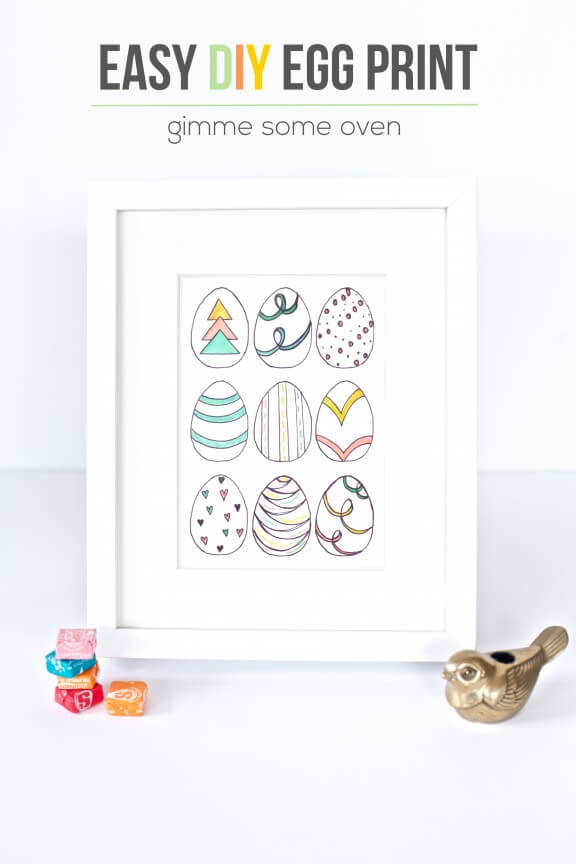
- Once you have your stencil cut out and ready to use you can let your creativity go! I chose to make a print with 3 rows of 3 eggs, but anything could be cute.
- Since I had a 5×7 matte to go off of, I decided it would be easiest for me to start in each corner and work my way in. I just matched my stencil edge up with the corner of my cardstock and traced!
- I traced the first set of eggs in pencil to make sure it looked the way I wanted it to look, and then carefully went over the pencil with a thin tipped black sharpie.
- Once the eggs are all in place it is time to get creative. Like I said above, I used Ali’s Oreo Truffles as inspiration, but I also chose to use a few of my current favorite patterns as well.
- As soon as the sharpie dries you are ready to frame! I made two separate prints and chose to color in one print with a few Spring colors just for fun.
- Frame your print and display it for all to see:)

See? So cute and easy!
These would also be a perfect craft to do with your kiddos (and also a little less messy than dying Easter eggs!). Or the big adult “kiddos” in your life. Everyone loves to color!
Definitely a fun, quick and easy idea for Easter decor that we’ve enjoyed in our house. Hope you enjoy it too!


That is so cute, easy, and perfect for Easter! Thanks!
This is so cute and festive!
Adorable! What a fun idea!
Thanks Katie!
So cute! They really do brighten up the place!