This post may contain affiliate links. Please read my disclosure policy.
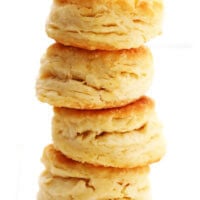
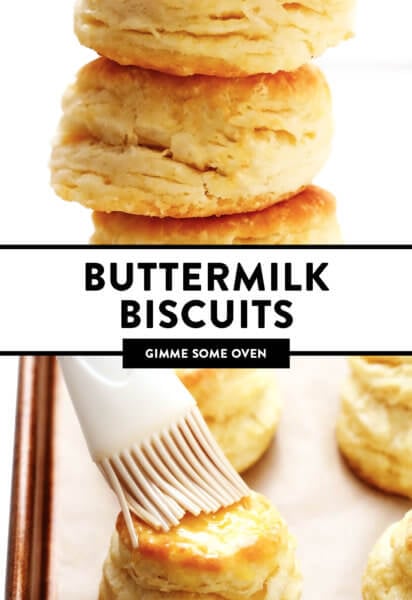
My favorite homemade buttermilk biscuit recipe — easy to make, perfectly soft and tall and flaky, and always SO buttery and delicious.
A few weeks ago when I happened to pass by our local KFC here in Barcelona, I suddenly found myself majorly craving some crispy chicken fingers and buttermilk biscuits. (Haven’t had either in years since we moved abroad!) I decided to indulge and popped in impulsively to place a quick order. But after scanning the menu again and again and again, I realized that — gasp — biscuits apparently aren’t available at KFC here in Spain!
When I mentioned my shock on Instagram, dozens of you from around the world replied that your international KFCs also do not offer biscuits on the menu. (Which, we’ve all agreed, feels like a majorly missed opportunity, KFC — who in the world wouldn’t love your soft and buttery buttermilk biscuits?!) Either way, though, I realized that day that if I wanted to satisfy my craving for biscuits, I was going to have to make them myself. So I picked up some buttermilk on my way home, pulled up the bookmark of my favorite recipe that I have turned to over the years, and baked up a quick batch from scratch. And wow, I had almost forgotten just how magical a fresh-outta-the-oven hot pan of buttermilk biscuits can be.
Nothing beats a good homemade biscuit. ♡
This particular recipe that I like to use is also incredibly easy to make by hand with basic ingredients that you likely already have in your kitchen, and comes together from start to finish in just over a half hour. And the combination of creamy butter and tangy buttermilk yields here yields the most delicious biscuits, especially when brushed with some extra melted butter hot out of the oven and sprinkled with a pinch of flaky sea salt (which I highly recommend). The simple folding technique used here also helps ensure that your biscuits will bake up soft and tall, and pull apart into flaky layers upon layers when you crack them open.
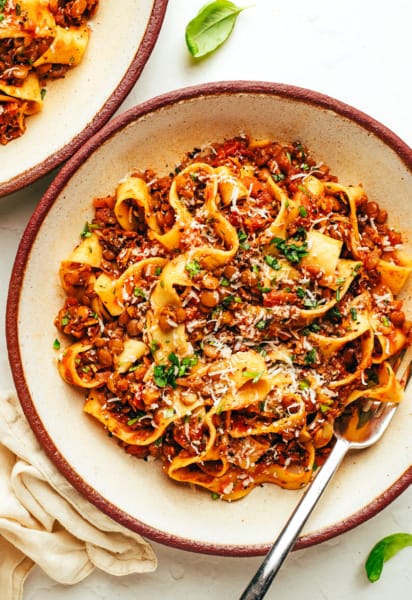
Bottom line, this recipe has never let me down when the biscuit cravings strike. It’s perfect for morning biscuits and gravy or biscuits with jam, works great as a side dish with dinner, or you can even be used to top your favorite chicken pot pie or other casseroles. It’s simple, classic and never lets me down. So if you are looking for a reliable homemade biscuit recipe to have in your repertoire, definitely bookmark this one and let’s bake a batch together!
Buttermilk Biscuit Ingredients:
Before we get to the full recipe below, here are a few quick notes about the ingredients you will need to make the best homemade biscuits:
Flour: When making classic buttermilk biscuits, I opt for standard all-purpose flour and recommend weighing it so that you have the correct amount.
Baking powder and baking soda: To help give these biscuits be extra-soft and rise nice and tall.
Light brown sugar (optional): I like to add a tiny hint of sweetness to my biscuits (any kind of sugar or honey would work), but you are welcome to leave the sweetener out if you prefer.
Salt: I wrote this recipe using fine sea salt in the biscuits, plus an extra optional sprinkle of flaky (or fine) sea salt on top of the biscuits before serving. If you do not have sea salt and are using iodized table salt, I recommend using half of the amount listed in the recipe.
Butter: It’s extremely important that the butter be very, very cold for this recipe so that the biscuits can bake up to be tall and flaky. So be sure that it has been completely chilled in the fridge before dicing and adding it to the dough. (Or if you happen to have the time, I recommend popping your butter in the freezer for 30 minutes before using it to make it extra cold.) I also recommend brushing the baked biscuits with a bit of melted
Buttermilk: The buttermilk in this recipe also needs to have been completely chilled in the fridge before adding it to the recipe. I used full-fat buttermilk here, which I highly recommend, but low-fat buttermilk or “homemade “buttermilk (made by mixing whole milk and lemon juice) would also work.
I also recommend the following equipment to make this easy biscuit recipe:
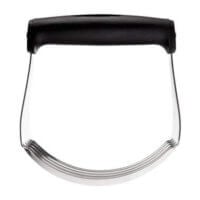
Pastry cutter: You can either use a pastry cutter or two forks to cut the butter into the dry ingredients by hand. Or alternately, if you happen to own a food processor, you can use that to pulse the butter and dry ingredients.
Biscuit cutter: I recommend a 2 to 2.5-inch round biscuit cutter for this recipe, preferably one with a handle so that you do not have to twist the biscuits to cut them out of the dough. That said, if you do not have a biscuit cutter, you can just roll the dough into a 9-inch rectangle and cut the dough into 9 even squares.
Rolling pin: Using a rolling pin, versus patting the dough down with your (warm) hands, helps greatly to keep the dough nice and chilled.
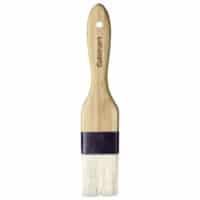
Pastry brush: If you would like to brush the biscuits with some warm melted butter once they come out of the oven.
7 Important Tips For How To Make The Best Biscuits:
Detailed instructions are included in the recipe below for how to make biscuits. But first, please take a moment to read the following tips so that your biscuits are sure to be perfectly soft, flaky, tall, and EPIC. ♡
Keep your ingredients cold, cold, cold: In order for the butter to stay extra-cold and not melt while forming these biscuits — which will help them to rise in the oven to flaky perfection — it’s important that the butter and other ingredients in this recipe stay as cold as possible before baking. So be sure that your butter and buttermilk are completely chilled and stay in the fridge until you add them to the recipe. (Or better yet, pop the butter in the freezer for 30 minutes before adding it to the recipe.) Then try to work quickly once the butter has been added to the recipe, avoid touching the butter with your warm hands as much as possible, and let the formed biscuits chill in the fridge or freezer for 15 minutes before baking so that the butter can firm back up again. It sounds picky, but keeping your butter nice and cold will really make a difference in this recipe!
Aim for pea-sized butter chunks: When cutting (mixing) the butter into the dry ingredients, aim for it to be broken up into pea-sized chunks. You don’t want the butter chunks to be too much smaller. Otherwise, the biscuits will be flatter and less flaky.
Be gentle with the dough: When rolling and folding the dough, try to be fairly gentle with it and do not press the dough down extra-hard with your rolling pin.
Don’t over-flour the dough between folds: Also try to avoid adding unnecessary amounts of flour to the dough while folding and rolling it out. You will, of course, need to sprinkle on a bit of extra flour throughout the process so that the dough doesn’t stick to the surface or the rolling pin. But too much extra flour will cause the layers to separate a bunch, and your flaky biscuit layers may topple over a bit in the oven. (Which isn’t a terrible thing — they will still be delicious!)
Don’t twist the biscuit cutter: When cutting out the biscuits, try to avoid twisting the biscuit cutter. Doing so will “seal” the edges of the biscuits, which will prevent them from separating into flaky layers and rising as tall.
Cut the biscuits into squares (if you don’t have a biscuit cutter): Alternately, if you do not own a round biscuit cutter, you can just roll out the dough into roughly a 9-inch square, and then cut the dough into 9 equally-sized (3-inch) biscuit squares.
Consider your options for crispy or taller biscuits: If you prefer your biscuits to have crispy sides, like I do, space them evenly apart on the baking sheet. Or if you would prefer taller biscuits with softer sides, you can place them side-by-side so that they are touching on the baking sheet (or you could opt to bake them in a cast-iron pan or pie plate instead).
More Essential Bread Recipes:
Looking for more classic bread recipes to bookmark for your repertoire? Here are a few of my go-to favorites…
6 tablespoons (85 grams) very cold butter*, diced into 1/2-inch cubes
1 cup cold buttermilk
optional toppings: extra melted butter and flaky sea salt
Instructions
Mix the dry ingredients: Combine the flour, baking powder, brown sugar, salt and baking soda in a large mixing bowl. Stir briefly to combine.
Cut in the butter. Sprinkle the diced butter over the dry ingredient mixture. Use a pastry cutter or two forks (or a food processor*) to cut the butter into the dry ingredients until it is well-mixed and forms pea-sized chunks of butter.
Add the buttermilk. Pour in the cold buttermilk and stir until the dough until it is just combined. (Try to avoid over-mixing the dough.)
Form the dough. Turn the dough out onto a floured work surface. Use your hands to quickly shape the dough into a small rectangle. Use a rolling pin to roll the dough out evenly until it is about 1/2-inch thick.
Fold the dough. Then fold the dough on top of itself into thirds (like you are folding an envelope, see image above). Rotate the dough 90 degrees. Then repeat the folding process a second time, rotate, repeat the folding process a third time, rotate.
Cut the dough. Roll the dough out once more into a roughly 10 x 5-inch rectangle. Then use a 2 to 2.5-inch biscuit cutter to firmly cut the dough into 8 circles, taking care not to twist the biscuit cutter at all when cutting the dough, and arrange the biscuits evenly on the prepared baking sheet.* If you would like, re-roll the remaining dough scraps and cut out 1 or 2 more biscuits.
Heat the oven. Heat the oven to 450°F (232°C). And transfer the biscuits to your freezer or refrigerator for 15 minutes as the oven heats.
Bake. Once the oven is ready to go, bake the biscuits for 10-12 minutes, or until they achieve your desired level of browning on top. Transfer the baking sheet to a wire rack. Then, if you would like, brush the tops of the biscuits with some melted butter and sprinkle with a pinch of flaky sea salt.
Chilling the butter: If you have the extra time, I recommend chilling your butter in the freezer for 30 minutes before adding it to the recipe so that it can be extra cold. (I also recommend chilling the flour too!)
Alternate food processor shortcut: Alternately, if you happen to own a food processor, you can add the dry ingredients (flour, baking powder, light brown sugar, salt and baking soda) to the food processor and pulse a few times to combine. Sprinkle the cubed butter on top of the dry ingredients and pulse a few more times until it forms pea-sized clumps. Then transfer the mixture to a large mixing bowl, stir in the buttermilk, and continue on with the recipe as directed.
Arranging the biscuits on the baking sheet: If you prefer your biscuits to have crispy sides, like I do, you can space them evenly apart on the baking sheet. Or if you would prefer taller biscuits with softer sides, you can place them side-by-side so that they are touching on the baking sheet (or you could opt to bake them in a cast-iron pan or pie plate instead).
Source: Recipe very slightly adapted from Food.com.
Oh they serve biscuits in KFC? I have never been to a KFC that serves biscuits, over here in Asia, well the ones I have been to its always a bun and mash potatoes or fries. These look so nice and buttery.
I have never used cold butter in my biscuits…just the buttermilk. However, we use self rise flour instead of all the other ingredients. Our recipe has been handed down through the family for generations. Nothing beats a homemade biscuit!!
Unfortunately, I cannot say for sure since I have only tested it with all-purpose flour. If you test it with gluten-free flour (a 1-for-1 blend might work), would love to hear how it goes.
Yummmmm. I must say that those bisquits looks so much yummier than KFC’s. But yes I will try to make some your bisquits, and I sure hope they come out looking delicious and all like yours. ?
Karen vervoordt —
My bisquits did not rise. Tried it twice. Kept ingredients very cold. No idea what i did wrong. Going to try again because your photo looks so flaky and delicious!
I’ve been experimenting with biscuit recipes over the last year, and this is my favorite! These were DELICIOUS and easy to make. My mother-in-law is an expert baker and incredibly picky about biscuits, and she thought these were great, too. This may be my go-to from now on.
I used salted butter (the recipe doesn’t specify), froze the butter / made sure the buttermilk was cold, and used my food processor to make the dough. A+ recipe.
Turned out great! I ran out of buttermilk so I subbed half of the liquid with heavy cream. Yum! I also felt like I rolled them too thin before placing on the baking sheet, so I took two pieces and pinched them together. When they came out of the oven, we were able to pull the two pieces apart into two halves.
Joan Arenstein —
They are so yummy! How do I store them and reheat them? In case I don’t eat them all today!
Yes! These are just like my grandma made. No higher praise than that! I followed the recipe but had no buttermilk, so I made the homemade version and it worked perfectly. I always love your recipes Ali!
Even after adding more flour, the dough was too damp and sticky to roll out. So I put it into muffin forms. The muffins turned out fine with a slightly longer baking time (add 3-4 minutes).
When my wife ate the muffins, she said: ‘They taste just like the ones at KFC.’
I hadn’t told her about the intro to this recipe and she has not eaten at KFC’s in decades (!).
I call myself a haphazard cook…some things work and sometimes it’s a disaster. I made these biscuits this morning and perfection! Thanks to your thoughtful and detailed instructions and tips! I love your recipes and website. Thank you!
Our new go-to biscuits! Delicious! I keep butter in the freezer and then grate it into the flour mixture. I also put my buttermilk in the freezer for a little bit, which helped. The dough was pretty sticky to work with, but got better as the folding process went on and the biscuits turned out great. The recipe made 12 biscuits for me. I also really appreciate the gram measurements…using the scale makes things super easy!
Made these biscuits this morning and served them with sausage gravy, and butter and jam. They are everything. Very appreciative of the weights included, especially for the flour. We used the food processor, and it worked beautifully. We chose to cut the biscuits into even squares rather than use a round biscuit cutter and placed them on a quarter sheet to bake. Turned out beautifully. We have found our holy grail biscuit recipe. Can’t wait to make them for my mother. She will be so impressed.
Do you think it would be ok to keep them in the refrigerator for a few hours before baking? Thinking of prepping the dough beforehand and waiting until just before eating to bake them. Thanks!
I made this recipe this morning for breakfast. These biscuits are Over The Moon! I usually chose recipes that are made by well-known websites – Bon Appetite, Cooking – New York Times, and Taste of Home. But the picture of your biscuits sold me to try your recipe. I am a Champion Baker and I know biscuits, pie dough, etc. After I poured the buttermilk over the dry ingredients and began stirring it with a spoon, the mixture began to come together “beautifully”. I could tell that the dough was going to be amazing! I got excited!
I then took the dough out of the bowl, placing it on a large cutting board, sprinkled with flour. I shaped the dough into a rectangle and rolled out the dough to 1/2 inch then folded the dough over once then once again. I then rolled the dough to 1/2 an inch and cut out circles and placed them on my baking sheet. I baked them at 450 degrees for 12 minutes. After I took them out of the oven, I basted them with melted butter. Then I cut a piece off and tasted it. It was Fantastic! And the BEST biscuit I’ve ever tasted! Thank you so much!
Oh woow. I am glad I found this recipe as I have been looking for the perfect biscuits recipe. This is such a flavorful biscuit recipe. It melts so nice in the mouth and enjoyable with your favorite tea. Very simple ingredients and instructions to follow. My guests were in love with this yummy biscuits and kept going for more until they were all done. It was that good?. The only thing was to add extra 1/4 cup flour for my preference texture as I found my mixing a bit sticky. Thanks for sharing. ?✌️?
These are delicious biscuits! I am not a baker by choice but by necessity – I need biscuits in my life. I used part salted and part unsalted butter because its what I had and because the recipe didn’t specify. I found the biscuits a little saltier than I would have liked, but I suspect that is because I used salted butter. Using salted butter, maybe I should have cut the salt down… ? But overall so delicious! I will make these again the next time I need some buttermilk biscuits.
These are mouth watering buttery flaky perfection. We made them to serve with our favorite Emeril’s barb b qued shrimp modified recipe for New Year’s Eve. The folding snd turning really makes these shine. Yum!!
Thank you for this recipe. This is the first time since I have been trying to make biscuits that came out just as you said they would. I ate three of them before I served dinner. This will be my go to recipe. Thank you again.
I make these every time I make a buttermilk chicken, they are amazing! I swear by the food processor method to cut the butter in. Hoping to keep making these in big batches and freeze them!
I made these n they were awesome, full disclosure I added freshly roasted garlic, cheese, Cajun spices. The fluffest quick biscuit recipe I’ve used so far. Thank you.
What did I do wrong? I made two separate batches – one with gluten free 1-1 flour and one with all purpose flour and they both came out flat. The all purpose flour batch rose a little bit more, but nothing like the pictures.
Great recipe Gimmesomeoven, my worst critic (my adult daughter, 35) said so, I will definitely make them again and everytime I want biscuits in the future. I did use too much buttermilk but they came out super fluffy. Thank you so much for sharing!
I used a stick of butter (8tbsp) instead of 6 tbsp. This recipe is my favorite. I have tried about 6 different recipes and I am sticking with this one for now on.
So easy. Excellent recipe. I’m lazy so I grated a stick of frozen butter into dry ingredients. Instead of rolling, iI turned out on counter and cut and folded dough several times until it held together, pressed into a thick rectangle and used dough cutter to make 9 biscuits. Minimal handling makes the most tender biscuits.
I’ve made this recipe 3x. All 3x my dough is so sticky/wet. It’s impossible to handle ‘gently’ while trying to get it off my hands, rolling pin and counter…. My 3rd batch was the most delicious. I’m measuring my ingredients exactly per recipe, chilling butter, flour and buttermilk.I’m not getting the rise but at least they’re tasty. But I’m not sure I’d call it easy. Definitely would love any input on why it’s so wet or how to work with that. Love your site and most everything I’ve made is great! Oh and kfc has NOTHING on these biscuits.
Oh my gosh I just made these exactly according to recipe! They were amazingly delicious and melted in your mouth. I also made a batch with my preferred substitutes. They still came out tremendous. I think this recipe is one that even people who are terrible in the kitchen could make.. “Fool-Proof biscuits” ! Although, my dough was significantly more wet. To the point that I couldn’t roll it out or anything so I made drop biscuits. I also don’t use baking powder. I use a mixture of baking soda and vinegar instead(1tsp baking soda with a 1/4tsp of vinegar for every tsp of baking powder) and I prefer to make “home made buttermilk” with whole cream and lemon juice. I also used lard instead of butter. I think those are preferred ingredients because making them either way, they literally didn’t even last the evening after taking them out of the oven. I was constantly seeing the kiddo and hubby sneaking them out with all different toppings (butter, honey, jam, cinnamon and sugar etc). Regardless, my family and I will be adopting this recipe for biscuits( mostly because they won’t eat any other kind)! Thanks a bunch!
My favorite biscuit recipe by far, to the point I make them from memory now instead of looking at the recipe, lol. Generally make a double batch just because we love them and they never go to waste. I’ve recommended it to everyone I know and haven’t had any complaints.
Hey, I’m Ali!
My favorite thing in life is time spent around the table. And all the better with some seriously tasty food to bring us all together. more about me »


Oh they serve biscuits in KFC? I have never been to a KFC that serves biscuits, over here in Asia, well the ones I have been to its always a bun and mash potatoes or fries. These look so nice and buttery.
I have never used cold butter in my biscuits…just the buttermilk. However, we use self rise flour instead of all the other ingredients. Our recipe has been handed down through the family for generations. Nothing beats a homemade biscuit!!
Do you use White Lily flour?
The best buttermilk biscuit. Thx for sharing.
Will this recipe work with gluten free flour? It looks yummy, but there are some celiacs in our family.
Unfortunately, I cannot say for sure since I have only tested it with all-purpose flour. If you test it with gluten-free flour (a 1-for-1 blend might work), would love to hear how it goes.
Going to try ,nothing like a good biscuit
Yummmmm. I must say that those bisquits looks so much yummier than KFC’s. But yes I will try to make some your bisquits, and I sure hope they come out looking delicious and all like yours. ?
My bisquits did not rise. Tried it twice. Kept ingredients very cold. No idea what i did wrong. Going to try again because your photo looks so flaky and delicious!
I’ve been experimenting with biscuit recipes over the last year, and this is my favorite! These were DELICIOUS and easy to make. My mother-in-law is an expert baker and incredibly picky about biscuits, and she thought these were great, too. This may be my go-to from now on.
I used salted butter (the recipe doesn’t specify), froze the butter / made sure the buttermilk was cold, and used my food processor to make the dough. A+ recipe.
Turned out great! I ran out of buttermilk so I subbed half of the liquid with heavy cream. Yum! I also felt like I rolled them too thin before placing on the baking sheet, so I took two pieces and pinched them together. When they came out of the oven, we were able to pull the two pieces apart into two halves.
They are so yummy! How do I store them and reheat them? In case I don’t eat them all today!
I just made these biscuits tonight and they were delicious! Thanks for another great recipe!
Yes! These are just like my grandma made. No higher praise than that! I followed the recipe but had no buttermilk, so I made the homemade version and it worked perfectly. I always love your recipes Ali!
Even after adding more flour, the dough was too damp and sticky to roll out. So I put it into muffin forms. The muffins turned out fine with a slightly longer baking time (add 3-4 minutes).
When my wife ate the muffins, she said: ‘They taste just like the ones at KFC.’
I hadn’t told her about the intro to this recipe and she has not eaten at KFC’s in decades (!).
I call myself a haphazard cook…some things work and sometimes it’s a disaster. I made these biscuits this morning and perfection! Thanks to your thoughtful and detailed instructions and tips! I love your recipes and website. Thank you!
Grate your chilled butter! Sift you White Lilly s/r flour. Buttery flavored Crisco in the hot skillet makes for a lovely flaky crust!
Our new go-to biscuits! Delicious! I keep butter in the freezer and then grate it into the flour mixture. I also put my buttermilk in the freezer for a little bit, which helped. The dough was pretty sticky to work with, but got better as the folding process went on and the biscuits turned out great. The recipe made 12 biscuits for me. I also really appreciate the gram measurements…using the scale makes things super easy!
We finally found our family’s go to biscuit recipe – thank you! These were delicious!
Made these biscuits this morning and served them with sausage gravy, and butter and jam. They are everything. Very appreciative of the weights included, especially for the flour. We used the food processor, and it worked beautifully. We chose to cut the biscuits into even squares rather than use a round biscuit cutter and placed them on a quarter sheet to bake. Turned out beautifully. We have found our holy grail biscuit recipe. Can’t wait to make them for my mother. She will be so impressed.
Do you think it would be ok to keep them in the refrigerator for a few hours before baking? Thinking of prepping the dough beforehand and waiting until just before eating to bake them. Thanks!
I made this recipe this morning for breakfast. These biscuits are Over The Moon! I usually chose recipes that are made by well-known websites – Bon Appetite, Cooking – New York Times, and Taste of Home. But the picture of your biscuits sold me to try your recipe. I am a Champion Baker and I know biscuits, pie dough, etc. After I poured the buttermilk over the dry ingredients and began stirring it with a spoon, the mixture began to come together “beautifully”. I could tell that the dough was going to be amazing! I got excited!
I then took the dough out of the bowl, placing it on a large cutting board, sprinkled with flour. I shaped the dough into a rectangle and rolled out the dough to 1/2 inch then folded the dough over once then once again. I then rolled the dough to 1/2 an inch and cut out circles and placed them on my baking sheet. I baked them at 450 degrees for 12 minutes. After I took them out of the oven, I basted them with melted butter. Then I cut a piece off and tasted it. It was Fantastic! And the BEST biscuit I’ve ever tasted! Thank you so much!
Serendipitous flaky biscuits by making the passes when kneading the dough. What a pleasant surprise.
Mine turned out ‘thin’ too so I may adjust by not rolling as much or doubling the recipe. I’ve made this three times already.
Oh woow. I am glad I found this recipe as I have been looking for the perfect biscuits recipe. This is such a flavorful biscuit recipe. It melts so nice in the mouth and enjoyable with your favorite tea. Very simple ingredients and instructions to follow. My guests were in love with this yummy biscuits and kept going for more until they were all done. It was that good?. The only thing was to add extra 1/4 cup flour for my preference texture as I found my mixing a bit sticky. Thanks for sharing. ?✌️?
I’ve made these a few times and they’re absolutely amazing!
These are delicious biscuits! I am not a baker by choice but by necessity – I need biscuits in my life. I used part salted and part unsalted butter because its what I had and because the recipe didn’t specify. I found the biscuits a little saltier than I would have liked, but I suspect that is because I used salted butter. Using salted butter, maybe I should have cut the salt down… ? But overall so delicious! I will make these again the next time I need some buttermilk biscuits.
Biscuits came out wonderful! I am keeping this recipe.
I have made a lot of biscuits but this recipe is finally the one!
Must be the brown sugar!
These are mouth watering buttery flaky perfection. We made them to serve with our favorite Emeril’s barb b qued shrimp modified recipe for New Year’s Eve. The folding snd turning really makes these shine. Yum!!
Thank you for this recipe. This is the first time since I have been trying to make biscuits that came out just as you said they would. I ate three of them before I served dinner. This will be my go to recipe. Thank you again.
I make these every time I make a buttermilk chicken, they are amazing! I swear by the food processor method to cut the butter in. Hoping to keep making these in big batches and freeze them!
I like to bake it’s very nice and quick I like it
I have not made biscuits in soooo long, but this recipe will put them back in the rotation! So light, fluffy, moist and yummy!! Thank you!!!
I made these n they were awesome, full disclosure I added freshly roasted garlic, cheese, Cajun spices. The fluffest quick biscuit recipe I’ve used so far. Thank you.
Good flavor, but too moist and doughy. Great tips for making flaky layers, but still too moist.
KFC biscuits aren’t very good anymore
What did I do wrong? I made two separate batches – one with gluten free 1-1 flour and one with all purpose flour and they both came out flat. The all purpose flour batch rose a little bit more, but nothing like the pictures.
Great recipe Gimmesomeoven, my worst critic (my adult daughter, 35) said so, I will definitely make them again and everytime I want biscuits in the future. I did use too much buttermilk but they came out super fluffy. Thank you so much for sharing!
I used a stick of butter (8tbsp) instead of 6 tbsp. This recipe is my favorite. I have tried about 6 different recipes and I am sticking with this one for now on.
So easy. Excellent recipe. I’m lazy so I grated a stick of frozen butter into dry ingredients. Instead of rolling, iI turned out on counter and cut and folded dough several times until it held together, pressed into a thick rectangle and used dough cutter to make 9 biscuits. Minimal handling makes the most tender biscuits.
I’ve made these a few times, they really hit the spot. Really nice split with jam and cream.
I’ve made this recipe 3x. All 3x my dough is so sticky/wet. It’s impossible to handle ‘gently’ while trying to get it off my hands, rolling pin and counter…. My 3rd batch was the most delicious. I’m measuring my ingredients exactly per recipe, chilling butter, flour and buttermilk.I’m not getting the rise but at least they’re tasty. But I’m not sure I’d call it easy. Definitely would love any input on why it’s so wet or how to work with that. Love your site and most everything I’ve made is great! Oh and kfc has NOTHING on these biscuits.
Oh my gosh I just made these exactly according to recipe! They were amazingly delicious and melted in your mouth. I also made a batch with my preferred substitutes. They still came out tremendous. I think this recipe is one that even people who are terrible in the kitchen could make.. “Fool-Proof biscuits” ! Although, my dough was significantly more wet. To the point that I couldn’t roll it out or anything so I made drop biscuits. I also don’t use baking powder. I use a mixture of baking soda and vinegar instead(1tsp baking soda with a 1/4tsp of vinegar for every tsp of baking powder) and I prefer to make “home made buttermilk” with whole cream and lemon juice. I also used lard instead of butter. I think those are preferred ingredients because making them either way, they literally didn’t even last the evening after taking them out of the oven. I was constantly seeing the kiddo and hubby sneaking them out with all different toppings (butter, honey, jam, cinnamon and sugar etc). Regardless, my family and I will be adopting this recipe for biscuits( mostly because they won’t eat any other kind)! Thanks a bunch!
-The Graehl Family
Reno, NV
Excellent! Easy to make!
Love recipe reminds of my Grandma’s Biscuits that melt in your mouth Thank you
My favorite biscuit recipe by far, to the point I make them from memory now instead of looking at the recipe, lol. Generally make a double batch just because we love them and they never go to waste. I’ve recommended it to everyone I know and haven’t had any complaints.