This post may contain affiliate links. Please read my disclosure policy.
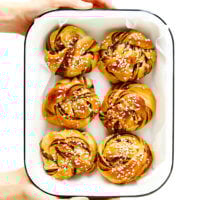
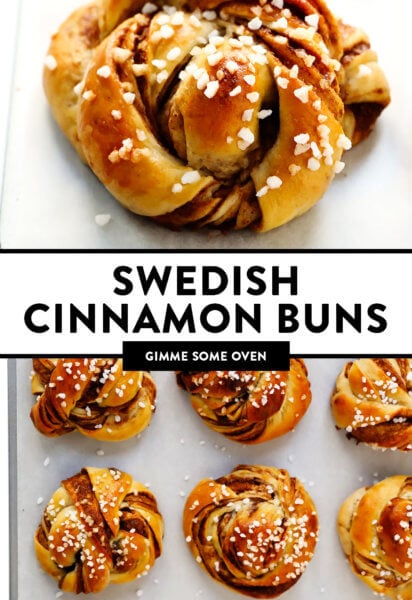
This traditional Swedish kanelbullar (cinnamon buns) recipe is made with a perfectly soft and chewy cardamom dough, a buttery cinnamon-sugar filling, and twisted into cute little knots.
A few years ago when Barclay and I visited Stockholm together for the very first time, we were introduced to one of Sweden’s most delicious national treasures that I have been craving ever since…
…Sweden’s famous cinnamon buns. ♡♡♡
Somehow, Barclay and I had lived our entire lives up until that trip without ever having tried kanelbullar (Swedish cinnamon buns) or kardemummabullar (Swedish cardamom buns). But our friend in Stockholm said that these sweet treats were an absolute must. So the very first morning that we arrived, we ordered one of each to go with our coffee. And oh my word, you guys, it was head-over-heels cinnamon bun love at first bite.
I can’t even tell you how much I love these cinnamon buns! By contrast to their American cinnamon roll cousins, Swedish cinnamon buns are typically twisted and tied into these cute little knots, as you can see above. And instead of spreading a thick layer of icing on top, these buns are sprinkled with crunchy pearl sugar. The dough in Swedish cinnamon buns is also kneaded with a hint of cardamom, which adds an irresistibly warm depth of flavor to the cinnamon in the filling. And best of all, these rolls are baked just long enough so that they stay perfectly soft and chewy, which I strongly believe is the optimum texture for any type of cinnamon roll or bun.
Anyway, Barclay and I literally could not get enough of these sweet treats during our time in Stockholm and have been craving them ever since. So when one of my good friends offered to teach us how to make them a few weeks ago (via Zoom, of course, while we’re all still staying home), we wholeheartedly said YES. Turns out — they’re easier to make than I was expecting! The twisting technique definitely takes a bit of practice at first, but it’s quick and easy once you get the hang of it. And otherwise, the process for making the dough and filling are pretty standard. They do require a few hours of prep time overall, thanks to a few long rise times, so set aside a good long morning to make a batch. But trust me, it will be one million times worth it.
Alright, I’ve been looking forward to sharing this kanelbullar recipe with you for weeks now. So let’s get to it!
To make this Swedish cinnamon buns recipe (kanelbullar), you will need the following ingredients:
Milk: I used cow’s milk for this recipe, but plain non-dairy milk (such as almond milk or oat milk) would work too.
Butter: Part of which we will add to the rolls, and part of which we will use for the filling. Please note that it’s essential that the butter be room temperature for this recipe.
Flour: I just used standard all-purpose flour.
Yeast: I used instant yeast, because it can easily be mixed in with the dry ingredients. See variation notes below if you would like to sub in active dry yeast instead.
Granulated and brown sugar: We will use granulated (white) sugar in the dough and the brown sugar in the filling.
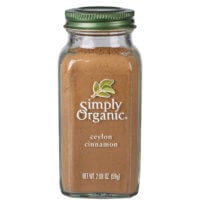
Ground cinnamon and cardamom: The cardamom here is one of the essential flavors that differentiates the taste of Swedish cinnamon buns from traditional American cinnamon rolls. And trust me — it is delicious. I just used store-bought ground cardamom this recipe. But if you would like to go the extra mile, you can make your own cardamom by emptying out the green pods and finely-grinding the seeds. (The flavor will be more potent and you will also have the classic black flecks of seeds in your buns.)
Vanilla extract: To add a bit of cozy vanilla flavor to the filling.
Fine sea salt: To bring out all of these delicious flavors.
Egg wash: An egg plus a tablespoon of water whisked together, which will help the pearled sugar to stick to the tops of the rolls.
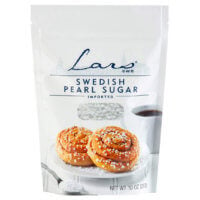
Pearl sugar: I topped my cinnamon buns with traditional Swedish pearl sugar, which is chunky and crunchy and adds some fun decor to these buns. But feel free to sprinkle on some turbinado sugar or, really, any type of sugar that you have on hand.
How To Make Cinnamon Buns:
As I mentioned above, these rolls require a few long rises before they are baked. So be sure to plan ahead, and I promise they will be worth the extra time and effort! Full instructions are included in the recipe below, but here is a brief overview of what’s ahead:
Heat the milk and butter. Heat the milk and butter together (either in the microwave or in a saucepan) until they reach 110°F, which is the optimum temperature to help your yeast activate.
Mix the dough. In a separate large mixing bowl, briefly whisk together the dry ingredients (flour, sugar, yeast, ground cardamom and salt), add the mixture, stir until combined, then turn the dough out onto a floured surface and knead for 7-10 minutes.
First dough rise. Form the dough into a ball, place it in a greased bowl, cover, and let it rise in a warm place for 1 hour (or until doubled in size).
Mix the filling. Meanwhile, stir together the filling ingredients in a separate mixing bowl until evenly combined.
Roll out the dough. Next, the fun part! Turn the dough out onto a large floured work surface and roll it into a 22 x 15-inch (55 x 38-cm) rectangle. Spread the filling mixture evenly across the dough. (I find it’s easier to dot little spoonfuls evenly across the dough, as pictured above, then spread it out evenly.) Fold the left third of the dough in towards the center, and fold the right third of the dough over that towards the center, like you’re folding a business letter. Then gently run the rolling pin over the dough to press out any big bubbles, and roll the dough out a bit more so that it forms a 15 x 8-inch (38 x 20-cm) rectangle.
Form the buns. Using a pizza cutter, pastry cutter or a knife, slice the dough into even 2 x 20-cm long strips. Take one strip and twist it several times, gently stretching it as you do so until it nearly doubles in length. Grab one end of the twisted strip and loosely wrap the dough around two fingers twice, like a bandage. Then loop the rest of the dough perpendicularly around the dough so that it forms a knot, and tuck the loose end in at the bottom. Transfer the dough to a large parchment-covered baking sheet, and repeat with the remaining dough strips. (Here is a great visual for twisting the dough, or you can watch my step-by-step tutorial on Instagram stories.)
Second dough rise. Loosely cover the dough buns with a clean kitchen towel and let them rise for 45-60 minutes.
Brush and sprinkle. Heat the oven to 375°F. Brush each bun with the egg wash, then sprinkle with a pinch of pearled sugar.
Bake. Bake for 15-18 minutes, or until the rolls reach your desired level of golden brown. Transfer to a wire baking sheet and let cool for 5 minutes. Then serve warm and enjoy!! These rolls are best enjoyed the day that they are baked, but see tips below for storage instructions if you have leftovers.
Possible Variations:
Here are a few recipe variations that you are welcome to try too:
Make them vegan: Use a plain plant-based milk (such as almond milk or oat milk) or water, in place of the cow’s milk. Then use vegan butter in the dough and filling, and brush the rolls with melted vegan butter instead of an egg wash.
Make them ahead of time: If you would like to prep the rolls the night before, just follow the recipe until the dough is twisted into knots. Place the knots in a baking sheet or in a baking dish, cover and refrigerate overnight. Then let them rest on the counter until they reach room temperature (about 60-90 minutes), then bake as directed.
Roll the buns like round cinnamon rolls: If you would like to skip the twisting, you are welcome to roll out and slice the rolls like I do in this recipe.
Use active dry yeast: If you do not have instant yeast on hand, you will just need to take some extra time to activate the yeast. Heat the milk (on its own!) to 110°F, sprinkle the yeast on top, and give it a quick whisk. Let the mixture rest for 5 minutes. Then add in your remaining dough ingredients, including either room temperature or melted butter. You will also need to increase each rise time by about 15-20 minutes, if using active dry yeast. But you can use the exact same amount of active dry yeast as instant yeast — 7 grams.
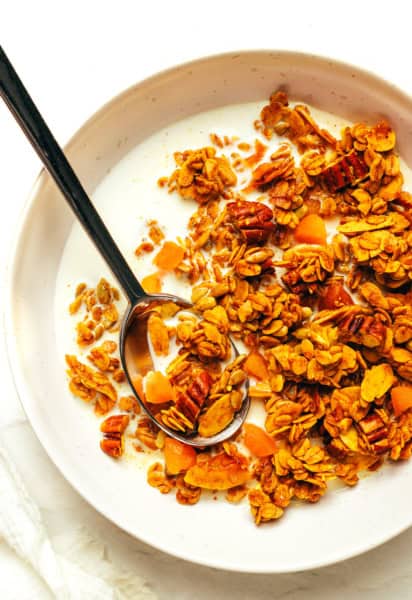
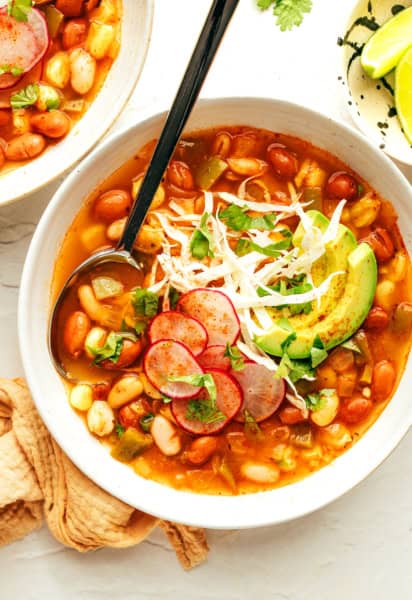
More Cinnamon Roll Recipes:
Looking for more yummy cinnamon roll recipes? Here are a few of my faves:
This traditional Swedish kanelbullar (cinnamon buns) recipe is made with a perfectly soft and chewy cardamom dough, a buttery cinnamon-sugar filling, and twisted into cute little knots.
Heat the milk and butter. Combine the milk and 1/4 cup butter in a small saucepan*. Heat over medium-low heat, stirring frequently to melt the butter, until the mixture reaches 110°F. (I recommend measuring the temperature with a cooking thermometer, but if you don’t have one, the mixture should be warm but not hot to the touch. If the mixture gets too hot, just wait a few minutes for it to cool.)
Mix the dough. (See optional stand mixer instructions below.) In a separate large mixing bowl, briefly whisk together the flour, sugar, yeast, ground cardamom and salt until combined. Add the warm milk mixture and stir until the dough begins to form. Turn the dough out onto a floured surface and knead for 7-10 minutes, or until the dough is smooth and soft.
First dough rise. Form the dough into a ball, place it in a greased bowl and cover with a damp towel or plastic wrap. Let the dough rise in a warm space for 1 hour, or until it has doubled in size.
Mix the filling. Meanwhile, stir together the filling ingredients in a separate mixing bowl until evenly combined.
Roll out the dough. Once the dough is ready to go, turn it out onto a large floured work surface. Use a rolling pin to roll the dough into a 22 x 15-inch (55 x 38-cm) rectangle. Carefully and evenly spread the filling mixture across the entire surface of the dough. Then (as pictured above) fold the left third of the dough in towards the center, and fold the right third of the dough over that towards the center, like you’re folding a business letter. Gently run the rolling pin over the dough to press out any big bubbles. Then roll the dough out a bit more so that it forms a 15 x 8-inch (38 x 20-cm) rectangle.
Form the buns. Using a pizza cutter, pastry cutter or a knife, slice the dough into even 2 x 20-cm long strips. Take one strip and twist it several times, gently stretching it as you do so until it nearly doubles in length. Grab one end of the twisted strip and loosely wrap the dough around two fingers twice, like a bandage. Then loop the rest of the dough perpendicularly around the dough so that it forms a knot, and tuck the loose end in at the bottom. Transfer the dough to a large parchment-covered baking sheet, and repeat with the remaining dough strips. (Here is a great visual for twisting the dough, or you can watch my step-by-step Instagram tutorial here.)
Second dough rise. Loosely cover the dough buns with a clean kitchen towel and let them rise for 45-60 minutes.
Brush and sprinkle. Heat the oven to 375°F. Brush each bun with the egg wash, then sprinkle with a pinch of pearled sugar.
Bake. Bake for 15-18 minutes, or until the rolls reach your desired level of golden brown. (I like mine just very lightly golden, so that they stay super soft.) Transfer to a wire baking sheet and let cool for 5 minutes. Then serve warm and enjoy!! These rolls are best enjoyed the day that they are baked, but see tips below for storage instructions if you have leftovers.
Microwave option: Alternately, you can combine the milk and butter in a microwave-safe bowl or measuring cup. Then microwave the mixture for 1 minute, pausing to give it a good stir to help melt the butter, and then continue heating in 15-second intervals, until the mixture reaches 110°F.
Stand mixer option: If you own a stand mixer, you can mix the dough using the dough attachment on low speed for 8 minutes, or until the dough is smooth and soft. If you find that the dough is sticking to the sides of the bowl, just sprinkle in a bit of extra flour.
Make-ahead option: If you would like to prep the rolls the night before, just follow the recipe until the dough is twisted into knots. Place the knots in a baking sheet or in a baking dish, cover and refrigerate overnight. Then let them rest on the counter for until they reach room temperature (about 60-90 minutes), then bake as directed.
Storage instructions: These rolls are best enjoyed the same day that they are baked. But any leftovers can be stored in a sealed container for up to 3 days, or frozen for up to 3 months.
I am SO excited to try these. Your Instagram story on making these looked like way too much fun to pass up. I only recently discovered the magic that is cardamom, and really looking forward to trying it in cinnamon buns!
If I wanted to make part of this recipe the night before, is there a good spot to stop in the evening and then pick up the next morning? These look like a really yummy morning treat, but I don’t know if I have that much time in the morning.
Sidenote, we have a Finnish bakery near our house, and I love their pulla rolls. It will be fun to try these Swedish ones.
Ooh thank you, I forgot to include make-ahead instructions in the post. But yes, once you twist the dough into the knots, you can place them on a baking sheet, cover and let them rise in the refrigerator overnight. Then let them rest on the counter for 30-45 minutes, until they more or less reach room temperature. Then bake as directed. :)
Hi Ali, thanks for posting these! They were the perfect project for today, and they turned out so delicious. This was my first time using cardamom and I’m glad I tried it!
Just a quick shout out, I’ve been following your blog for years and I love having this corner of the internet where I can count on inspiration and recipes that I already know I will love because our tastes are so similar and you do such a good job with them. I don’t eat dairy and you don’t use a ton of it, or most recipes are easily adaptable. I love that most of your stuff fits right into that 30 minute timeframe that I need for dinner. Thanks so much for all the great food!
AmyJ —
Oh, I used avocado oil in the dough and vegan butter in the filling. Worked great!
I made these last night using the make ahead method. I loved the balance of spice and sweetness & the mystery of how best to pull apart while eating! I sprinkled with raw sugar & my four kiddos gobbled them up. I grew up with a swedish bread for Christmas and knew these pastries would become my new fav, & they are! Thank you for the great tutorial.
Assembled last night and made this morning. They are so scrumptious and remind me so much of the pastries I had in Visby, Sweden! Can’t recommend these enough :)
I just made these today and oh my goodness, it was so delicious! Everyone in my family loved it! Your video on Insta story was so helpful. I’m pretty sure we could’ve eaten all the buns in one sitting but had to save some for tomorrow. Can’t wait to dig into them again!
I recently discovered Ali from a friend’s Instagram post and the two recipes I’ve tried so far have been fabulous!
Lena —
Just made them…and they are delicious!
I love cooking but somehow always mess up baking, luckily not this time ?
They turned out perfect and cheered up a particularly cold and rainy day!
I found your recipe yesterday tried to make it this morning. It tastes super yummy. I was so sure that this cinnammon bun tastes delicious, so I doubled the recipe. My twisting is not like yours, but the taste is lecker. Hopefully the next baking, the twisting will be good.
I showed a friend what I baked, and she wants to bake too, using your recipe.
Thank you very much.
These were the best Swedish cinnamon buns I’ve made, and I’ve tried a few recipes. The dough comes out so light and fluffy and easy to roll, and the taste is just amazing! And during this time at home, kneading is a great way to let out some pent up aggression, lol. We will be making these many, many more times! Thanks for such a wonderful recipe, and Instagram tutorial!
What did I do wrong if my dough just rips when I try to gently twist and stretch it? It was impossible to nearly double the length. :/
I’m baking them tomorrow, I hope flavourwise they’ll be ok.
Quick question, I just finished twisting and there on the second dough rise. When I was twisting, a couple of them tore apart, I wasn’t pulling or twisting very hard but the dough seemed a bit on the dry side? Any suggestions for the next time I make?
These were delicious and fun to make! It’s hard to find pastry recipes that don’t have too much sugar, but these were perfect in flavor and texture. Thank you!
I finally tried making these and followed the recipe exactly, and they are INCREDIBLE! My family is obsessed. And they were so fun to make. Can’t wait for the next batch!
Hi!
I just tried making this recipe today and I had an issue with the dough not being stretchy enough during the twisting step. Do you think the dough wasn’t kneaded long enough? Or maybe kneaded too much? Either way I gave up on the twisting after two of them didn’t work out and did it the old school way. Not as pretty but still super delish ☺️
Nina —
I had the same problem. The strips did not seem long enough to make the turns and final tuck under. Another problem I had was that the filling oozed out and made twisting more difficult and messier. Otherwise the taste was great. Can anyone help suggest what to do? Thank you for the recipe.
Kim —
Lynn and Nana – I had the same thing happen. I believe the tearing is from the dough being too thin when it was rolled out. I’m not sure why the butter and cinnamon melted out. I was wondering the same thing. Does anyone know the reason?
Thanks so much for this recipe, it’s insanely good! I just made them last night and these buns are incredible, my whole family went crazy for them.
Also, your Insta video on shaping the buns was very helpful.
Can’t wait to make these again!
I just tried your focaccia recipe which was incredible!! I am about to try this recipe and noticed other recipes call for an egg in the dough – would you kindly explain what it would do to the dough?
We’re on our second batch of these, still perfecting the twist but so tasty. I cooked the first batch for recommended time but were a bit dark and crsipy. I found my fan oven even if down to 170 only needed 10 minutes.
WOW this looks so yum. Seems super easy to make too, but doesn’t look like it! Which means it’s the perfect gift for the friends I so badly wanna come visit during this time :-)
They were too dark, almost burned after 17 min in the oven. The second batch (14 min in the oven) was way better. Otherwise, they tasted great! Thanks for the detailed recipe.
Several things wrong with this recipe:
1) The instant yeast did not rise nearly enough like the recipe says it should have
2) I had to use substantially less flour because I used the listed amount during my first attempt at this recipe, and the dough completely crumbled.
3) The baking temperature is either too low, or the baking time is too short, because baking these at the prescribed temp/time resulted in raw rolls.
For those seeking to make Swedish cinnamon rolls, I recommend using the recipe on the back of Lars pearled sugar bags – at least it is professionally put together.
If I could give this recipe zero stars, I would. For now, I’ll settle for one.
Kari —
AGREED! Worst recipe ever! I followed it to the letter The dough is so dry and not stretchy at all.
A great variation on the toppings i learned from ”Fredriks Fika” is to skip the egg wash to “glue” the pearl sugar and instead make a simple syrup (50:50). As soon as the buns come out of the oven you brush (a similar amount to the egg wash) the buns with the simple syrup and then sprinkle the pearl sugar on them. Allow to cool.
I made these today and the house smelled amazing! They were absolutely delicious, but I did feel they were a tad bit too dry and as I was twisting, the dough ripped quite easily. Any idea on what happened and how to fix it for next time? Thank you so much!
I have similar issues as others, where the dough does not get stretchy/soft enough. Is there sufficient liquid/butter in the recipe? Any advice would be helpful. Thanks
Wow, they turned out sooooo good!!!!! I am not very experienced with yeast pastry, but this dough was great to work with, so easy. Thank you very much!!!
These are SO amazing. Not too sweet and all the warm, cozy flavors. I love cooking but tend to stay away from baking- however as always, Ali has clear and helpful instructions that are easy to follow! I love that you always include variations, substitutes, etc. I’ve already made these twice and they turned out great both times!
i just made it tonight here in Sweden… first time.. and I loved the outcome,very soft and fluffy… nom nom.. my husband ate 3 right away,and i have 2. thanks for sharing this recipe.
Hello there! I have made these twice at this point and I wanted to ask, how do I avoid the bread part tasting too dry? Each time it was delicious but it was a tad dry. Open to any advice!
I’ve made this recipe twice, and I’m loving it! The second time around I made only about 2/3rd of the filling though, it was a little too sugary to my taste and using 2/3rd of the filling made it less messy and, in my opinion, closer to the buns I’ve had in Scandinavia.
Thank you!! Reminds me of my visit to Stockholm! Cafe Vete Katten was my favorite!! I LOVED this recipe, but quickly realized I’m not exactly great at rolling out the dough evenly. I’m still using the training wheels dough rails. Can you tell me what thickness to roll the dough out to? I see the dimensions, but my dough was uneven and created a thinner side & caused my rolls to expand and tear during the second rise. Help?
Hi,
We’ve made this twice and both times the dough was very dry. This time we kneaded and kneaded and added more milk but couldn’t get light and fluffy. In the end it tasted delicious but dense. What could be causing this?
Made these this afternoon with my daughter, we had similar rolls in Denmark and though these looked really good. I am go glad that we tried them — they are delicious! The cardamom definitely adds an entire layer to the typical cinnamon bun flavor. I ordered pearl sugar from Amazon and made these as soon as it arrived today – highly recommend using Swedish style pearl sugar, it is smaller than the Belgian style.
Thanks so much for posting this recipe, it is a keeper!
Mike —
One other thing I would like to mention — I think that some of the folks having problems with dry dough might be due to using the cup measurements rather than using the gram weights ( just a guess ). I have found that baking by weight using a good scale works much more reliably than baking using the traditional cup measurements. The cup measurement can so easily be thrown off by how dense your flour is, how tight you pack the brown sugar etc. ) With the weight measurements — 300 grams is always 300 grams, much more consistent as long as you have a good scale you can trust.
O.M.G.! I have a Finnish neighbor and a Swedish dentist, and so I have learned to LOVE anything with cardamom with or without cinnamon. I have made this recipe three times in the past week and a half, hoping to have some to save. No such luck! My wife and kids actually sit around and wait for these to come out of the oven. My first batch and attempt to make “knots” was a failure, but no one complained. On my second attempt, I kind of stretched the strips, and the knots were successful. The first batch, I was out of bread flour and used a.p. flour, but on my next batches I had a new supply of bread flour. Big difference. Suggestion: Don’t be afraid to make these! Even your “failures” will taste delicious!☘️
Made these cardamom knots today – they are absolutely amazing!
Followed the recipe to the letter. The buns were quite easy to make though it took a while.
Might double the amount of cardamom next time – but will be definitely baking them again (and again).
Thank you so much for sharing!
Keira —
These were spectacular. Entire family loved them. I used the gram measurements instead of the cup measurements, instant yeast as described in the recipe and 8 minutes of kneading on setting ‘4’ of my Kitchenaid. I did adjust by adding a bit (about a tablespoon) of flour because it stuck to the sides of the bowl; funny how other people describe that the recipe is wrong and has too much flour.
Twisting the strips had the filling oozing out a bit and therefore made it messy, but I thought it gave the buns a nice effect. A little more oozed out during baking but nothing to be concerned about. Second rise was a bit longer for me (probably because we took the shaped but unbaked buns with us in a cold car) but we gave it the time it needed to become 1,5-2x the size. Baked them for 16 minutes in an 356F oven due to a conversion error, but they still came out nice and browned. And like I said: they were heavenly.
For the people struggling (or reading those comments beforehand and worrying): every type of flour, every dough rise and every oven is different, so don’t be afraid to adjust as needed! Add flour or milk by the teaspoon until the dough has the right consistency, let them rise a bit longer if they have not quite doubled in size (especially if the environment is cold), adjust oven time or temperature if they look undone or on their way to burning to you: it’s part of the deal when working with dough. I believe this recipe is definitely worth it.
I moved to Sweden a month ago and fell in LOVE with kannelbullar. This recipe was great! Next time I make them, I’m going to add a little more than a pinch of sugar on top because they need that extra bit of sweetness. I will be sharing these with my neighbours as a Valentine’s day treat :)
Hi! I made these today and they turned out AMAZING!! My only question is how can I prevent the dough from being too dry?? When I went to twist them into their cute lil buns, they almost started to rip a bit and I am thinking I might’ve added too much flour to roll them out?? Thank you so much!! (I have eaten four already)
Followed the recipe as is and it turned out perfectly! I found the dough easy to work with and not dry at all. (If it is too dry, try adding a tsp of water until it’s the right consistency). My family and I loved that they weren’t too sweet as well. I’ll definitely be making these again and again!
Your notes indicate that the dough can be made the night before and stored in the fridge overnight. Would it be possible to store the dough in the freezer if I want to make all the dough at once but then bake individual knots over a period of several days? If so, do I then defrost in the fridge the night before baking?
Thanks,
Marisol
Thank you for the recipe. These are just delectable. I’ve made them a few times already. Perfect with a cup of coffee and I just love how the cardamom sings through. It always feels like an achievement when these come out of the oven as I’m pretty new to baking!
I can be a hit-or-miss baker due to amateur mistakes and my unpredictable apartment oven. But, these were foolproof and delicious. I followed the recipe exactly. Ali’s Instagram story really helped explain the process. The dough rolled out beautifully so I can’t understand why other reviewers have had problems, but here are my notes:
1. I used a stand mixer with the dough hook attachment and mixed on low for the 8 minutes instructed, hardly adding any flour to make sure the dough didn’t stick to the bowl.
2. I worked too slowly after rolling, and the dough had started to rise before I had a chance to stretch and twist the strips. I didn’t get long enough strips, and the knots came apart in the oven a bit. They still tasted and looked great so it wasn’t a failure but I’ll work faster next time. Must perfect the knot.
3. I used measuring cups and spoons for all the ingredients except the butter. For that, I weighed the grams out because slicing butter based on the TBSP measuring lines is so imprecise.
4. The cardamom flavor is very forward. May reduce per husband’s taste, but that’s a personal preference. I loved it.
5. These baked longer than instructed in my oven. This could be due to the thickness of the strips that I sliced, or just because my oven temp fluctuates.
6. I think these would be delicious with a little orange zest in the filling, in which case I would reduce the cardamom a bit. Will try next time.
7. I didn’t have time to order pearl sugar, so I crushed sugar cubes to make chunky sugar, and it was a good second.
 recipe is made with a perfectly soft and chewy cardamom dough, a buttery cinnamon-sugar filling, and twisted into cute little knots. Top these rolls with crunchy sweet pearl sugar or any type of sugar that you have on hand! | gimmesomeoven.com #swedish #cinnamon #buns #rolls #breakfast #brunch #sweet #vegetarian #vegan")
 recipe is made with a perfectly soft and chewy cardamom dough, a buttery cinnamon-sugar filling, and twisted into cute little knots. Top these rolls with crunchy sweet pearl sugar or any type of sugar that you have on hand! | gimmesomeoven.com #swedish #cinnamon #buns #rolls #breakfast #brunch #sweet #vegetarian #vegan")
 recipe is made with a perfectly soft and chewy cardamom dough, a buttery cinnamon-sugar filling, and twisted into cute little knots. Top these rolls with crunchy sweet pearl sugar or any type of sugar that you have on hand! | gimmesomeoven.com #swedish #cinnamon #buns #rolls #breakfast #brunch #sweet #vegetarian #vegan")
 recipe is made with a perfectly soft and chewy cardamom dough, a buttery cinnamon-sugar filling, and twisted into cute little knots. Top these rolls with crunchy sweet pearl sugar or any type of sugar that you have on hand! | gimmesomeoven.com #swedish #cinnamon #buns #rolls #breakfast #brunch #sweet #vegetarian #vegan")
 recipe is made with a perfectly soft and chewy cardamom dough, a buttery cinnamon-sugar filling, and twisted into cute little knots. Top these rolls with crunchy sweet pearl sugar or any type of sugar that you have on hand! | gimmesomeoven.com #swedish #cinnamon #buns #rolls #breakfast #brunch #sweet #vegetarian #vegan")
 recipe is made with a perfectly soft and chewy cardamom dough, a buttery cinnamon-sugar filling, and twisted into cute little knots. Top these rolls with crunchy sweet pearl sugar or any type of sugar that you have on hand! | gimmesomeoven.com #swedish #cinnamon #buns #rolls #breakfast #brunch #sweet #vegetarian #vegan")
 recipe is made with a perfectly soft and chewy cardamom dough, a buttery cinnamon-sugar filling, and twisted into cute little knots. Top these rolls with crunchy sweet pearl sugar or any type of sugar that you have on hand! | gimmesomeoven.com #swedish #cinnamon #buns #rolls #breakfast #brunch #sweet #vegetarian #vegan")
 recipe is made with a perfectly soft and chewy cardamom dough, a buttery cinnamon-sugar filling, and twisted into cute little knots. Top these rolls with crunchy sweet pearl sugar or any type of sugar that you have on hand! | gimmesomeoven.com #swedish #cinnamon #buns #rolls #breakfast #brunch #sweet #vegetarian #vegan")
 recipe is made with a perfectly soft and chewy cardamom dough, a buttery cinnamon-sugar filling, and twisted into cute little knots. Top these rolls with crunchy sweet pearl sugar or any type of sugar that you have on hand! | gimmesomeoven.com #swedish #cinnamon #buns #rolls #breakfast #brunch #sweet #vegetarian #vegan")
 recipe is made with a perfectly soft and chewy cardamom dough, a buttery cinnamon-sugar filling, and twisted into cute little knots. Top these rolls with crunchy sweet pearl sugar or any type of sugar that you have on hand! | gimmesomeoven.com #swedish #cinnamon #buns #rolls #breakfast #brunch #sweet #vegetarian #vegan")


I am SO excited to try these. Your Instagram story on making these looked like way too much fun to pass up. I only recently discovered the magic that is cardamom, and really looking forward to trying it in cinnamon buns!
If I wanted to make part of this recipe the night before, is there a good spot to stop in the evening and then pick up the next morning? These look like a really yummy morning treat, but I don’t know if I have that much time in the morning.
Sidenote, we have a Finnish bakery near our house, and I love their pulla rolls. It will be fun to try these Swedish ones.
Ooh thank you, I forgot to include make-ahead instructions in the post. But yes, once you twist the dough into the knots, you can place them on a baking sheet, cover and let them rise in the refrigerator overnight. Then let them rest on the counter for 30-45 minutes, until they more or less reach room temperature. Then bake as directed. :)
Thanks!
Will you post a recipe for kardemummabullar? We are huge cardamom fans ?
I would also like the recipe for kardemummbullar…..
Hi Ali, thanks for posting these! They were the perfect project for today, and they turned out so delicious. This was my first time using cardamom and I’m glad I tried it!
Just a quick shout out, I’ve been following your blog for years and I love having this corner of the internet where I can count on inspiration and recipes that I already know I will love because our tastes are so similar and you do such a good job with them. I don’t eat dairy and you don’t use a ton of it, or most recipes are easily adaptable. I love that most of your stuff fits right into that 30 minute timeframe that I need for dinner. Thanks so much for all the great food!
Oh, I used avocado oil in the dough and vegan butter in the filling. Worked great!
I made these last night using the make ahead method. I loved the balance of spice and sweetness & the mystery of how best to pull apart while eating! I sprinkled with raw sugar & my four kiddos gobbled them up. I grew up with a swedish bread for Christmas and knew these pastries would become my new fav, & they are! Thank you for the great tutorial.
Assembled last night and made this morning. They are so scrumptious and remind me so much of the pastries I had in Visby, Sweden! Can’t recommend these enough :)
I just made these today and oh my goodness, it was so delicious! Everyone in my family loved it! Your video on Insta story was so helpful. I’m pretty sure we could’ve eaten all the buns in one sitting but had to save some for tomorrow. Can’t wait to dig into them again!
I recently discovered Ali from a friend’s Instagram post and the two recipes I’ve tried so far have been fabulous!
Just made them…and they are delicious!
I love cooking but somehow always mess up baking, luckily not this time ?
They turned out perfect and cheered up a particularly cold and rainy day!
I just made these! Delicious and so much fun to make!
I found your recipe yesterday tried to make it this morning. It tastes super yummy. I was so sure that this cinnammon bun tastes delicious, so I doubled the recipe. My twisting is not like yours, but the taste is lecker. Hopefully the next baking, the twisting will be good.
I showed a friend what I baked, and she wants to bake too, using your recipe.
Thank you very much.
These were the best Swedish cinnamon buns I’ve made, and I’ve tried a few recipes. The dough comes out so light and fluffy and easy to roll, and the taste is just amazing! And during this time at home, kneading is a great way to let out some pent up aggression, lol. We will be making these many, many more times! Thanks for such a wonderful recipe, and Instagram tutorial!
What did I do wrong if my dough just rips when I try to gently twist and stretch it? It was impossible to nearly double the length. :/
I’m baking them tomorrow, I hope flavourwise they’ll be ok.
Quick question, I just finished twisting and there on the second dough rise. When I was twisting, a couple of them tore apart, I wasn’t pulling or twisting very hard but the dough seemed a bit on the dry side? Any suggestions for the next time I make?
These were delicious and fun to make! It’s hard to find pastry recipes that don’t have too much sugar, but these were perfect in flavor and texture. Thank you!
I finally tried making these and followed the recipe exactly, and they are INCREDIBLE! My family is obsessed. And they were so fun to make. Can’t wait for the next batch!
Hi!
I just tried making this recipe today and I had an issue with the dough not being stretchy enough during the twisting step. Do you think the dough wasn’t kneaded long enough? Or maybe kneaded too much? Either way I gave up on the twisting after two of them didn’t work out and did it the old school way. Not as pretty but still super delish ☺️
I had the same problem. The strips did not seem long enough to make the turns and final tuck under. Another problem I had was that the filling oozed out and made twisting more difficult and messier. Otherwise the taste was great. Can anyone help suggest what to do? Thank you for the recipe.
Lynn and Nana – I had the same thing happen. I believe the tearing is from the dough being too thin when it was rolled out. I’m not sure why the butter and cinnamon melted out. I was wondering the same thing. Does anyone know the reason?
Thanks so much for this recipe, it’s insanely good! I just made them last night and these buns are incredible, my whole family went crazy for them.
Also, your Insta video on shaping the buns was very helpful.
Can’t wait to make these again!
I just tried your focaccia recipe which was incredible!! I am about to try this recipe and noticed other recipes call for an egg in the dough – would you kindly explain what it would do to the dough?
We’re on our second batch of these, still perfecting the twist but so tasty. I cooked the first batch for recommended time but were a bit dark and crsipy. I found my fan oven even if down to 170 only needed 10 minutes.
WOW this looks so yum. Seems super easy to make too, but doesn’t look like it! Which means it’s the perfect gift for the friends I so badly wanna come visit during this time :-)
They were too dark, almost burned after 17 min in the oven. The second batch (14 min in the oven) was way better. Otherwise, they tasted great! Thanks for the detailed recipe.
Several things wrong with this recipe:
1) The instant yeast did not rise nearly enough like the recipe says it should have
2) I had to use substantially less flour because I used the listed amount during my first attempt at this recipe, and the dough completely crumbled.
3) The baking temperature is either too low, or the baking time is too short, because baking these at the prescribed temp/time resulted in raw rolls.
For those seeking to make Swedish cinnamon rolls, I recommend using the recipe on the back of Lars pearled sugar bags – at least it is professionally put together.
If I could give this recipe zero stars, I would. For now, I’ll settle for one.
AGREED! Worst recipe ever! I followed it to the letter The dough is so dry and not stretchy at all.
A great variation on the toppings i learned from ”Fredriks Fika” is to skip the egg wash to “glue” the pearl sugar and instead make a simple syrup (50:50). As soon as the buns come out of the oven you brush (a similar amount to the egg wash) the buns with the simple syrup and then sprinkle the pearl sugar on them. Allow to cool.
This recipe was so easy to follow (such helpful pictures!!) and was a blast to make. These turned out absolutely delicious! Thanks for sharing, Ali!
Had to add way more flour than called for but it ended up being amazing!!! Definitely going to make it again!
I made these today and the house smelled amazing! They were absolutely delicious, but I did feel they were a tad bit too dry and as I was twisting, the dough ripped quite easily. Any idea on what happened and how to fix it for next time? Thank you so much!
I live in Sweden for a semester back in 2013 and really missed these – your recipe is so nice, thank you!!
These are so fun and SO good!
I have similar issues as others, where the dough does not get stretchy/soft enough. Is there sufficient liquid/butter in the recipe? Any advice would be helpful. Thanks
Delicious flavor, fun to make, beautiful shapes! Definitely a keeper. Who does not love cardamom and cinnamon?
I am Swedish, and misses home SO much! These buns hit the spot today. Thank you :)
Wow, they turned out sooooo good!!!!! I am not very experienced with yeast pastry, but this dough was great to work with, so easy. Thank you very much!!!
These are a weekend favourite in our house! Fool proof recipe that works out delicious every single time.
Thanks a mil for sharing this recjoe!
These are SO amazing. Not too sweet and all the warm, cozy flavors. I love cooking but tend to stay away from baking- however as always, Ali has clear and helpful instructions that are easy to follow! I love that you always include variations, substitutes, etc. I’ve already made these twice and they turned out great both times!
i just made it tonight here in Sweden… first time.. and I loved the outcome,very soft and fluffy… nom nom.. my husband ate 3 right away,and i have 2. thanks for sharing this recipe.
Hello there! I have made these twice at this point and I wanted to ask, how do I avoid the bread part tasting too dry? Each time it was delicious but it was a tad dry. Open to any advice!
I’ve made this recipe twice, and I’m loving it! The second time around I made only about 2/3rd of the filling though, it was a little too sugary to my taste and using 2/3rd of the filling made it less messy and, in my opinion, closer to the buns I’ve had in Scandinavia.
Thanks for writing up this recipe, it is amazing!
La hice. Es excelente.
Thank you!! Reminds me of my visit to Stockholm! Cafe Vete Katten was my favorite!! I LOVED this recipe, but quickly realized I’m not exactly great at rolling out the dough evenly. I’m still using the training wheels dough rails. Can you tell me what thickness to roll the dough out to? I see the dimensions, but my dough was uneven and created a thinner side & caused my rolls to expand and tear during the second rise. Help?
Hi,
We’ve made this twice and both times the dough was very dry. This time we kneaded and kneaded and added more milk but couldn’t get light and fluffy. In the end it tasted delicious but dense. What could be causing this?
Made these this afternoon with my daughter, we had similar rolls in Denmark and though these looked really good. I am go glad that we tried them — they are delicious! The cardamom definitely adds an entire layer to the typical cinnamon bun flavor. I ordered pearl sugar from Amazon and made these as soon as it arrived today – highly recommend using Swedish style pearl sugar, it is smaller than the Belgian style.
Thanks so much for posting this recipe, it is a keeper!
One other thing I would like to mention — I think that some of the folks having problems with dry dough might be due to using the cup measurements rather than using the gram weights ( just a guess ). I have found that baking by weight using a good scale works much more reliably than baking using the traditional cup measurements. The cup measurement can so easily be thrown off by how dense your flour is, how tight you pack the brown sugar etc. ) With the weight measurements — 300 grams is always 300 grams, much more consistent as long as you have a good scale you can trust.
O.M.G.! I have a Finnish neighbor and a Swedish dentist, and so I have learned to LOVE anything with cardamom with or without cinnamon. I have made this recipe three times in the past week and a half, hoping to have some to save. No such luck! My wife and kids actually sit around and wait for these to come out of the oven. My first batch and attempt to make “knots” was a failure, but no one complained. On my second attempt, I kind of stretched the strips, and the knots were successful. The first batch, I was out of bread flour and used a.p. flour, but on my next batches I had a new supply of bread flour. Big difference. Suggestion: Don’t be afraid to make these! Even your “failures” will taste delicious!☘️
These cinnamon buns are amazing and everything I ever wanted in life. Love how they’re not too sweet. Thank you Ali!
These were so good. Much better than regular cinnamon rolls. Thanks a lot for this recipe.
Made these cardamom knots today – they are absolutely amazing!
Followed the recipe to the letter. The buns were quite easy to make though it took a while.
Might double the amount of cardamom next time – but will be definitely baking them again (and again).
Thank you so much for sharing!
These were spectacular. Entire family loved them. I used the gram measurements instead of the cup measurements, instant yeast as described in the recipe and 8 minutes of kneading on setting ‘4’ of my Kitchenaid. I did adjust by adding a bit (about a tablespoon) of flour because it stuck to the sides of the bowl; funny how other people describe that the recipe is wrong and has too much flour.
Twisting the strips had the filling oozing out a bit and therefore made it messy, but I thought it gave the buns a nice effect. A little more oozed out during baking but nothing to be concerned about. Second rise was a bit longer for me (probably because we took the shaped but unbaked buns with us in a cold car) but we gave it the time it needed to become 1,5-2x the size. Baked them for 16 minutes in an 356F oven due to a conversion error, but they still came out nice and browned. And like I said: they were heavenly.
For the people struggling (or reading those comments beforehand and worrying): every type of flour, every dough rise and every oven is different, so don’t be afraid to adjust as needed! Add flour or milk by the teaspoon until the dough has the right consistency, let them rise a bit longer if they have not quite doubled in size (especially if the environment is cold), adjust oven time or temperature if they look undone or on their way to burning to you: it’s part of the deal when working with dough. I believe this recipe is definitely worth it.
I moved to Sweden a month ago and fell in LOVE with kannelbullar. This recipe was great! Next time I make them, I’m going to add a little more than a pinch of sugar on top because they need that extra bit of sweetness. I will be sharing these with my neighbours as a Valentine’s day treat :)
Hi! I made these today and they turned out AMAZING!! My only question is how can I prevent the dough from being too dry?? When I went to twist them into their cute lil buns, they almost started to rip a bit and I am thinking I might’ve added too much flour to roll them out?? Thank you so much!! (I have eaten four already)
Followed the recipe as is and it turned out perfectly! I found the dough easy to work with and not dry at all. (If it is too dry, try adding a tsp of water until it’s the right consistency). My family and I loved that they weren’t too sweet as well. I’ll definitely be making these again and again!
Your notes indicate that the dough can be made the night before and stored in the fridge overnight. Would it be possible to store the dough in the freezer if I want to make all the dough at once but then bake individual knots over a period of several days? If so, do I then defrost in the fridge the night before baking?
Thanks,
Marisol
Thank you for the recipe. These are just delectable. I’ve made them a few times already. Perfect with a cup of coffee and I just love how the cardamom sings through. It always feels like an achievement when these come out of the oven as I’m pretty new to baking!
I can be a hit-or-miss baker due to amateur mistakes and my unpredictable apartment oven. But, these were foolproof and delicious. I followed the recipe exactly. Ali’s Instagram story really helped explain the process. The dough rolled out beautifully so I can’t understand why other reviewers have had problems, but here are my notes:
1. I used a stand mixer with the dough hook attachment and mixed on low for the 8 minutes instructed, hardly adding any flour to make sure the dough didn’t stick to the bowl.
2. I worked too slowly after rolling, and the dough had started to rise before I had a chance to stretch and twist the strips. I didn’t get long enough strips, and the knots came apart in the oven a bit. They still tasted and looked great so it wasn’t a failure but I’ll work faster next time. Must perfect the knot.
3. I used measuring cups and spoons for all the ingredients except the butter. For that, I weighed the grams out because slicing butter based on the TBSP measuring lines is so imprecise.
4. The cardamom flavor is very forward. May reduce per husband’s taste, but that’s a personal preference. I loved it.
5. These baked longer than instructed in my oven. This could be due to the thickness of the strips that I sliced, or just because my oven temp fluctuates.
6. I think these would be delicious with a little orange zest in the filling, in which case I would reduce the cardamom a bit. Will try next time.
7. I didn’t have time to order pearl sugar, so I crushed sugar cubes to make chunky sugar, and it was a good second.