This post may contain affiliate links. Please read my disclosure policy.
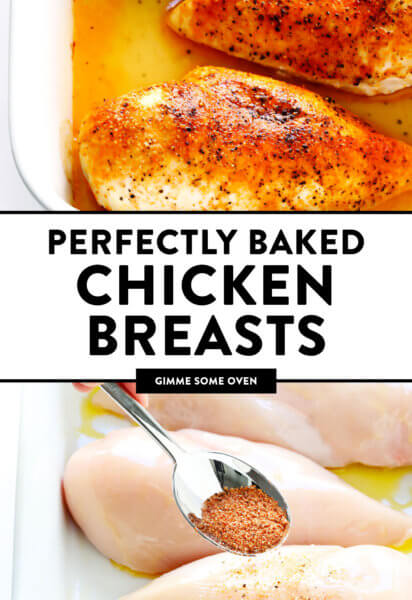
My favorite oven baked chicken breasts recipe! It never fails me, thanks to this simple 5-step method that is easy to make and customize with your favorite seasonings.
A few weeks ago on Insta, I asked if you all might be interested in a back-to-basics series about the best ways to bake proteins (i.e. chicken, pork, steak, seafood, tofu, etc.) in the oven. Your answer? A resounding yes, please. Many of you had requests and questions about methods for cooking various proteins, plus more than a few tales to tell about proteins gone not-so-right over the years. And oh boy, I hear ya. My little kitchen has seen more than its share of overcooked steaks, completely dried out pork chops, salmon skin glued to pans, and not-so-crispy tofu over the years too. Which are never fun, especially since proteins can be pricey and intended for special occasions. But hey, it’s all part of the adventure of learning how to cook. And eventually, I’ve trial-and-errored my way to some basic methods for baking proteins that have become super-reliable, super-delicious staples in my kitchen.
So over the next two weeks, I thought we could work our way through each of them, beginning today with the #1 most requested protein here on Gimme Some Oven…
…chicken.
Specifically, boneless skinless chicken breasts.
Over the years, I’ve received countless requests for new chicken breast recipes, and many more for tips on how to bake chicken breasts in the oven. Because anyone who worked with chicken breasts before know that they can be incredibly versatile, yet also incredibly finicky to work with, especially when baked in the oven. Cook them the wrong way and you’ll end up with a dry, rubbery, tough, and flavorless disaster. But cooked the right way?! We’re talkin’ juicy, tender, flavorful, perfectly baked chicken breasts that you will love.
The good news is that they’re also totally easy to customize with your favorite seasonings or sauces. And also, incredibly easy to make with my 5-step baked chicken breasts method. Thousands of our readers have tried it over the years and reported back that this method was a game-changer with cooking chicken. So if you have yet to give it a try, let’s bake some chicken together!
Baked Chicken Breasts Recipe | 1-Minute Video
Baked Chicken Breast Ingredients:
To make this baked chicken breasts recipe, you will need:
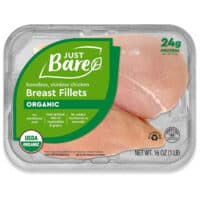
Boneless, skinless chicken breasts: You can either purchase fresh chicken breasts (my preference) or frozen chicken breasts (which you will need to completely thaw before using). Some chicken also comes pre-brined nowadays, in which case you can skip step one below.
Butter or olive oil: Your pick! I like the extra flavor that butter adds, but olive oil will also work well.
Kosher Salt: An essential ingredient in our brine, and we will also use salt to season the chicken before baking.
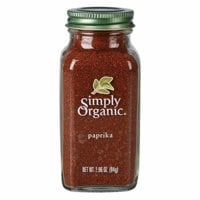
Seasonings: I included an all-purpose blend of smoked paprika, garlic powder, salt and black pepper in the recipe below, which is super-simple and goes with just about anything. But feel free to sub in any dry seasoning blend that you prefer.
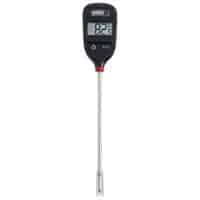
Also, if you bake chicken (or any other kind of baked proteins) regularly in the oven, I strongly having a cooking thermometer on hand too. It is the most foolproof way to ensure that your chicken is not over- or under-cooked, and works like a charm. I recommend either this:
Instant-read cooking thermometer(pictured below): which I have owned and used for years when cooking chicken, which retails for about $9.99 on Amazon.
Dual-probe wireless meat thermometer: which I also own and love because it can be used inside of a hot oven (especially helpful for baking steak, salmon and pork), which retails for about $24.99 on Amazon.
How To Bake Chicken Breasts:
Alright, so here’s the secret! To make perfectly baked chicken bbrrreasts, you simply need to follow this 5-step acronym: B.B.R.R.R.
Brine
Brush
Rub
Roast
Rest
Brine (Step 1): I’m telling you — this step is an absolute must for anytime you want to bake chicken breasts in the oven. Brining chicken is super-easy, it makes your chicken extra juicy, and best of all, it can be effectively done in just 15 minutes. Plus, if you brine chicken in lukewarm water, it also helps bring the chicken to room temperature, which makes for more even cooking. Win-win!
To brine chicken, simply fill a big bowl with lukewarm (not hot) water. Stir in a handful of salt until it mostly dissolves. Then add your chicken breasts and let them sit in the saltwater to brine for at least 15 minutes. If you are doing this in advance, you can cover and refrigerate the bowl of chicken and saltwater for up to 6 hours. But you don’t want to let the chicken brine for much longer than that.
When you’re ready to go, remove the chicken from the brine. Give it a good rinse it with cold water to wash off the salt, and then pat it dry with some paper towels. And voila — your chicken is officially brined.
Really, don’t skip over this step! It makes a world of difference.
Note: That said, some store-bought chicken breasts are now sold pre-brined. So double-check your packaging beforehand. And if your chicken has already been pre-brined in a sodium solution, just move onto step two. :)
Brush (Step 2): Brush your chicken breasts with melted butter. Or at least, I highly recommend using butter. It adds great flavor and helps give a nice golden crust on the outside. But if you’d rather use olive oil (or another favorite cooking oil), feel free.
Brush the breasts liberally on both sides to prevent the chicken from sticking to the pan, and also to help the seasonings stick. Then place the chicken breasts in a large baking dish or roasting pan.
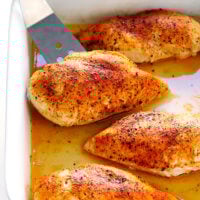
Rub (Step 3): If you’re really wanting to keep things simple, you can simply sprinkle some salt and pepper onto the chicken breasts. But again, chicken will pick up the flavor of whatever seasonings you add. So even if you’re making a simple dish that calls for “plain” chicken breasts, I highly recommend the simple chicken seasoning recipe I have included below that includes salt, pepper, garlic powder and paprika.
Roast (Step 4): So this is the step that causes some squabbles amongst chicken lovers — how long to bake chicken breasts? And what is the correct temperature to bake chicken? Do you bake it low and slow (as in, 30 minutes at 350°F)? Or do you roast chicken high and quick (as in, 15 minutes at 450)? I have tested out both — and just about every interval in between — dozens upon dozens upon dozens of times. And in the end, I fall firmly in the latter camp when it comes to baked chicken.
I like to roast my chicken breasts on high heat.
Depending on the thickness of your chicken breasts, roasting chicken at 450°F should require a cooking time of about 15-18 minutes (depending on the thickness/size of your chicken breasts). It’s speedy and it’s easy. But mostly I love it because cooking at high heat quickly develops a nice crispier “crust” on the outside of the breasts, which also helps to lock in those juices and keep the oven roasted chicken perfectly tender on the inside. It’s the best of both worlds.
I highly recommend investing in a small cooking thermometer to measure the cooked chicken temp in order to tell if it is ready to go (the FDA says that the safe cooked chicken temp is 165°F), versus cutting into it with a fork, which lets those good juices seep out. I use this instant-read thermometerthat I bought on Amazon for $10, and it will accurately measure your internal chicken temperature in seconds.
Rest (Step 5): This one is a non-negotiable. You must, must let your beautifully baked chicken breasts rest before cutting into them — a tip which applies to cooking any meat, really. If you cut in right away, you will lose all of the amazing juices and some of the tenderness that we’re going for. But if you give your freshly baked chicken breasts a brief rest, it will finish cooking and lock in all of those delicious juices, resulting in the most tender and juicy and delicious baked chicken.
I recommend loosely tenting a sheet of aluminum foil over the pan to keep the heat in while the chicken rests. And thenafter 5-10 minutes, you can finally serve and enjoy your perfectly-cooked chicken breasts.
And enjoy every last bite. ♡
How To Season Baked Chicken Breasts:
Again, I’m a big fan of the classic paprika-garlic-pepper mix in the recipe below. But if you’d like to mix things up, feel free to sub in any of your favorite dry seasoning mixes, such as:
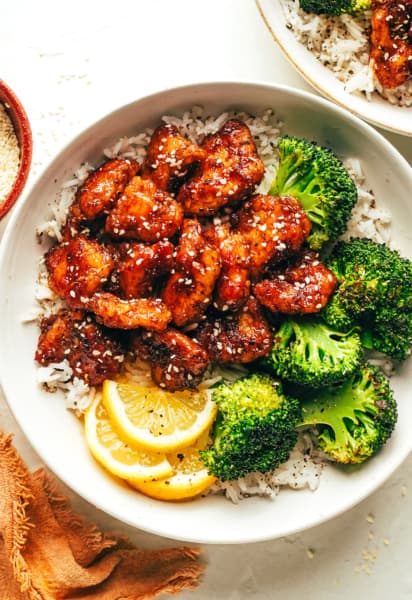
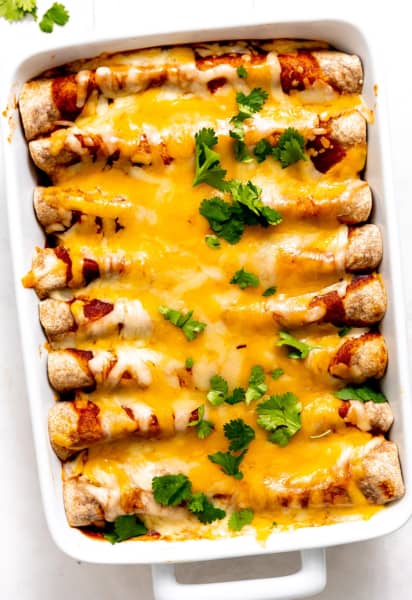
The easiest way, of course, is just to serve these roasted chicken breasts fresh outta the oven. But feel free to also slice, shred, or dice these oven baked chicken breasts for use in another recipe, such as these faves:
Once the chicken has been baked, it can be stored in a sealed container in the refrigerator for up to 3 days. Or you can freeze it for up to 3 months. (<– I recommend shredding, dicing or slicing the chicken before freezing for easier use.)
Side Dish Recipe Ideas:
Looking for some side dishes to serve with this baked chicken recipe? Here are a few of my faves:
Brine the chicken. (Check the label of your chicken breasts. If they have already been pre-brined in a sodium solution, please skip this step.) Fill a large bowl with 1 quart of warm water and 1/4 cup kosher salt. Stir to combine until most of the salt is absorbed. Add the chicken breasts and let them sit in the mixture to brine for 15 minutes, or you can also also cover the bowl and refrigerate for up to 6 hours. Remove the chicken breasts from the brine, rinse them with cold water, then pat them dry with paper towels.
Heat the oven. Preheat oven to 450°F.
Season the chicken. Place the chicken breasts in a single layer in a large baking dish*. Brush on both sides (turning once) evenly with the melted butter or olive oil. In a separate small bowl, whisk the salt, pepper, garlic powder and paprika until combined. Sprinkle the seasoning mixture evenly over the chicken on both sides.
Bake. Bake for 15-18* minutes, or until the chicken is cooked through and no longer pink. Cooking time will depend on the thickness of the chicken breasts, so I recommend using a cooking thermometer to know exactly when the chicken is fully cooked. The thickest part of the breast should measure 165°F. (If you want the chicken to be a little bit browned and crispier on top, you can turn the broiler on high for the final 3-5 minutes of the cooking time and broil the chicken until it is cooked through and golden on top. Keep a close eye on the chicken, however, so that it does not overcook and/or burn.)
Rest the chicken. Once the chicken is cooked, remove the pan from the oven, transfer the chicken to a clean plate, and loosely tent the plate with aluminum foil. Let the chicken rest for at least 5-10 minutes.
Baking Dish: Please double-check the maximum temperature of your baking dish for this recipe. Glass dishes (such as Pyrex) usually have a maximum recommended temperature of 425°F, so we do not recommend using a glass dish for this recipe. You can also cook this recipe on a thick metal baking sheet.
Storage instructions: Cooked chicken can be stored in a sealed container and refrigerated for up to 3 days or frozen for up to 3 months.
I came across this recipe a few weeks ago and I have made it several times since. I cooked it at 450° for about 15 minutes, and it is perfect. This is the best chicken breast I have ever had, super tender. I can’t see making it any other way now.
The BEST baked boneless skinless chicken ever! My family raves about it every time I make it. The only way I make it anymore! #gimmesomeoven #companyworthy
Absolutely delighted with this recipe! Nailed it all the way around with juiciness and spices!! I will definitely make this part of my life from now on!
Followed very closely, making it for two with one large (12+ oz) chicken breast.
Used a Corning “Individual Casserole” dish which just fit the chicken. Had room to add in some sliced shallots (and a couple tabs of butter for them).
Seasoned with kosher, pepper and (lightly) za’atar.
Baked right about 15 min to about 160 +/- – finishes cooking in foil. Can’t broil the corning though.
DELICIOUS. Served with Orzo and carrots (using plenty of broth).
Can’t wait to try this as my chicken breasts always turn out dry.
My one question is , is there another salt that can be used if you don’t have kosher salt.?
Thank you!!
OMG, Absolutely fantastic so juicy, succulent and tasty, it’s the only way I’m going to eat roast chicken from now on.
This recipe was obviously written from the US, (I’ll forgive you for giving the cooking temperature in Fahrenheit only, for the rest of the world it’s 230⁰C)
Delicious and moist! Thank you! I would like to comment, though, that the idea that high heat cooking or searing holds moisture in meat has been shown to be a myth. Hope you will help dispel the myth. See food scientist Harold McGee, for example.
Great recipe. Only issue for me is I guess I use larger breasts (boneless/skinless). Mine take well over 30 minutes at 450 to reach the proper temperature. Otherwise, they’re great!


Made this today and chicken cooked perfectly! Thankyou for the recipe.
Absolutely perfect chicken breast! My husband followed the recipe as is and they chicken breasts were juicy and delicious. Thanks!
I came across this recipe a few weeks ago and I have made it several times since. I cooked it at 450° for about 15 minutes, and it is perfect. This is the best chicken breast I have ever had, super tender. I can’t see making it any other way now.
The BEST baked boneless skinless chicken ever! My family raves about it every time I make it. The only way I make it anymore! #gimmesomeoven #companyworthy
Absolutely delighted with this recipe! Nailed it all the way around with juiciness and spices!! I will definitely make this part of my life from now on!
Followed very closely, making it for two with one large (12+ oz) chicken breast.
Used a Corning “Individual Casserole” dish which just fit the chicken. Had room to add in some sliced shallots (and a couple tabs of butter for them).
Seasoned with kosher, pepper and (lightly) za’atar.
Baked right about 15 min to about 160 +/- – finishes cooking in foil. Can’t broil the corning though.
DELICIOUS. Served with Orzo and carrots (using plenty of broth).
I love the chicken recipe with five steps it’s make third something time baking it and I shared it too.
Best chicken I’ve ever made!
Can’t wait to try this as my chicken breasts always turn out dry.
My one question is , is there another salt that can be used if you don’t have kosher salt.?
Thank you!!
OMG, Absolutely fantastic so juicy, succulent and tasty, it’s the only way I’m going to eat roast chicken from now on.
This recipe was obviously written from the US, (I’ll forgive you for giving the cooking temperature in Fahrenheit only, for the rest of the world it’s 230⁰C)
Cooked at 450° for about 25-30 min to reach 165°+ and didn’t develop a crust.
It was almost comical how much both of my kids liked these enchiladas!!
I made this and no joke! The chicken breasts werè just delish. I used mine to make soup. Better than rotisserie chicken!! Tasty and tender!
Delicious and moist! Thank you! I would like to comment, though, that the idea that high heat cooking or searing holds moisture in meat has been shown to be a myth. Hope you will help dispel the myth. See food scientist Harold McGee, for example.
Great recipe. Only issue for me is I guess I use larger breasts (boneless/skinless). Mine take well over 30 minutes at 450 to reach the proper temperature. Otherwise, they’re great!
I made it today. It’s very good and I will make it again for sure!