This post may contain affiliate links. Please read my disclosure policy.
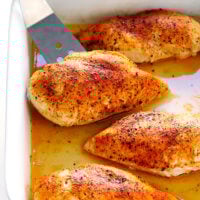
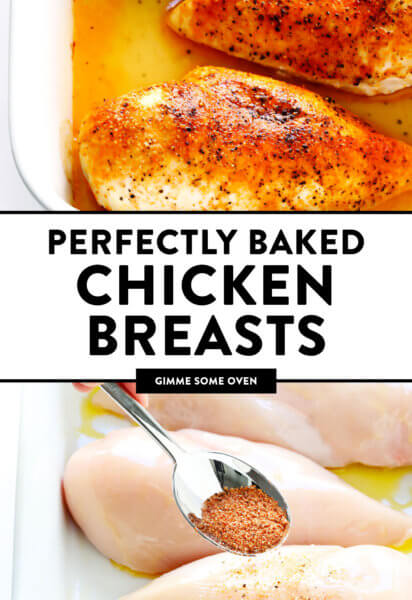
My favorite oven baked chicken breasts recipe! It never fails me, thanks to this simple 5-step method that is easy to make and customize with your favorite seasonings.
A few weeks ago on Insta, I asked if you all might be interested in a back-to-basics series about the best ways to bake proteins (i.e. chicken, pork, steak, seafood, tofu, etc.) in the oven. Your answer? A resounding yes, please. Many of you had requests and questions about methods for cooking various proteins, plus more than a few tales to tell about proteins gone not-so-right over the years. And oh boy, I hear ya. My little kitchen has seen more than its share of overcooked steaks, completely dried out pork chops, salmon skin glued to pans, and not-so-crispy tofu over the years too. Which are never fun, especially since proteins can be pricey and intended for special occasions. But hey, it’s all part of the adventure of learning how to cook. And eventually, I’ve trial-and-errored my way to some basic methods for baking proteins that have become super-reliable, super-delicious staples in my kitchen.
So over the next two weeks, I thought we could work our way through each of them, beginning today with the #1 most requested protein here on Gimme Some Oven…
…chicken.
Specifically, boneless skinless chicken breasts.
Over the years, I’ve received countless requests for new chicken breast recipes, and many more for tips on how to bake chicken breasts in the oven. Because anyone who worked with chicken breasts before know that they can be incredibly versatile, yet also incredibly finicky to work with, especially when baked in the oven. Cook them the wrong way and you’ll end up with a dry, rubbery, tough, and flavorless disaster. But cooked the right way?! We’re talkin’ juicy, tender, flavorful, perfectly baked chicken breasts that you will love.
The good news is that they’re also totally easy to customize with your favorite seasonings or sauces. And also, incredibly easy to make with my 5-step baked chicken breasts method. Thousands of our readers have tried it over the years and reported back that this method was a game-changer with cooking chicken. So if you have yet to give it a try, let’s bake some chicken together!
Baked Chicken Breasts Recipe | 1-Minute Video
Baked Chicken Breast Ingredients:
To make this baked chicken breasts recipe, you will need:
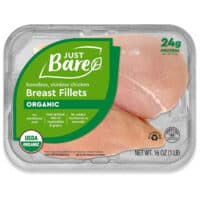
Boneless, skinless chicken breasts: You can either purchase fresh chicken breasts (my preference) or frozen chicken breasts (which you will need to completely thaw before using). Some chicken also comes pre-brined nowadays, in which case you can skip step one below.
Butter or olive oil: Your pick! I like the extra flavor that butter adds, but olive oil will also work well.
Kosher Salt: An essential ingredient in our brine, and we will also use salt to season the chicken before baking.
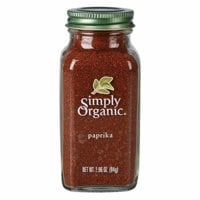
Seasonings: I included an all-purpose blend of smoked paprika, garlic powder, salt and black pepper in the recipe below, which is super-simple and goes with just about anything. But feel free to sub in any dry seasoning blend that you prefer.
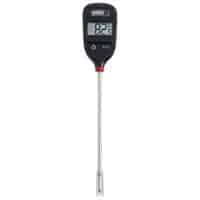
Also, if you bake chicken (or any other kind of baked proteins) regularly in the oven, I strongly having a cooking thermometer on hand too. It is the most foolproof way to ensure that your chicken is not over- or under-cooked, and works like a charm. I recommend either this:
Instant-read cooking thermometer(pictured below): which I have owned and used for years when cooking chicken, which retails for about $9.99 on Amazon.
Dual-probe wireless meat thermometer: which I also own and love because it can be used inside of a hot oven (especially helpful for baking steak, salmon and pork), which retails for about $24.99 on Amazon.
How To Bake Chicken Breasts:
Alright, so here’s the secret! To make perfectly baked chicken bbrrreasts, you simply need to follow this 5-step acronym: B.B.R.R.R.
Brine
Brush
Rub
Roast
Rest
Brine (Step 1): I’m telling you — this step is an absolute must for anytime you want to bake chicken breasts in the oven. Brining chicken is super-easy, it makes your chicken extra juicy, and best of all, it can be effectively done in just 15 minutes. Plus, if you brine chicken in lukewarm water, it also helps bring the chicken to room temperature, which makes for more even cooking. Win-win!
To brine chicken, simply fill a big bowl with lukewarm (not hot) water. Stir in a handful of salt until it mostly dissolves. Then add your chicken breasts and let them sit in the saltwater to brine for at least 15 minutes. If you are doing this in advance, you can cover and refrigerate the bowl of chicken and saltwater for up to 6 hours. But you don’t want to let the chicken brine for much longer than that.
When you’re ready to go, remove the chicken from the brine. Give it a good rinse it with cold water to wash off the salt, and then pat it dry with some paper towels. And voila — your chicken is officially brined.
Really, don’t skip over this step! It makes a world of difference.
Note: That said, some store-bought chicken breasts are now sold pre-brined. So double-check your packaging beforehand. And if your chicken has already been pre-brined in a sodium solution, just move onto step two. :)
Brush (Step 2): Brush your chicken breasts with melted butter. Or at least, I highly recommend using butter. It adds great flavor and helps give a nice golden crust on the outside. But if you’d rather use olive oil (or another favorite cooking oil), feel free.
Brush the breasts liberally on both sides to prevent the chicken from sticking to the pan, and also to help the seasonings stick. Then place the chicken breasts in a large baking dish or roasting pan.
Rub (Step 3): If you’re really wanting to keep things simple, you can simply sprinkle some salt and pepper onto the chicken breasts. But again, chicken will pick up the flavor of whatever seasonings you add. So even if you’re making a simple dish that calls for “plain” chicken breasts, I highly recommend the simple chicken seasoning recipe I have included below that includes salt, pepper, garlic powder and paprika.
Roast (Step 4): So this is the step that causes some squabbles amongst chicken lovers — how long to bake chicken breasts? And what is the correct temperature to bake chicken? Do you bake it low and slow (as in, 30 minutes at 350°F)? Or do you roast chicken high and quick (as in, 15 minutes at 450)? I have tested out both — and just about every interval in between — dozens upon dozens upon dozens of times. And in the end, I fall firmly in the latter camp when it comes to baked chicken.
I like to roast my chicken breasts on high heat.
Depending on the thickness of your chicken breasts, roasting chicken at 450°F should require a cooking time of about 15-18 minutes (depending on the thickness/size of your chicken breasts). It’s speedy and it’s easy. But mostly I love it because cooking at high heat quickly develops a nice crispier “crust” on the outside of the breasts, which also helps to lock in those juices and keep the oven roasted chicken perfectly tender on the inside. It’s the best of both worlds.
I highly recommend investing in a small cooking thermometer to measure the cooked chicken temp in order to tell if it is ready to go (the FDA says that the safe cooked chicken temp is 165°F), versus cutting into it with a fork, which lets those good juices seep out. I use this instant-read thermometerthat I bought on Amazon for $10, and it will accurately measure your internal chicken temperature in seconds.
Rest (Step 5): This one is a non-negotiable. You must, must let your beautifully baked chicken breasts rest before cutting into them — a tip which applies to cooking any meat, really. If you cut in right away, you will lose all of the amazing juices and some of the tenderness that we’re going for. But if you give your freshly baked chicken breasts a brief rest, it will finish cooking and lock in all of those delicious juices, resulting in the most tender and juicy and delicious baked chicken.
I recommend loosely tenting a sheet of aluminum foil over the pan to keep the heat in while the chicken rests. And thenafter 5-10 minutes, you can finally serve and enjoy your perfectly-cooked chicken breasts.
And enjoy every last bite. ♡
How To Season Baked Chicken Breasts:
Again, I’m a big fan of the classic paprika-garlic-pepper mix in the recipe below. But if you’d like to mix things up, feel free to sub in any of your favorite dry seasoning mixes, such as:
The easiest way, of course, is just to serve these roasted chicken breasts fresh outta the oven. But feel free to also slice, shred, or dice these oven baked chicken breasts for use in another recipe, such as these faves:
Once the chicken has been baked, it can be stored in a sealed container in the refrigerator for up to 3 days. Or you can freeze it for up to 3 months. (<– I recommend shredding, dicing or slicing the chicken before freezing for easier use.)
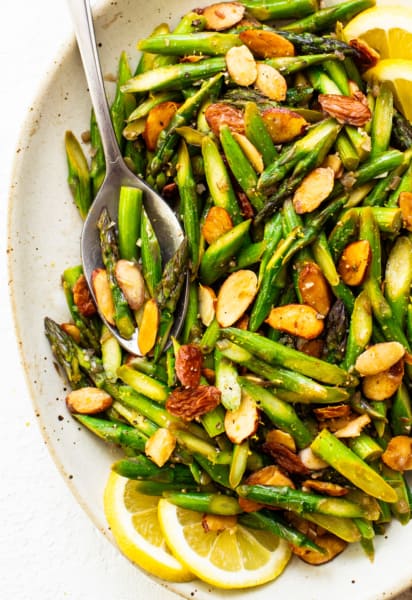
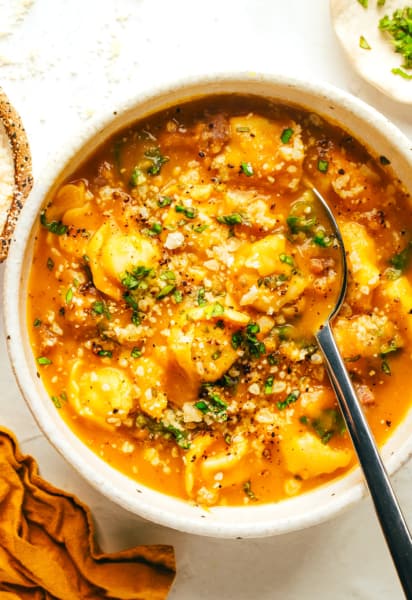
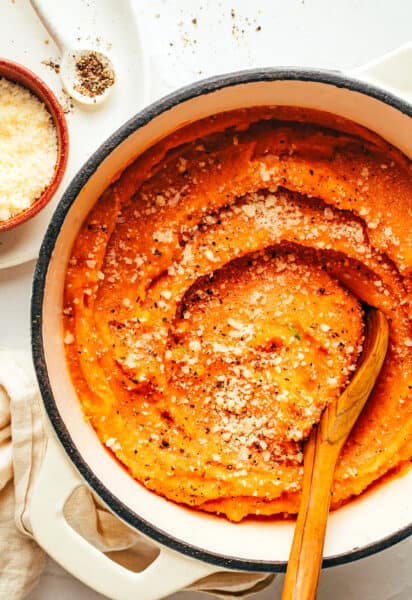
Side Dish Recipe Ideas:
Looking for some side dishes to serve with this baked chicken recipe? Here are a few of my faves:
Brine the chicken. (Check the label of your chicken breasts. If they have already been pre-brined in a sodium solution, please skip this step.) Fill a large bowl with 1 quart of warm water and 1/4 cup kosher salt. Stir to combine until most of the salt is absorbed. Add the chicken breasts and let them sit in the mixture to brine for 15 minutes, or you can also also cover the bowl and refrigerate for up to 6 hours. Remove the chicken breasts from the brine, rinse them with cold water, then pat them dry with paper towels.
Heat the oven. Preheat oven to 450°F.
Season the chicken. Place the chicken breasts in a single layer in a large baking dish*. Brush on both sides (turning once) evenly with the melted butter or olive oil. In a separate small bowl, whisk the salt, pepper, garlic powder and paprika until combined. Sprinkle the seasoning mixture evenly over the chicken on both sides.
Bake. Bake for 15-18* minutes, or until the chicken is cooked through and no longer pink. Cooking time will depend on the thickness of the chicken breasts, so I recommend using a cooking thermometer to know exactly when the chicken is fully cooked. The thickest part of the breast should measure 165°F. (If you want the chicken to be a little bit browned and crispier on top, you can turn the broiler on high for the final 3-5 minutes of the cooking time and broil the chicken until it is cooked through and golden on top. Keep a close eye on the chicken, however, so that it does not overcook and/or burn.)
Rest the chicken. Once the chicken is cooked, remove the pan from the oven, transfer the chicken to a clean plate, and loosely tent the plate with aluminum foil. Let the chicken rest for at least 5-10 minutes.
Baking Dish: Please double-check the maximum temperature of your baking dish for this recipe. Glass dishes (such as Pyrex) usually have a maximum recommended temperature of 425°F, so we do not recommend using a glass dish for this recipe. You can also cook this recipe on a thick metal baking sheet.
Storage instructions: Cooked chicken can be stored in a sealed container and refrigerated for up to 3 days or frozen for up to 3 months.
This is the very best quick and easy baked chicken breast recipe/cooking method. I used it twice and am so happy I found it. Much better than standard.
By Golly, this works! I had bought some chicken breasts on sale, and they were grilling up so tough! I Googled how to cook tender chicken breasts, and decided I’d give this one a try.
Since I was using a cast iron skillet to bake my two l had left, I let it preheat in the 450° oven. Pre-oiled it with EVOO, which I did use instead of the butter.
Thanks so much for the recipe! And, since these were pre-cut into thinner (but not the *real* thin) pieces, I baked for only 13 minutes. Anyway: yum! Thanks again.
Thank you so much, this is perfect as promised! I have struggled with dried out chicken until now. I will never use another recipe for chicken breasts!
I made the chicken breasts last night and WOW! Best chicken breast ever!!! I will never again buy already roasted whole chicken. Usually, the breast part is quickly gone and the rest often goes to waste because it just doesn’t taste as good as when it’s still hot. Anyway, I made minor changes to the recipe. Instead of just salt and pepper, I used Brookfields seasoned salt and instead of regular paprika, I used smoked paprika. I brined the chicken for about 2 hours, rinsed it, patted it dry and followed the recipe. The meat was super juicy and very tender.I let it sit for about 30 minutes before cutting it. I stored the uneaten breast in a plastic bag along with all the juices and had some for lunch today. Incredibly tasty. I can eat this every day at every meal.
Thank you so much. Though I am a pretty good cook, and I have roasted many meats and love my lemon pepper chicken wings done in my toaster oven that has convection, my absolute new favorite is this chicken breast.
Outstanding. We don’t normally cook chicken breasts. They have been boring. Bland, dried out and chewy.
But NOW, I love them! Brining and careful temp check with digital thermometer.
We did it this way:
Brined about 1/2 hour because they were still just a little frozen.
3 large breasts in a 9×9 glass pan. Olive oil brushing. Heavy sprinkle of paprika. 1/4 cup white wine
Roasted uncovered at 350 because they were thick.
Temp check at 20 minutes, gave them another 10. Done.
Rested 10 minutes under foil while we finished a wine.
Wow, wow, wow.
This baked chicken breast is literally the best I’ve ever tasted. Super tender and moist, not to mention so easy! My husband and I eat a lot of lean protein and I can see myself making this every week. The leftovers are just as delicious! I am looking forward to trying a variety of different seasonings but that doesn’t change the fact this method of cooking is spot on! Thanks so much for an amazing recipe!!
I haven’t made it yet but plan on trying it this weekend. I know you roast at a temperature of 425 degrees, but my oven is broken and the highest temp I can gets 399. Can I do this at this temperature and still have the same juiciness as in the recipe with the higher cooking temperature. Do I leave in in the oven for an addition 5-10 minutes?
I just want to say my family absolutely loved me when I made this. I had cooked about 12 servings of this recipe because I planned on freezing some of it (at the time, I was meal prepping). However, I didn’t get to freeze any because my family descended on this like a bunch of vultures. lol
So, thank you so much! I plan on checking out your other chicken marinades!
I was searching for a baked chicken breast recipe and found yours right after I had already started baking with the other recipe. About to eat it now but I’ve been drooling over this post as soon as I put the other one in the oven. We’ll see how it is but this o e sounds delish! Will definitely try it this week.
I made this, but coudnt get kosher salt, so I used sea salt flakes, the same quantity, it tasted to salty. I did rince it after it was brining for 4 hours. The chicken was lovely and moist, but just a bit on the salty side? What is a substitute and quantity when you cant get kosher salt? Or does it have another name in the uk? Thank you Margaret
I made the baked chicken breasts this evening. I was very surprised at its simplicity! I would have never thought about rubbing the chicken with butter. However, it gave the chicken a very nice flavor. I already had the ingredients, so that made it very convenient. I followed the recipe, and was happy that it called for some of my favorite seasonings. Brining the chicken really made a difference! I would not have thought of that. I baked the chicken on high at 450 degrees. I was happy to see how quickly it cooked. After the chicken was done, I let it rest for 10 minutes. When I cut into it, the chicken was juicy and very tasty! I’ve added this recipe to my list of favorites. Thanks!
Absolute game changer!! My boneless skinless chicken breasts have always been hit or miss. This recipe is fabulous! Brining! Who knew?! Dinner tonight was delicious!
I will definitely shake up the seasonings, but the brining and butter are spot on!
Thanks so much for this recipe! We eat chicken all the time and now it will be perfect every time!!
I find it always takes a lot longer to cook at 450 then 15 -18 minutes. It’s still raw. Is this because i am cooking over 10 breasts at a time? How much cooking time should I add for each breast?
It is beautiful the color after baking! And have you tried to store it for 3 months? That’s so incredible ? I cannot imagine how it will be after 3 month freezing.
– Natalie Ellis
First sentence from the husband, “Mmmmm – keep this recipe!” We split 2 thicker breasts into 4 thinner pieces, brined for 25 minutes, used rotisserie seasoning on 450 for 17-18 minutes. Excellent! So happy to come across this recipe!
Definitely turned better than any previous attempt I have made at baked chicken breast. Used olive oil instead of butter but followed everything else to a T. Chicken seemed to turn out kind of “poached”? Didn’t taste bad but it wasn’t what I anticipated. Wondering if using butter instead of olive oil is a game changer?
My picky 6 year old who refuses to eat chicken – absolutely loves this chicken recipe and ate about half a breast by herself. She even passed up the Applewood bacon to eat the chicken!!!
This is easily the best baked chicken I’ve ever had. I tweak the seasonings depending on the dish, but the chicken always comes out perfectly done, moist and juicy. I tried at least forty different times and methods before this one, but this was the winner! We haven’t baked chicken any other way since.
I now use your brining process every time I make chicken breasts, whether I am roasting or grilling. I had been doing this for months until one day I was short on time and decided to skip it. This drew a definite response from the family — “This chicken is really dry for some reason!” Lesson learned — now I always brine.


Amazing! Thank you so much!
I’ve finally found a juicy and delicious baked chicken recipe that works. THANK YOU!
This is the very best quick and easy baked chicken breast recipe/cooking method. I used it twice and am so happy I found it. Much better than standard.
By Golly, this works! I had bought some chicken breasts on sale, and they were grilling up so tough! I Googled how to cook tender chicken breasts, and decided I’d give this one a try.
Since I was using a cast iron skillet to bake my two l had left, I let it preheat in the 450° oven. Pre-oiled it with EVOO, which I did use instead of the butter.
Thanks so much for the recipe! And, since these were pre-cut into thinner (but not the *real* thin) pieces, I baked for only 13 minutes. Anyway: yum! Thanks again.
Thank you so much, this is perfect as promised! I have struggled with dried out chicken until now. I will never use another recipe for chicken breasts!
Just made these….they were AHHHMAZING!!! I saw it on Pinterest and just had to try. You’re right….brining is KEY!!
I made the chicken breasts last night and WOW! Best chicken breast ever!!! I will never again buy already roasted whole chicken. Usually, the breast part is quickly gone and the rest often goes to waste because it just doesn’t taste as good as when it’s still hot. Anyway, I made minor changes to the recipe. Instead of just salt and pepper, I used Brookfields seasoned salt and instead of regular paprika, I used smoked paprika. I brined the chicken for about 2 hours, rinsed it, patted it dry and followed the recipe. The meat was super juicy and very tender.I let it sit for about 30 minutes before cutting it. I stored the uneaten breast in a plastic bag along with all the juices and had some for lunch today. Incredibly tasty. I can eat this every day at every meal.
Thank you so much. Though I am a pretty good cook, and I have roasted many meats and love my lemon pepper chicken wings done in my toaster oven that has convection, my absolute new favorite is this chicken breast.
Will never make chicken any other way again.
This recipe is bang on. My chicken turned out great.
Outstanding. We don’t normally cook chicken breasts. They have been boring. Bland, dried out and chewy.
But NOW, I love them! Brining and careful temp check with digital thermometer.
We did it this way:
Brined about 1/2 hour because they were still just a little frozen.
3 large breasts in a 9×9 glass pan. Olive oil brushing. Heavy sprinkle of paprika. 1/4 cup white wine
Roasted uncovered at 350 because they were thick.
Temp check at 20 minutes, gave them another 10. Done.
Rested 10 minutes under foil while we finished a wine.
Wow, wow, wow.
I made this recipe tonight – it was delicious!
This recipe is perfection!
This baked chicken breast is literally the best I’ve ever tasted. Super tender and moist, not to mention so easy! My husband and I eat a lot of lean protein and I can see myself making this every week. The leftovers are just as delicious! I am looking forward to trying a variety of different seasonings but that doesn’t change the fact this method of cooking is spot on! Thanks so much for an amazing recipe!!
For some reason it didn’t let me rate 6 stars at first…this is definitely at 6 star recipe!!
This was so easy and came out great! Incredibly moist and juicy. A real standout!
I haven’t made it yet but plan on trying it this weekend. I know you roast at a temperature of 425 degrees, but my oven is broken and the highest temp I can gets 399. Can I do this at this temperature and still have the same juiciness as in the recipe with the higher cooking temperature. Do I leave in in the oven for an addition 5-10 minutes?
I just want to say my family absolutely loved me when I made this. I had cooked about 12 servings of this recipe because I planned on freezing some of it (at the time, I was meal prepping). However, I didn’t get to freeze any because my family descended on this like a bunch of vultures. lol
So, thank you so much! I plan on checking out your other chicken marinades!
Even my picky eater loved this one! I had to double the recipe the 2nd time I made it!
I was searching for a baked chicken breast recipe and found yours right after I had already started baking with the other recipe. About to eat it now but I’ve been drooling over this post as soon as I put the other one in the oven. We’ll see how it is but this o e sounds delish! Will definitely try it this week.
Hands down the BEST way to cook chicken!
This is it
I made this, but coudnt get kosher salt, so I used sea salt flakes, the same quantity, it tasted to salty. I did rince it after it was brining for 4 hours. The chicken was lovely and moist, but just a bit on the salty side? What is a substitute and quantity when you cant get kosher salt? Or does it have another name in the uk? Thank you Margaret
Delicious!!! So easy and quick!
YAY!! Finally a SIMPLE recipe for baking boneless skinless chicken breasts! Very flavorful and so moist. Loved it and will definitely do this again.
I made the baked chicken breasts this evening. I was very surprised at its simplicity! I would have never thought about rubbing the chicken with butter. However, it gave the chicken a very nice flavor. I already had the ingredients, so that made it very convenient. I followed the recipe, and was happy that it called for some of my favorite seasonings. Brining the chicken really made a difference! I would not have thought of that. I baked the chicken on high at 450 degrees. I was happy to see how quickly it cooked. After the chicken was done, I let it rest for 10 minutes. When I cut into it, the chicken was juicy and very tasty! I’ve added this recipe to my list of favorites. Thanks!
My girls and I loved the chicken. It was delicious! Thank you
A-M-A-Z-I-N-G!!!! I was skeptical at first but this recipe is easy peasy and SO GOOD!!!
I have never had a problem cooking chicken breasts after I used this recipe. They always come out moist with a nice skin.
However, I would suggest not to use the recommended salt for the brining. Less will work just fine.
Absolute game changer!! My boneless skinless chicken breasts have always been hit or miss. This recipe is fabulous! Brining! Who knew?! Dinner tonight was delicious!
I will definitely shake up the seasonings, but the brining and butter are spot on!
Thanks so much for this recipe! We eat chicken all the time and now it will be perfect every time!!
I find it always takes a lot longer to cook at 450 then 15 -18 minutes. It’s still raw. Is this because i am cooking over 10 breasts at a time? How much cooking time should I add for each breast?
Just made these tonight…absolutely delicious!
Easy. Delicious. Very moist!
I have made this before with the boneless skinless chicken breast and t turned out wonderful! I am trying now with bone in pick of the chicken.
This recipe is the best!!!
We make this almost every week. Sooooo good!
Thank you so much for this recipe!!! It worked perfectly and I’ve had a lot of trouble cooking chicken breasts.
Great recipe! Delicious chicken !!
It is beautiful the color after baking! And have you tried to store it for 3 months? That’s so incredible ? I cannot imagine how it will be after 3 month freezing.
– Natalie Ellis
First sentence from the husband, “Mmmmm – keep this recipe!” We split 2 thicker breasts into 4 thinner pieces, brined for 25 minutes, used rotisserie seasoning on 450 for 17-18 minutes. Excellent! So happy to come across this recipe!
This is a great recipe. The chicken breast was nice and moist. Thanks.
Not sure what happened but I baked the chicken at the same time and temperature but my chicken was still completely uncooked and pink and raw.
Definitely turned better than any previous attempt I have made at baked chicken breast. Used olive oil instead of butter but followed everything else to a T. Chicken seemed to turn out kind of “poached”? Didn’t taste bad but it wasn’t what I anticipated. Wondering if using butter instead of olive oil is a game changer?
Best baked chicken ever! This is how I will do it from now on. Thank you for the simple, quick and easy recipe.
My picky 6 year old who refuses to eat chicken – absolutely loves this chicken recipe and ate about half a breast by herself. She even passed up the Applewood bacon to eat the chicken!!!
Best chicken ever. So simple and so good. Thank you … My dry old chicken days are over!!! ??
This is easily the best baked chicken I’ve ever had. I tweak the seasonings depending on the dish, but the chicken always comes out perfectly done, moist and juicy. I tried at least forty different times and methods before this one, but this was the winner! We haven’t baked chicken any other way since.
I now use your brining process every time I make chicken breasts, whether I am roasting or grilling. I had been doing this for months until one day I was short on time and decided to skip it. This drew a definite response from the family — “This chicken is really dry for some reason!” Lesson learned — now I always brine.
All around absolute best baked chicken recipe. I like it better than grilled.
Absofrigginlutely delightful! The quick and hot is it! THANK YOU!
Tried this last night. Delicious, easy, fast, and my husband loved it.