This post may contain affiliate links. Please read my disclosure policy.
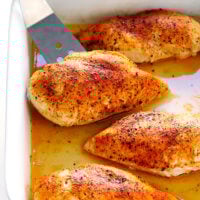
My favorite oven baked chicken breasts recipe! It never fails, thanks to this simple 5-step method that is easy to make and customize with your favorite seasonings.
A few weeks ago on Insta, I asked if you all might be interested in a back-to-basics series about the best ways to bake proteins (i.e. chicken, pork, steak, seafood, tofu, etc.) in the oven. Your answer? A resounding yes, please. Many of you had requests and questions about methods for cooking various proteins, plus more than a few tales to tell about proteins gone not-so-right over the years. I hear you! My little kitchen has seen more than its share of overcooked steaks, completely dried out pork chops, salmon skin glued to pans, and not-so-crispy tofu over the years too. Which are never fun, especially since proteins can be pricey and intended for special occasions. But hey, it’s all part of the adventure of learning how to cook. And eventually, I’ve trial-and-errored my way to some basic methods for baking proteins that have become super-reliable, super-delicious staples in my kitchen.
So over the next two weeks, I thought we could work our way through each of them, beginning today with the #1 most requested protein here on Gimme Some Oven…baked chicken.
Specifically, baked chicken breasts.
Over the years, I’ve received countless requests for new chicken breast recipes, and many more for tips on how to bake chicken breasts in the oven. Because anyone who worked with chicken breasts before know that they can be incredibly versatile, yet also incredibly finicky to work with, especially when baked in the oven. Cook them the wrong way and you’ll end up with a dry, rubbery, tough, and flavorless disaster. But cooked the right way?! We’re talkin’ juicy, tender, flavorful, perfectly baked chicken breasts that you will love.
The good news is that they’re also totally easy to customize with your favorite seasonings or sauces. And also, incredibly easy to make with my 5-step baked chicken breasts method. Thousands of our readers have tried it over the years and reported back that this method was a game-changer with cooking chicken. So if you have yet to give it a try, let’s bake some chicken together!
Baked Chicken Breasts Recipe | 1-Minute Video
Baked Chicken Breast Ingredients
To make this baked chicken breasts recipe, you will need:
Boneless, skinless chicken breasts: You can either purchase fresh chicken breasts (my preference) or frozen chicken breasts (which you will need to completely thaw before using). Some chicken also comes pre-brined nowadays, in which case you can skip step one below.
Butter or olive oil: Your pick! I like the extra flavor that butter adds, but olive oil will also work well.
Kosher Salt: An essential ingredient in our brine, and we will also use salt to season the chicken before baking.
Seasonings: I included an all-purpose blend of smoked paprika, garlic powder, salt and black pepper in the recipe below, which is super-simple and goes with just about anything. But feel free to sub in any dry seasoning blend that you prefer.
Also, if you bake chicken (or any other kind of baked proteins) regularly in the oven, I strongly having a cooking thermometer on hand too. It is the most foolproof way to ensure that your chicken is not over- or under-cooked, and works like a charm. I recommend either this:
Instant-read cooking thermometer: which I have owned and used for years when cooking chicken, which currently retails for about $14 on Amazon.
Dual-probe wireless meat thermometer: which I also own and love because it can be used inside of a hot oven (especially helpful for baking steak, salmon and pork) plus it can either beep or send an alert to your cell phone, and currently retails for about $33 on Amazon.
How To Bake Chicken Breasts
Alright, so here’s the secret! To make perfectly baked chicken bbrrreasts, you simply need to follow this 5-step acronym: B.B.R.R.R.
Brine
Brush
Rub
Roast
Rest
Brine (Step 1): This step is a must when you want to bake chicken breasts in the oven. Brining chicken is super-easy, it makes your chicken extra juicy, and best of all, it can be effectively done in just 15 minutes.
To brine chicken, simply fill a big bowl half full with lukewarm water. Stir in a handful of salt until it mostly dissolves. Add ice cubes or cold water to lower the temperature of the water so that it is cool to the touch. Then add your chicken breasts and let them sit in the saltwater to brine for at least 15 minutes. If you are doing this in advance, you can cover and refrigerate the bowl of chicken and saltwater for up to 6 hours. But you don’t want to let the chicken brine for much longer than that.
When you’re ready to go, remove the chicken from the brine. Give it a good rinse it with cold water to wash off the salt, and then pat it dry with some paper towels. And voila — your chicken is officially brined.
Really, don’t skip over this step! It makes a world of difference.
Note: That said, some store-bought chicken breasts are now sold pre-brined. So double-check your packaging beforehand. And if your chicken has already been pre-brined in a sodium solution, just move onto step two. :)
Brush (Step 2): Brush your chicken breasts with melted butter. Or at least, I highly recommend using butter. It adds great flavor and helps give a nice golden crust on the outside. But if you’d rather use olive oil (or another favorite cooking oil), feel free.
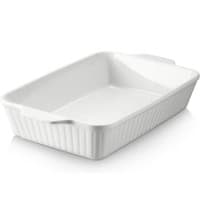
Brush the breasts liberally on both sides to prevent the chicken from sticking to the pan, and also to help the seasonings stick. Then place the chicken breasts in a large baking dish or roasting pan.
Rub (Step 3): If you’re really wanting to keep things simple, you can simply sprinkle some salt and pepper onto the chicken breasts. But again, chicken will pick up the flavor of whatever seasonings you add. So even if you’re making a simple dish that calls for “plain” chicken breasts, I highly recommend the simple chicken seasoning recipe I have included below that includes salt, pepper, garlic powder and paprika.
Roast (Step 4): So this is the step that causes some squabbles amongst chicken lovers — how long to bake chicken breasts? And what is the correct temperature to bake chicken? Do you bake it low and slow (as in, 30 minutes at 350°F)? Or do you roast chicken high and quick (as in, 15 minutes at 450)? I have tested out both — and just about every interval in between — dozens upon dozens upon dozens of times. And in the end, I fall firmly in the latter camp when it comes to baked chicken.
I like to roast my chicken breasts on high heat.
Depending on the thickness of your chicken breasts, roasting chicken at 450°F should require a cooking time of about 15-18 minutes (depending on the thickness/size of your chicken breasts). It’s speedy and it’s easy. But mostly I love it because cooking at high heat quickly develops a nice crispier “crust” on the outside of the breasts, which also helps to lock in those juices and keep the oven roasted chicken perfectly tender on the inside. It’s the best of both worlds.
I highly recommend investing in a small cooking thermometer to measure the cooked chicken temp in order to tell if it is ready to go (the FDA says that the safe cooked chicken temp is 165°F), versus cutting into it with a fork, which lets those good juices seep out. I use this instant-read thermometer and it will accurately measure your internal chicken temperature in seconds.
Rest (Step 5): This one is a non-negotiable. You must, must let your beautifully baked chicken breasts rest before cutting into them — a tip which applies to cooking any meat, really. If you cut in right away, you will lose all of the amazing juices and some of the tenderness that we’re going for. But if you give your freshly baked chicken breasts a brief rest, it will finish cooking and lock in all of those delicious juices, resulting in the most tender and juicy and delicious baked chicken.
I recommend loosely tenting a sheet of aluminum foil over the pan to keep the heat in while the chicken rests. And thenafter 5-10 minutes, you can finally serve and enjoy your perfectly-cooked chicken breasts.
And enjoy every last bite. ♡
How To Season Baked Chicken Breasts
Again, I’m a big fan of the classic paprika-garlic-pepper mix in the recipe below. But if you’d like to mix things up, feel free to sub in any of your favorite dry seasoning mixes, such as:
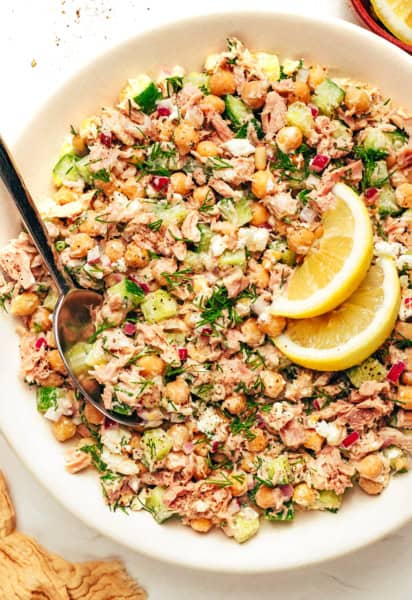
Here are some of my favorite ways to serve baked chicken breasts:
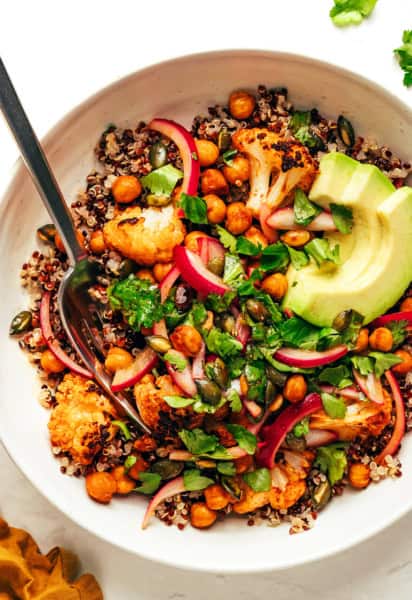
With roasted vegetables. Have your oven do double-duty and roast some vegetables to go along with the chicken. Roasted asparagus, broccoli, Brussels sprouts, cauliflower, mushrooms, potatoes, or zucchini are always delicious!
Stuffed in tacos or enchiladas. Shred or dice the chicken to make chicken tacos, such as these quick and easy chicken tinga tacos or chicken enchiladas.
Stuffed into wraps or pitas. Slice and tuck the chicken into tortillas or pitas, such as chicken souvlaki.
Once the chicken has been baked, it can be stored in a sealed container in the refrigerator for up to 3 days. Or you can freeze it for up to 3 months. (I recommend shredding, dicing or slicing the chicken before freezing for easier use.)
Side Dish Recipe Ideas
Looking for some side dishes to serve with this baked chicken recipe? Here are a few of my faves:
Learn how to make juicy, tender, delicious baked chicken breasts with this simple 5-step method.
Ingredients
Scale
4 boneless skinless chicken breasts, pounded to even thickness
1 tablespoon melted butter or olive oil
1 teaspoon kosher salt
1/2 teaspoon freshly-ground black pepper
1/2 teaspoon garlic powder
1/2 teaspoon smoked paprika
Instructions
Brine the chicken. (Check the label of your chicken breasts. If they have already been pre-brined in a sodium solution, please skip this step.) Fill a large mixing bowl with 2 cups of lukewarm water and 1/4 cup kosher salt. Stir to combine until most of the salt is absorbed. Add 2 cups of cold water (or a few ice cubes) to lower the temperature of the water so that it is cool to the touch. Add the chicken breasts and let them sit in the mixture to brine for 15 minutes, or you can also also cover the bowl and refrigerate for up to 6 hours. Remove the chicken breasts from the brine, rinse them with cold water, then pat them dry with paper towels.
Heat the oven. Preheat oven to 450°F.
Season the chicken. Place the chicken breasts in a single layer in a large baking dish*. Brush on both sides (turning once) evenly with the melted butter or olive oil. In a separate small bowl, whisk the salt, pepper, garlic powder and paprika until combined. Sprinkle the seasoning mixture evenly over the chicken on both sides.
Bake. Bake for 15-18* minutes, or until the chicken is cooked through and no longer pink. Cooking time will depend on the thickness of the chicken breasts, so I recommend using a cooking thermometer to know exactly when the chicken is fully cooked. The thickest part of the breast should measure 165°F. (If you want the chicken to be a little bit browned and crispier on top, you can turn the broiler on high for the final 3-5 minutes of the cooking time and broil the chicken until it is cooked through and golden on top. Keep a close eye on the chicken, however, so that it does not overcook and/or burn.)
Rest the chicken. Once the chicken is cooked, remove the pan from the oven, transfer the chicken to a clean plate, and loosely tent the plate with aluminum foil. Let the chicken rest for at least 5-10 minutes.
Baking Dish: Please double-check the maximum temperature of your baking dish for this recipe. Glass dishes (such as Pyrex) usually have a maximum recommended temperature of 425°F, so we do not recommend using a glass dish for this recipe. You can also cook this recipe on a thick metal baking sheet.
Storage instructions: Cooked chicken can be stored in a sealed container and refrigerated for up to 3 days or frozen for up to 3 months.
If I want to have a marsala and mushroom sauce for this would you suggest I cook that separately and spoon over at the end? I am intrigued and hopeful, your recipe sounds great, comments very supportive and I think the high heat makes a lot of sense. I have been searching for a way to make boneless breasts taste good, not dry, tasteless which is what happened no matter what I do….thank you!!! But curious about adding sauces like BBQ or a tangy combo of balsamic vinegar, caramelized onions, etc. (Most of the sauce recipes are stove top and the chicken simply comes out tough!)
Hayley @ Gimme Some Oven —
Hi Janet! Yes, we would recommend just cooking your sauce separately and then adding it over the chicken at the end (marsala mushroom sauce is the BEST). We hope you enjoy the chicken — definitely let us know what you think! :)
Made this since I needed the protein. Turned out great and juicy in 15 mins, though a little salty and high in sodium. I did forget to wash it after brining it though, and I only used 1 tsp salt and 1/2 tsp pepper for the seasoning, so it’s one or both of those things. Anyway, gonna try this next time with less salt, and washing the breasts after brining.
Hayley @ Gimme Some Oven —
We’re glad you enjoyed this — yes, definitely don’t forget to rinse the chicken after brining next time! :) We appreciate you giving the recipe a try! :)
having an infant would take most of my time and I barely have time to make my dinner. I’m glad I came across your website and made it tonight for dinner. Its easy and can do it while watching my kid. It’s really easy and tastes good. I just placed so much salt on it that came out salty but ogher than taht, its excellent. Would love to make it again.
Hayley @ Gimme Some Oven —
Thanks Xin — we’re glad you enjoyed this! As for the salt – did you make sure to rinse the chicken well after you brined it?
This was absolutely spectacular! The paprika and pepper really made this dish – so tasty. I was very heavy handed on the butter, but it came out all the better.
It’s strange, but the chicken almost had the texture and a little bit of the taste of fresh mozzarella – easy to pull apart and with a rich sweetness. This dish was a hit and I suspect I’ll be making it again and again! Thank you!
Hayley @ Gimme Some Oven —
Thank you Julie — we’re so glad to hear it was a hit! :)
This is the very best technique for cooking chicken breasts. Thank you so much. I started using it just because it seemed so simple. Now it is my ‘go to’ recipe even when I am having guests. They all leave with the link to this site! Now my husband is using it for his curry recipes. He brines, seasons with his spices, cooks the chicken just under the 160°, rests it, then cuts it in chunks to simmer for a bit in his homemade sauce. The best he had ever made.
Hayley @ Gimme Some Oven —
Thanks Janet! We’re happy you and your husband enjoy this (once we tried the brining trick, we quickly became obsessed)! :)
How much time difference would the cooking be on 450 degrees for seven pieces of chicken breast? And by how much would I increase the spice mix? Thanks!
Hayley @ Gimme Some Oven —
Hi Jenna! Hmmm, we’re afraid we’re not sure what you mean by seven pieces of chicken breast. Do you mean chicken tenders or seven half breasts?
I came across your recipe earlier this evening looking for a new recipe to bake “MOIST” chicken breast. Man did I hit the JACKPOT!!! I made this 100% per your instructions and I was so floored how moist my chicken was in just 15mins in the oven. Wow!! I wanted to share a photo of it but I’m not sure how to add it here??!
Thanks so very much for sharing your recipe. I’m dying for my husband to get home Wednesday night from working out of town and I’m going to cook it the same way for him.
Thanks again!
~Teresa
Hayley @ Gimme Some Oven —
Thanks for your sweet comment Teresa! We’re so happy you loved the recipe! :)
I just tried this recipe tonight because I wanted a to add some roasted chicken to the pesto flatbread pizza with green bell peppers and pineapple chunks that I wanted to make for days and let me tell you that adding the roasted chicken made a huge difference! My family inhaled their serving of pizza in just minutes. My mom even requested for me to do this recipe again. Next time, I would pair this chicken with some salad to make it a healthy combination. Thank you!
Hayley @ Gimme Some Oven —
You’re welcome Jay — we’re so glad you and your family enjoyed the chicken (and your pizza)! :)
Hi,
Love the Brined Chicken Breast, Hi Heat! The bomb.
If I may offer my favorite twist for BBQ beeasts.
Seasoning Lawrys season salt chili powder paprika. I just season by sight. 12 minutes 450. Remove, quickly brush on favorite bbq sauce. Back in for 5-6 minutes to allow sauce to glaze over.
A mixed review here. Yes, it was moist. I have not had much success cooking chicken at high temperates before, it always came out very tough. The brining probably was the key here. On the downside, it was very, very salty even though I rinsed and rinsed the chicken. I think half a teaspoon for seasoning would be fine, maybe even less would work. There was no crispiness or crust on the top so next time I think I will add some cracker crumbs or panko. Running it under the broiler doesn’t work for many of my baking pans, so not an option. It was easy to prepare, so it’s worth trying again with adjustments.
Hayley @ Gimme Some Oven —
Hey there! We appreciate your honest feedback. We’re sorry it turned out on the salty side! It sounds like some groceries use a brining solution on their chicken and that could be the case here and could explain the excess salt. We haven’t had this experience but it seems a few others have, and this is the only thing we can think of. As for trying to get that crust, you can spray it with some cooking spray (or brush with oil) before baking, which will help. Or if you really want the crust and it’s not happening, you could cook the chicken until it’s nearly done, and then pop it under the broiler for a minute or two. That’ll definitely help it get a nice crust. We hope this helps for next time!
I can’t begin to express how excited I am to have stumbled across this, I just tired it out this evening and it was amazing! I’ve been trying for years to cook chicken breasts and they always come out dry and bland (admittedly I’m not a good cook). But this recipe was easy to follow and the chicken was delicious! This has seriously made my week!
Hayley @ Gimme Some Oven —
Thank you Allison! We’re so happy you enjoyed this! :D
I’ve been looking for a recipe for simple baked chicken breasts and came across yours, which looked failproof enough for me. Thanks to you, my first attempt at roasting meat was a success! Just like the second one. Took a little longer in my oven though, it should have been gas mark 4-5 but had to put it on mark 7 for the crust.
The second time, my man insisted on throwing in a few chicken legs along on the tray and they worked out just as good cooked the same way. Although there are probably different secrets to cooking them.
Hayley @ Gimme Some Oven —
Thanks for sharing Tanya — we’re so glad this worked out for you and that you enjoyed it! :)
Made this recipe last night for dinner and it turned out wonderful, way better than I thought it would! I followed the recipe, also ensuring I rinsed the chicken well after bringing and it came out great, not too salty at all, and so juicy, almost like rotisserie chicken. I just had to change the seasonings a bit to use what was on hand, substituting paprika for some season all, for flavor and color. I will definitely be making this again! Thanks! I also often use your slow cooker BBQ chicken recipe too, everyone loves it!
Hayley @ Gimme Some Oven —
Thanks so much Chelsi — we’re happy you enjoyed this, and that you’re a fan of the slow cooker BBQ chicken as well! :D
I just wanted to say that I have always (30+ years) cooked chicken breast at 350 for 30-45 min…yes, 45 minutes…that is how I learned it. Today, as I was about to cook my chicken I decided to google the correct time to cook it because it is always so dry and blah. I came across your website and OH EM GEE this chicken turned out to be the best chicken I have ever made and I am beside myself on the difference! THANK YOU, THANK YOU, THANK YOU!
Hayley @ Gimme Some Oven —
We’re so happy you enjoyed this Nina — thanks for taking the time to leave such a nice comment! :)
KUDOS! To you~~~~~~~~~~~ tried your baked chix recipe..I think I use a bit too much paprika, but they are THE BEST chicken breast I’ve ever had roasted in an oven……………..I can really taste a lovely chicken flavor and they look beautiful too. I cannot wait to try your lemon chicken and saffron-lemon chicken is a favorite. I’m sure yours will be fabulous. Thanks SO much!
I’m 57 years old and cooking for myself now. I’ve never baked chicken breasts before. I followed this recipe and they turned out great. I was so impressed I had to share the recipe on Facebook with my daughters and on an online forum with some of my friends. I made enough to have leftovers and the cold, diced leftover chicken may be even better than it was hot from the oven. Great for use in a salad.
Hayley @ Gimme Some Oven —
Hi Robin! We’re so glad you enjoyed the recipe, and we appreciate you sharing it with your friends! :)
How much less time should I cook the chicken if the breasts I got are thinly sliced?
Hayley @ Gimme Some Oven —
Hi Jennifer! Hmmm, that’s hard to say since we haven’t tested this recipe with thinly sliced chicken breast. We would advise maybe taking the temp down to 400 and baking these for around 15-20 min. Just be careful not to over-bake since they’re so thin. (Also, be sure that the internal chicken temp is between 160-170 degrees F. The FDA recommends 170 degrees F.) We hope this helps and that this turns out well for you — let us know!
I was wondering, if I have 3 chicken breasts about twice the size of the ones shown, about how long do I cook them? Thanks
Hayley @ Gimme Some Oven —
Hi Amy! You’ll want to pound them down a bit if they’re a lot fatter than the ones we used. As for baking time, it might be a few minutes less, since you have 3 instead of 4, but we’d still advise checking the temp. We hope this helps!
Hi Veronica! It’s listed in the recipe ingredients:
1 teaspoon kosher salt
1/2 teaspoon freshly-cracked black pepper
1/2 teaspoon garlic powder
1/2 teaspoon paprika (I prefer smoked paprika)
I have used this recipe several times. They come out wonderfully juicy and tender. I followed the recipe exactly and I am successful every time . I don’t think I will grill them ever again. Awesome recipe ! Thank you!
Hayley @ Gimme Some Oven —
Thanks for sharing Pam — we’re so glad to hear that! :)
I use this recipe all the time when I cook chicken now, although I add cumin as well. My family and friends love it! Many people have asked me for the recipe, and they are always surprised at the oven temperature.
Thanks so much for sharing this…chicken is so tough to get right!
Hayley @ Gimme Some Oven —
HI Amanda! Thanks for sharing with us — we’re so glad you and your friends and family enjoy the recipe! :)
I have made this so many times with a variety of spiced rubs, but this makes the best chicken!! I have heard everytime that it is the most moist and best cooked chicken they have had. In face this technique has made my boyfriend think I can cook! Ooops!
Just made this tonight and it came out so juicy! I added a bit more garlic powder and paprika tho. Sprinkled some paprika over the parts that had nothing on it and it gave it incredible flavor. Never knew about brining but now I can’t imagine not doing it. Thanks for such an easy dinner idea ?
Hayley @ Gimme Some Oven —
We’re so glad you enjoyed it, Caryl — thanks for sharing with us!
THANK YOUUUUU
This is the best chicken I’ve ever had at home. I could never get mine right – it always ended up too dry. But this was perfectly moist and glazed and hnnnng simply delicious. It felt like restaurant bought. Thank you so much.
Hayley @ Gimme Some Oven —
Thank you, Stephanie — we’re so glad you enjoyed it! :)
As any parent knows life dont pause because you are having a bad day lol. I went through a tough time and had to have multiple back surgerys so atm my wife is working and im a house dad. The only problem i run into is pushing through the pain(i refuse to take pain meds)so some days are worse than others. I love cooking but baked chicken was never in my wheelhouse. This recipe was simple, fast, and goes great with steamed rice. Tryed it, wife and kids loved it so this will be the goto dinner on bad days insted of fast food(yuk). Thanks!
Hayley @ Gimme Some Oven —
Oh no, we’re sorry about your back problems, Shane! We’re so glad you enjoyed this recipe and that it was also a hit with your family — thanks for giving it a try, and for your sweet comment!
My father hates poultry. He says it’s dry and tasteless protein mass. He’ll eat it, but he’ll complain the whole time. Well, I used this technique when I became the main meal builder while my mom recovers from surgery. His reaction? “The chicken. It’s wet!” So I will call it a hit. (It’s definitely the best chicken recipe I’ve ever tried.)
Hayley @ Gimme Some Oven —
Haha! Thanks for sharing with us, Jamie — we’re so glad he was happily surprised, and we’re glad you enjoyed it as well!
Quick question, do you turn it? And try making that spice mix and adding it to Olive oil and melted butter. Add the juice of one lemon and a good tables or oregano. Throw the quartered potatoes in and toss then let them sit in the fridge. Roast them low around 300 then when they are soft turn up the heat till they brown. Boom my Yiayia’s Greek potatoes.
Hayley @ Gimme Some Oven —
Hi Kristin! You don’t need to turn the chicken while it’s baking. Thanks for sharing your Yiayia’s potato recipe with us (they sound FANTASTIC and we bet they’re heavenly with this chicken)! :)
After 450* and 18 minutes, the chicken was gray and had no carmelization. I let it go to 24 minutes and it was still gray. I then turned on the broiler and after 10 minutes later, it finally resembled browned chicken. I have a new gas range oven so the 450* temp or broiling feature wasnt an issue, it just took longer than 18 minutes to get anywhere near what the photo portrays.
Hayley @ Gimme Some Oven —
Hi Sean! Thanks for sharing this with us — we’re sorry it took you so much longer to get it the right temp and color. We’re honestly not sure what happened, as we’ve tested this a zillion times and have never had any issues like that. That’s really strange that the chicken was gray! Is it possible your chicken could have been old? Or was it super thick? Maybe it needed to be pounded a bit, as the extra thickness could have caused a longer bake time. Other than that, we’re stumped. We hope it worked out in the end for you though!
I just made this recipe. Just tweeked the spices abit. By hand just added some cayene pepper, parsly, black lemon peppor, paprika and lemon juice. Baked in high heat for 20min and let it wait for 5min. Best best most juiciest chicken EVER!! FEELING ABSOLUTELY AWSOME! Thanks for the recipe and tips!!
Hayley @ Gimme Some Oven —
Thanks for your sweet words, Marinella! We’re so thrilled that you loved it! :D
Thank you for a terrific chicken recipe. I prepared it exactly as written and it came out perfectly (baked 15 minutes at 450 and let rest for 5 to 8 minutes)! I served it with roasted baby squash that was drizzed with olive oil and simply seasoned with salt and pepper, and fresh baked cornbread. My husband was thrilled and asked for seconds. Totally fantastic! I will be preparing this again and again. Easy peasy. Cheers! Dianne
This was so good!!! I’m not a very good cook so when I taste tested this and came out delicious I actually did a little dance. This is my go-to recipe now for chicken.
Hayley @ Gimme Some Oven —
Thanks for sharing, Gina — we’re so happy you liked the recipe! :)
This recipe was so good! I followed it exactly and it was the best baked chicken I have ever made! The family loved it and will definitely be making this again and again! Thank You!
Hayley @ Gimme Some Oven —
Thanks for sharing with us, Keli — we’re so happy you and your family loved it! :D
Did it several times already, this is absolutely the safest and easiest way to make juicy chicken breasts. I already did everything this recipe outlined before I found it, and it made me even more sure that this is it, the one way to bake chicken breasts.
I would like to add that you can omit salt in your spice mixture if you don’t wash the chicken after brining. Turns out the same as if you washed the chicken and added the salt afterwards, but not washing it is a bit easier and thriftier.
Also you can use absolutely any kind of spices imaginable, fresh or dried, this recipe is very flexible.
Oops, forgot to add one more thing: it doesn’t matter if your breasts are snug or loose, it could only affect the looks, snugly fit breasts in a small pan wouldn’t have that even and appetizing crust on top. Other than that, same thing, use any kind of baking dish you’ve got.


If I want to have a marsala and mushroom sauce for this would you suggest I cook that separately and spoon over at the end? I am intrigued and hopeful, your recipe sounds great, comments very supportive and I think the high heat makes a lot of sense. I have been searching for a way to make boneless breasts taste good, not dry, tasteless which is what happened no matter what I do….thank you!!! But curious about adding sauces like BBQ or a tangy combo of balsamic vinegar, caramelized onions, etc. (Most of the sauce recipes are stove top and the chicken simply comes out tough!)
Hi Janet! Yes, we would recommend just cooking your sauce separately and then adding it over the chicken at the end (marsala mushroom sauce is the BEST). We hope you enjoy the chicken — definitely let us know what you think! :)
LOVE this recipe! I’ve used it multiple times and consider it my go-to baked chicken recipe! Thanks for sharing! :)
Thanks Jasmine — we’re happy to hear that! :D
Made this since I needed the protein. Turned out great and juicy in 15 mins, though a little salty and high in sodium. I did forget to wash it after brining it though, and I only used 1 tsp salt and 1/2 tsp pepper for the seasoning, so it’s one or both of those things. Anyway, gonna try this next time with less salt, and washing the breasts after brining.
We’re glad you enjoyed this — yes, definitely don’t forget to rinse the chicken after brining next time! :) We appreciate you giving the recipe a try! :)
having an infant would take most of my time and I barely have time to make my dinner. I’m glad I came across your website and made it tonight for dinner. Its easy and can do it while watching my kid. It’s really easy and tastes good. I just placed so much salt on it that came out salty but ogher than taht, its excellent. Would love to make it again.
Thanks Xin — we’re glad you enjoyed this! As for the salt – did you make sure to rinse the chicken well after you brined it?
This was absolutely spectacular! The paprika and pepper really made this dish – so tasty. I was very heavy handed on the butter, but it came out all the better.
It’s strange, but the chicken almost had the texture and a little bit of the taste of fresh mozzarella – easy to pull apart and with a rich sweetness. This dish was a hit and I suspect I’ll be making it again and again! Thank you!
Thank you Julie — we’re so glad to hear it was a hit! :)
This is the very best technique for cooking chicken breasts. Thank you so much. I started using it just because it seemed so simple. Now it is my ‘go to’ recipe even when I am having guests. They all leave with the link to this site! Now my husband is using it for his curry recipes. He brines, seasons with his spices, cooks the chicken just under the 160°, rests it, then cuts it in chunks to simmer for a bit in his homemade sauce. The best he had ever made.
Thanks Janet! We’re happy you and your husband enjoy this (once we tried the brining trick, we quickly became obsessed)! :)
How much time difference would the cooking be on 450 degrees for seven pieces of chicken breast? And by how much would I increase the spice mix? Thanks!
Hi Jenna! Hmmm, we’re afraid we’re not sure what you mean by seven pieces of chicken breast. Do you mean chicken tenders or seven half breasts?
I came across your recipe earlier this evening looking for a new recipe to bake “MOIST” chicken breast. Man did I hit the JACKPOT!!! I made this 100% per your instructions and I was so floored how moist my chicken was in just 15mins in the oven. Wow!! I wanted to share a photo of it but I’m not sure how to add it here??!
Thanks so very much for sharing your recipe. I’m dying for my husband to get home Wednesday night from working out of town and I’m going to cook it the same way for him.
Thanks again!
~Teresa
Thanks for your sweet comment Teresa! We’re so happy you loved the recipe! :)
Yes, yes and oh yes! Thank you for this! Finally a recipe that doesn’t require a lot of ingredients and doesn’t take 3 years to cook.
Yeah! We hope you love it Jasmine! :)
I just tried this recipe tonight because I wanted a to add some roasted chicken to the pesto flatbread pizza with green bell peppers and pineapple chunks that I wanted to make for days and let me tell you that adding the roasted chicken made a huge difference! My family inhaled their serving of pizza in just minutes. My mom even requested for me to do this recipe again. Next time, I would pair this chicken with some salad to make it a healthy combination. Thank you!
You’re welcome Jay — we’re so glad you and your family enjoyed the chicken (and your pizza)! :)
I just tried this tonight and it was awesome. Really moist. Super easy. This will be a go-to for me for sure. Thanks!
Thanks for sharing Jennifer — we’re so happy you enjoyed it! :)
Hi,
Love the Brined Chicken Breast, Hi Heat! The bomb.
If I may offer my favorite twist for BBQ beeasts.
Seasoning Lawrys season salt chili powder paprika. I just season by sight. 12 minutes 450. Remove, quickly brush on favorite bbq sauce. Back in for 5-6 minutes to allow sauce to glaze over.
Thanks William — we’re happy you enjoy it!
And btw Jay is right. Goes great on pizza!
This really is the best recipe for baked chicken breast ! Thank you
Thanks for your kind compliment Anna! We’re so happy you enjoy the recipe!
A mixed review here. Yes, it was moist. I have not had much success cooking chicken at high temperates before, it always came out very tough. The brining probably was the key here. On the downside, it was very, very salty even though I rinsed and rinsed the chicken. I think half a teaspoon for seasoning would be fine, maybe even less would work. There was no crispiness or crust on the top so next time I think I will add some cracker crumbs or panko. Running it under the broiler doesn’t work for many of my baking pans, so not an option. It was easy to prepare, so it’s worth trying again with adjustments.
Hey there! We appreciate your honest feedback. We’re sorry it turned out on the salty side! It sounds like some groceries use a brining solution on their chicken and that could be the case here and could explain the excess salt. We haven’t had this experience but it seems a few others have, and this is the only thing we can think of. As for trying to get that crust, you can spray it with some cooking spray (or brush with oil) before baking, which will help. Or if you really want the crust and it’s not happening, you could cook the chicken until it’s nearly done, and then pop it under the broiler for a minute or two. That’ll definitely help it get a nice crust. We hope this helps for next time!
I can’t begin to express how excited I am to have stumbled across this, I just tired it out this evening and it was amazing! I’ve been trying for years to cook chicken breasts and they always come out dry and bland (admittedly I’m not a good cook). But this recipe was easy to follow and the chicken was delicious! This has seriously made my week!
Thank you Allison! We’re so happy you enjoyed this! :D
Thi recipe is ah. ma. zing!!! My chicken was perfect and juicy- loved it and will definitely make it again soon. Thanks for sharing this recipe!
Awesome, so glad to hear it! :)
I’ve been looking for a recipe for simple baked chicken breasts and came across yours, which looked failproof enough for me. Thanks to you, my first attempt at roasting meat was a success! Just like the second one. Took a little longer in my oven though, it should have been gas mark 4-5 but had to put it on mark 7 for the crust.
The second time, my man insisted on throwing in a few chicken legs along on the tray and they worked out just as good cooked the same way. Although there are probably different secrets to cooking them.
Thanks for sharing Tanya — we’re so glad this worked out for you and that you enjoyed it! :)
Made this recipe last night for dinner and it turned out wonderful, way better than I thought it would! I followed the recipe, also ensuring I rinsed the chicken well after bringing and it came out great, not too salty at all, and so juicy, almost like rotisserie chicken. I just had to change the seasonings a bit to use what was on hand, substituting paprika for some season all, for flavor and color. I will definitely be making this again! Thanks! I also often use your slow cooker BBQ chicken recipe too, everyone loves it!
Thanks so much Chelsi — we’re happy you enjoyed this, and that you’re a fan of the slow cooker BBQ chicken as well! :D
I followed your instructions and the results yielded the best juiciest chicken breast I have ever had in my life. Thank you!
Thanks for your sweet compliment Mike — we’re so glad you loved this! :D
I just wanted to say that I have always (30+ years) cooked chicken breast at 350 for 30-45 min…yes, 45 minutes…that is how I learned it. Today, as I was about to cook my chicken I decided to google the correct time to cook it because it is always so dry and blah. I came across your website and OH EM GEE this chicken turned out to be the best chicken I have ever made and I am beside myself on the difference! THANK YOU, THANK YOU, THANK YOU!
We’re so happy you enjoyed this Nina — thanks for taking the time to leave such a nice comment! :)
KUDOS! To you~~~~~~~~~~~ tried your baked chix recipe..I think I use a bit too much paprika, but they are THE BEST chicken breast I’ve ever had roasted in an oven……………..I can really taste a lovely chicken flavor and they look beautiful too. I cannot wait to try your lemon chicken and saffron-lemon chicken is a favorite. I’m sure yours will be fabulous. Thanks SO much!
Thank you Lea — we’re so glad you enjoyed it! :D
I’m 57 years old and cooking for myself now. I’ve never baked chicken breasts before. I followed this recipe and they turned out great. I was so impressed I had to share the recipe on Facebook with my daughters and on an online forum with some of my friends. I made enough to have leftovers and the cold, diced leftover chicken may be even better than it was hot from the oven. Great for use in a salad.
Hi Robin! We’re so glad you enjoyed the recipe, and we appreciate you sharing it with your friends! :)
How much less time should I cook the chicken if the breasts I got are thinly sliced?
Hi Jennifer! Hmmm, that’s hard to say since we haven’t tested this recipe with thinly sliced chicken breast. We would advise maybe taking the temp down to 400 and baking these for around 15-20 min. Just be careful not to over-bake since they’re so thin. (Also, be sure that the internal chicken temp is between 160-170 degrees F. The FDA recommends 170 degrees F.) We hope this helps and that this turns out well for you — let us know!
Awesome!!! I had a “good to” recipe before and tried this. No turning back now.
Thanks for the insight. Got some brining as I type.
You’re so welcome, William — we’re happy to hear you enjoyed it!
I was wondering, if I have 3 chicken breasts about twice the size of the ones shown, about how long do I cook them? Thanks
Hi Amy! You’ll want to pound them down a bit if they’re a lot fatter than the ones we used. As for baking time, it might be a few minutes less, since you have 3 instead of 4, but we’d still advise checking the temp. We hope this helps!
What’s the recipe for the rub?
Hi Veronica! It’s listed in the recipe ingredients:
1 teaspoon kosher salt
1/2 teaspoon freshly-cracked black pepper
1/2 teaspoon garlic powder
1/2 teaspoon paprika (I prefer smoked paprika)
Try that spice mix on sweet potatoes. Amazing.
Oooh, we love that idea, Karen!
I have used this recipe several times. They come out wonderfully juicy and tender. I followed the recipe exactly and I am successful every time . I don’t think I will grill them ever again. Awesome recipe ! Thank you!
Thanks for sharing Pam — we’re so glad to hear that! :)
I use this recipe all the time when I cook chicken now, although I add cumin as well. My family and friends love it! Many people have asked me for the recipe, and they are always surprised at the oven temperature.
Thanks so much for sharing this…chicken is so tough to get right!
HI Amanda! Thanks for sharing with us — we’re so glad you and your friends and family enjoy the recipe! :)
This blog seriously changed my life and I find myself referring back to it often (just in case I forget something). Thanks for posting!
That is so kind of you to say, Lisa! We’re thrilled that you enjoy the blog! :D
This was awesome!!!!!
We’re so glad you liked it, Joanie!
holy cow wow! thank you.
it was easy to prep, smells fantastic, and went well in our chicken Caesar wraps tonight.
We’re so glad you enjoyed the chicken, Heather! :)
On point. Easily the best, if not the best boneless skinless chicken breast recipe out there. The seasoning options are endless.
Thanks for your sweet words, Sarah! We’re so happy you loved this!
I have made this so many times with a variety of spiced rubs, but this makes the best chicken!! I have heard everytime that it is the most moist and best cooked chicken they have had. In face this technique has made my boyfriend think I can cook! Ooops!
Yay! We’re so happy you enjoy the recipe, Alyssa!
Just made this tonight and it came out so juicy! I added a bit more garlic powder and paprika tho. Sprinkled some paprika over the parts that had nothing on it and it gave it incredible flavor. Never knew about brining but now I can’t imagine not doing it. Thanks for such an easy dinner idea ?
We’re so glad you enjoyed it, Caryl — thanks for sharing with us!
THANK YOUUUUU
This is the best chicken I’ve ever had at home. I could never get mine right – it always ended up too dry. But this was perfectly moist and glazed and hnnnng simply delicious. It felt like restaurant bought. Thank you so much.
Thank you, Stephanie — we’re so glad you enjoyed it! :)
As any parent knows life dont pause because you are having a bad day lol. I went through a tough time and had to have multiple back surgerys so atm my wife is working and im a house dad. The only problem i run into is pushing through the pain(i refuse to take pain meds)so some days are worse than others. I love cooking but baked chicken was never in my wheelhouse. This recipe was simple, fast, and goes great with steamed rice. Tryed it, wife and kids loved it so this will be the goto dinner on bad days insted of fast food(yuk). Thanks!
Oh no, we’re sorry about your back problems, Shane! We’re so glad you enjoyed this recipe and that it was also a hit with your family — thanks for giving it a try, and for your sweet comment!
My father hates poultry. He says it’s dry and tasteless protein mass. He’ll eat it, but he’ll complain the whole time. Well, I used this technique when I became the main meal builder while my mom recovers from surgery. His reaction? “The chicken. It’s wet!” So I will call it a hit. (It’s definitely the best chicken recipe I’ve ever tried.)
Haha! Thanks for sharing with us, Jamie — we’re so glad he was happily surprised, and we’re glad you enjoyed it as well!
I am cooking for one; how much salt should I use? Can’t wait to try this, LOVE chicken.
Hi Betsy! If cooking for one, we’d suggest just cutting the whole recipe in half. We hope you enjoy!
Holy cluck, that chick was tender as bawks!
We’re so glad you liked it!
Quick question, do you turn it? And try making that spice mix and adding it to Olive oil and melted butter. Add the juice of one lemon and a good tables or oregano. Throw the quartered potatoes in and toss then let them sit in the fridge. Roast them low around 300 then when they are soft turn up the heat till they brown. Boom my Yiayia’s Greek potatoes.
Hi Kristin! You don’t need to turn the chicken while it’s baking. Thanks for sharing your Yiayia’s potato recipe with us (they sound FANTASTIC and we bet they’re heavenly with this chicken)! :)
After 450* and 18 minutes, the chicken was gray and had no carmelization. I let it go to 24 minutes and it was still gray. I then turned on the broiler and after 10 minutes later, it finally resembled browned chicken. I have a new gas range oven so the 450* temp or broiling feature wasnt an issue, it just took longer than 18 minutes to get anywhere near what the photo portrays.
Hi Sean! Thanks for sharing this with us — we’re sorry it took you so much longer to get it the right temp and color. We’re honestly not sure what happened, as we’ve tested this a zillion times and have never had any issues like that. That’s really strange that the chicken was gray! Is it possible your chicken could have been old? Or was it super thick? Maybe it needed to be pounded a bit, as the extra thickness could have caused a longer bake time. Other than that, we’re stumped. We hope it worked out in the end for you though!
I just made this recipe. Just tweeked the spices abit. By hand just added some cayene pepper, parsly, black lemon peppor, paprika and lemon juice. Baked in high heat for 20min and let it wait for 5min. Best best most juiciest chicken EVER!! FEELING ABSOLUTELY AWSOME! Thanks for the recipe and tips!!
Thanks for your sweet words, Marinella! We’re so thrilled that you loved it! :D
Hi Ali,
Thank you for a terrific chicken recipe. I prepared it exactly as written and it came out perfectly (baked 15 minutes at 450 and let rest for 5 to 8 minutes)! I served it with roasted baby squash that was drizzed with olive oil and simply seasoned with salt and pepper, and fresh baked cornbread. My husband was thrilled and asked for seconds. Totally fantastic! I will be preparing this again and again. Easy peasy. Cheers! Dianne
This was so good!!! I’m not a very good cook so when I taste tested this and came out delicious I actually did a little dance. This is my go-to recipe now for chicken.
Thanks for sharing, Gina — we’re so happy you liked the recipe! :)
This was amazing. I have never brined chicken before and was hesitant about the high temperature. Definitely a favorite
We’re so happy you enjoyed it, Ginny!
This recipe was so good! I followed it exactly and it was the best baked chicken I have ever made! The family loved it and will definitely be making this again and again! Thank You!
Thanks for sharing with us, Keli — we’re so happy you and your family loved it! :D
Did it several times already, this is absolutely the safest and easiest way to make juicy chicken breasts. I already did everything this recipe outlined before I found it, and it made me even more sure that this is it, the one way to bake chicken breasts.
I would like to add that you can omit salt in your spice mixture if you don’t wash the chicken after brining. Turns out the same as if you washed the chicken and added the salt afterwards, but not washing it is a bit easier and thriftier.
Also you can use absolutely any kind of spices imaginable, fresh or dried, this recipe is very flexible.
Oops, forgot to add one more thing: it doesn’t matter if your breasts are snug or loose, it could only affect the looks, snugly fit breasts in a small pan wouldn’t have that even and appetizing crust on top. Other than that, same thing, use any kind of baking dish you’ve got.