This post may contain affiliate links. Please read my disclosure policy.
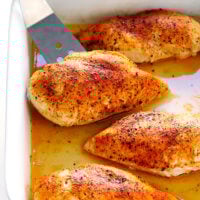
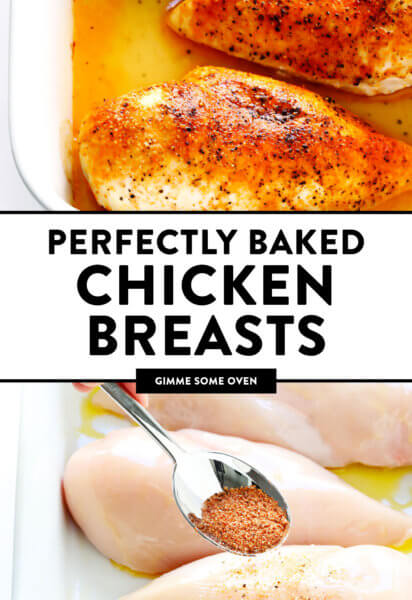
My favorite oven baked chicken breasts recipe! It never fails, thanks to this simple 5-step method that is easy to make and customize with your favorite seasonings.
A few weeks ago on Insta, I asked if you all might be interested in a back-to-basics series about the best ways to bake proteins (i.e. chicken, pork, steak, seafood, tofu, etc.) in the oven. Your answer? A resounding yes, please. Many of you had requests and questions about methods for cooking various proteins, plus more than a few tales to tell about proteins gone not-so-right over the years. I hear you! My little kitchen has seen more than its share of overcooked steaks, completely dried out pork chops, salmon skin glued to pans, and not-so-crispy tofu over the years too. Which are never fun, especially since proteins can be pricey and intended for special occasions. But hey, it’s all part of the adventure of learning how to cook. And eventually, I’ve trial-and-errored my way to some basic methods for baking proteins that have become super-reliable, super-delicious staples in my kitchen.
So over the next two weeks, I thought we could work our way through each of them, beginning today with the #1 most requested protein here on Gimme Some Oven…baked chicken.
Specifically, baked chicken breasts.
Over the years, I’ve received countless requests for new chicken breast recipes, and many more for tips on how to bake chicken breasts in the oven. Because anyone who worked with chicken breasts before know that they can be incredibly versatile, yet also incredibly finicky to work with, especially when baked in the oven. Cook them the wrong way and you’ll end up with a dry, rubbery, tough, and flavorless disaster. But cooked the right way?! We’re talkin’ juicy, tender, flavorful, perfectly baked chicken breasts that you will love.
The good news is that they’re also totally easy to customize with your favorite seasonings or sauces. And also, incredibly easy to make with my 5-step baked chicken breasts method. Thousands of our readers have tried it over the years and reported back that this method was a game-changer with cooking chicken. So if you have yet to give it a try, let’s bake some chicken together!
Baked Chicken Breasts Recipe | 1-Minute Video
Baked Chicken Breast Ingredients
To make this baked chicken breasts recipe, you will need:
Boneless, skinless chicken breasts: You can either purchase fresh chicken breasts (my preference) or frozen chicken breasts (which you will need to completely thaw before using). Some chicken also comes pre-brined nowadays, in which case you can skip step one below.
Butter or olive oil: Your pick! I like the extra flavor that butter adds, but olive oil will also work well.
Kosher Salt: An essential ingredient in our brine, and we will also use salt to season the chicken before baking.
Seasonings: I included an all-purpose blend of smoked paprika, garlic powder, salt and black pepper in the recipe below, which is super-simple and goes with just about anything. But feel free to sub in any dry seasoning blend that you prefer.
Also, if you bake chicken (or any other kind of baked proteins) regularly in the oven, I strongly having a cooking thermometer on hand too. It is the most foolproof way to ensure that your chicken is not over- or under-cooked, and works like a charm. I recommend either this:
Instant-read cooking thermometer: which I have owned and used for years when cooking chicken, which currently retails for about $14 on Amazon.
Dual-probe wireless meat thermometer: which I also own and love because it can be used inside of a hot oven (especially helpful for baking steak, salmon and pork) plus it can either beep or send an alert to your cell phone, and currently retails for about $33 on Amazon.
How To Bake Chicken Breasts
Alright, so here’s the secret! To make perfectly baked chicken bbrrreasts, you simply need to follow this 5-step acronym: B.B.R.R.R.
Brine
Brush
Rub
Roast
Rest
Brine (Step 1): This step is a must when you want to bake chicken breasts in the oven. Brining chicken is super-easy, it makes your chicken extra juicy, and best of all, it can be effectively done in just 15 minutes.
To brine chicken, simply fill a big bowl half full with lukewarm water. Stir in a handful of salt until it mostly dissolves. Add ice cubes or cold water to lower the temperature of the water so that it is cool to the touch. Then add your chicken breasts and let them sit in the saltwater to brine for at least 15 minutes. If you are doing this in advance, you can cover and refrigerate the bowl of chicken and saltwater for up to 6 hours. But you don’t want to let the chicken brine for much longer than that.
When you’re ready to go, remove the chicken from the brine. Give it a good rinse it with cold water to wash off the salt, and then pat it dry with some paper towels. And voila — your chicken is officially brined.
Really, don’t skip over this step! It makes a world of difference.
Note: That said, some store-bought chicken breasts are now sold pre-brined. So double-check your packaging beforehand. And if your chicken has already been pre-brined in a sodium solution, just move onto step two. :)
Brush (Step 2): Brush your chicken breasts with melted butter. Or at least, I highly recommend using butter. It adds great flavor and helps give a nice golden crust on the outside. But if you’d rather use olive oil (or another favorite cooking oil), feel free.
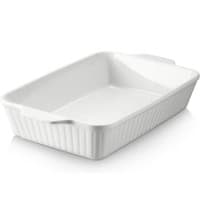
Brush the breasts liberally on both sides to prevent the chicken from sticking to the pan, and also to help the seasonings stick. Then place the chicken breasts in a large baking dish or roasting pan.
Rub (Step 3): If you’re really wanting to keep things simple, you can simply sprinkle some salt and pepper onto the chicken breasts. But again, chicken will pick up the flavor of whatever seasonings you add. So even if you’re making a simple dish that calls for “plain” chicken breasts, I highly recommend the simple chicken seasoning recipe I have included below that includes salt, pepper, garlic powder and paprika.
Roast (Step 4): So this is the step that causes some squabbles amongst chicken lovers — how long to bake chicken breasts? And what is the correct temperature to bake chicken? Do you bake it low and slow (as in, 30 minutes at 350°F)? Or do you roast chicken high and quick (as in, 15 minutes at 450)? I have tested out both — and just about every interval in between — dozens upon dozens upon dozens of times. And in the end, I fall firmly in the latter camp when it comes to baked chicken.
I like to roast my chicken breasts on high heat.
Depending on the thickness of your chicken breasts, roasting chicken at 450°F should require a cooking time of about 15-18 minutes (depending on the thickness/size of your chicken breasts). It’s speedy and it’s easy. But mostly I love it because cooking at high heat quickly develops a nice crispier “crust” on the outside of the breasts, which also helps to lock in those juices and keep the oven roasted chicken perfectly tender on the inside. It’s the best of both worlds.
I highly recommend investing in a small cooking thermometer to measure the cooked chicken temp in order to tell if it is ready to go (the FDA says that the safe cooked chicken temp is 165°F), versus cutting into it with a fork, which lets those good juices seep out. I use this instant-read thermometer and it will accurately measure your internal chicken temperature in seconds.
Rest (Step 5): This one is a non-negotiable. You must, must let your beautifully baked chicken breasts rest before cutting into them — a tip which applies to cooking any meat, really. If you cut in right away, you will lose all of the amazing juices and some of the tenderness that we’re going for. But if you give your freshly baked chicken breasts a brief rest, it will finish cooking and lock in all of those delicious juices, resulting in the most tender and juicy and delicious baked chicken.
I recommend loosely tenting a sheet of aluminum foil over the pan to keep the heat in while the chicken rests. And thenafter 5-10 minutes, you can finally serve and enjoy your perfectly-cooked chicken breasts.
And enjoy every last bite. ♡
How To Season Baked Chicken Breasts
Again, I’m a big fan of the classic paprika-garlic-pepper mix in the recipe below. But if you’d like to mix things up, feel free to sub in any of your favorite dry seasoning mixes, such as:
Here are some of my favorite ways to serve baked chicken breasts:
With roasted vegetables. Have your oven do double-duty and roast some vegetables to go along with the chicken. Roasted asparagus, broccoli, Brussels sprouts, cauliflower, mushrooms, potatoes, or zucchini are always delicious!
Stuffed in tacos or enchiladas. Shred or dice the chicken to make chicken tacos, such as these quick and easy chicken tinga tacos or chicken enchiladas.
Stuffed into wraps or pitas. Slice and tuck the chicken into tortillas or pitas, such as chicken souvlaki.
Once the chicken has been baked, it can be stored in a sealed container in the refrigerator for up to 3 days. Or you can freeze it for up to 3 months. (I recommend shredding, dicing or slicing the chicken before freezing for easier use.)
Side Dish Recipe Ideas
Looking for some side dishes to serve with this baked chicken recipe? Here are a few of my faves:
Learn how to make juicy, tender, delicious baked chicken breasts with this simple 5-step method.
Ingredients
Scale
4 boneless skinless chicken breasts, pounded to even thickness
1 tablespoon melted butter or olive oil
1 teaspoon kosher salt
1/2 teaspoon freshly-ground black pepper
1/2 teaspoon garlic powder
1/2 teaspoon smoked paprika
Instructions
Brine the chicken. (Check the label of your chicken breasts. If they have already been pre-brined in a sodium solution, please skip this step.) Fill a large mixing bowl with 2 cups of lukewarm water and 1/4 cup kosher salt. Stir to combine until most of the salt is absorbed. Add 2 cups of cold water (or a few ice cubes) to lower the temperature of the water so that it is cool to the touch. Add the chicken breasts and let them sit in the mixture to brine for 15 minutes, or you can also also cover the bowl and refrigerate for up to 6 hours. Remove the chicken breasts from the brine, rinse them with cold water, then pat them dry with paper towels.
Heat the oven. Preheat oven to 450°F.
Season the chicken. Place the chicken breasts in a single layer in a large baking dish*. Brush on both sides (turning once) evenly with the melted butter or olive oil. In a separate small bowl, whisk the salt, pepper, garlic powder and paprika until combined. Sprinkle the seasoning mixture evenly over the chicken on both sides.
Bake. Bake for 15-18* minutes, or until the chicken is cooked through and no longer pink. Cooking time will depend on the thickness of the chicken breasts, so I recommend using a cooking thermometer to know exactly when the chicken is fully cooked. The thickest part of the breast should measure 165°F. (If you want the chicken to be a little bit browned and crispier on top, you can turn the broiler on high for the final 3-5 minutes of the cooking time and broil the chicken until it is cooked through and golden on top. Keep a close eye on the chicken, however, so that it does not overcook and/or burn.)
Rest the chicken. Once the chicken is cooked, remove the pan from the oven, transfer the chicken to a clean plate, and loosely tent the plate with aluminum foil. Let the chicken rest for at least 5-10 minutes.
Baking Dish: Please double-check the maximum temperature of your baking dish for this recipe. Glass dishes (such as Pyrex) usually have a maximum recommended temperature of 425°F, so we do not recommend using a glass dish for this recipe. You can also cook this recipe on a thick metal baking sheet.
Storage instructions: Cooked chicken can be stored in a sealed container and refrigerated for up to 3 days or frozen for up to 3 months.
Holy Moly! This chicken was amazing and so moist and tender! I am a fan of dark meat so normally I go for one in thighs. Just happened to pick up some breasts because they were on sale at Harris Teeter. I found this recipe and holy mackerel I think I’m a breast fan now haha! I cooked it at 450 like you suggested until the temp got to 145 and then I broiled for the remainder of the cooking process til they hit 167. Rested it for the gen minutes in the aluminum tent and voila my boyfriend and two year old tore it up! Paired it with some butter Lima beans and herb chicken couscous. Can’t wait to make this again since there is no leftovers! Thanks for sharing!!
Hayley @ Gimme Some Oven —
Thank you for sharing, Meagan, we’re so happy you enjoyed this! :)
Are you supposed to turn around the chicken half way through? Maybe it’s common sense, so sorry for the silly question .. but I would appreciate a response!
This recipe rocks! The chicken was outrageously tender and delicious. Try it. I guarantee you will never go back. It will be hands down your favorite “plain ‘ol” boneless chicken breast recipe. PS- I followed the recipe to the letter. I would make no changes. Enjoy!
I don’t usually leave comments, but I just have to tell you how great this recipe is. I’ve made it three or four times now and it’s my go-to for boneless, skinless chicken breasts. I always overcooked them in the past, leading to dry, flavorless yuck. These are SO juicy every time, even after microwaving the next day. I’ve made it both with olive oil and melted butter, and while both are good, you are right, the butter is better.
Moistest chicken I ever made and very little effort. I only did the brine for 15 mins and I subbed cumin for the paprika because I never thought paprika had much flavor and was mostly just color. Even my 2 picky eaters 6 and 9 yrs old liked it and asked me to make it for dinner sometime. I chopped mine into bite size pieces and mixed with my homemade salsa for a very tasty low calorie lunch.
I love chicken dinners, unfortunately my fiance don’t. I made this and added lemon pepper and it was a huge hit!! By far the best chicken I’ve ever had and my fiance loved it!
I’ve actually made this recipe several times and though I should comment! It is excellent I don’t change any of the directions and it turns out perfect Everytime. This is my go to delicious and quick chicken recipe. Thank you so much!!
Hi Ali . how are you . I wanted to make a comment about your post for skinless chicken. It is awesome. My skinless chicken was moist, tasted great no leftovers.I BBRRR. Brime, brush, rub, roast , and rest. I brine chicken but I let it brine for 30 minutes in kosher salt and warm water. If frozen in freeze I put in bowl water for hour.bthen I brine with water and kosher salt . I use Morton kosher salt.
2. Brush chicken with oil or butter. I used gem olive oil from Walmart . I haven tried with melee butter. Question could I use olive oil then use butter?Like you do get turkey browser for thanksgiving.
R rub it with seasons. I use 1. Salt, 2. Pepper3. Garlic power, 4.onion power, 5.paprika, 6.poultry seasoning7. Old bay seasonings garlic and herb. Before I season chicken if you pat it dry with paper towel. Cut seven slits in chicken with knift. Cut it till goes tobother side chicken. Then turn over put knife in side. This gets favoring throughout whole chicken.
R cost chicken for 20 minutes on 450. I roastvten minutes one side. Then flip it over ten minutes on the other side. Then broil in oven for 4 minutes. 2 minutes one size. Two minutes other size. Believe me is with the extra steps.
R rest chicken 5 to ten minutes before you eat it.
Thanks Ali this is now my go to recipe for skinless chicken breast.. By way way you are beauty you could be model. Are people surprise you can cook . I usually get you can cook . then once eat my cooking. I get when are you cooking again. Lol. But thanks for your help . This recipe is simple and easy.
For single woman cook this baked chicken, baked potato, salad, biscuit, use Pillsbury or jiffy muffins, fruit,and cookies on Friday night date at home and dress up . Guy be so impressed with dinner. He want marry you or make you his lady.
Oh MY, this is the best, most tender & juicy boneless chicken breast I’ve ever had. I used a lot of spicy things on it, and it was wonderful. No more boring boiled chicken breasts ever again! TYSM!
The absolute best boneless chicken breast I’ve ever had. Never again boring, boiled chicken. I planned for leftovers, but we ate it all. TYSM for opening my eyes!!
Thank you, thank you, thank you! I struggle with chicken, and usually serve it sheepishly because I know how it comes out (not very good). However, I made this tonight, and it came out amazing! I was so proud to serve this to my family. My 7 year old told me she didn’t know I knew how to make chicken this good. I have to agree! This is my new chicken recipe.
I’ve also tried baking chicken so many different ways, and have never been thrilled with the outcome. This recipe nailed it! Seriously THE BEST! Thank you so much for sharing!
I read through all sixteen pages of comments to glean some tips and I’m amazed after several years, you are still responding to the thousands of comments! I am looking forward to trying your brine and high temp method. Do you think after brining, this method would still work well for chicken breasts that marinate, or is it meant strictly for a dry breast with seasonings? Thanks so much!
I only did one 4oz breast and it came out exactly as your site stated, tender and tasty. I am on the nutrisystems diet and the chicken breast was one of the Flex-Meals…
I’ve made this chicken twice and both times the chicken was delicious. The chicken was moist, tender, and flavorful. I intend to keep it as my go-to chicken recipe. Thanks for sharing this recipe.
This recipe yielded intensely succulent, flavorful chicken breasts! I view this more of a technique rather than a recipe. Follow this recipe exactly! No substitutions! Don’t cut corners! You will be rewarded with the most mouth watering chicken breasts you ever had!!
Wanted a boneless chicken recipe that wasnt fried. Used Italian seasoning instead of paprika. Husband’s reaction was “outstanding” and “yowzer” and I enjoyed it very much also, especially getting those reactions from him.
This just might be the best chicken I’ve ever eaten. I’m usually not a big fan of chicken, but this is absolutely delicious! I didn’t deviate from the recipe at all and it came out tender, juicy, and flavorful. This is my new go-to weeknight dinner recipe!
We will mention your name and think of you fondly every time we prepare chicken in this manner. How is that for a trade off? I just taught my adult sons how to make this dish as it is a keeper! Smoked paprika from Spain – simpatico. Thank you,
carolyn
I knew I was doing something wrong with the way I used to baked chicken. After using this recipe I will never cook chicken a different way. It was the most flavorful and juicy chicken breast I have ever done. I always use the cheap Aldi Frozen bagged chicken as well.
I use larger breasts than you, so have to add about ten extra minutes to cook time. Other than that, I followed your direction, generously using Italian Seasoning. Moist, delish. Thanks
I was skeptical but this was so moist and flavorful and all I did was baste with melted butter and seasoned with kosher salt. Perfect for soup, casserole or chicken salad.


I loved this recipe and I’m not a fan of chicken! First time we haven’t had leftovers and they have asked for it again all week! Definite winner!
We’re so glad to hear that, Jennifer, thank you! :)
I’ve been making awful, dry chicken for too long. No more! This made some of the best chicken I’ve ever eaten. Amazingly tender.
Thank you, Kat, we’re so happy you loved this!
It turned out amazing. We didn’t get the crust we wanted by that was my fault. I wish I could have put a picture up but it was amazing.
We’re so glad you enjoyed it, April!
Holy Moly! This chicken was amazing and so moist and tender! I am a fan of dark meat so normally I go for one in thighs. Just happened to pick up some breasts because they were on sale at Harris Teeter. I found this recipe and holy mackerel I think I’m a breast fan now haha! I cooked it at 450 like you suggested until the temp got to 145 and then I broiled for the remainder of the cooking process til they hit 167. Rested it for the gen minutes in the aluminum tent and voila my boyfriend and two year old tore it up! Paired it with some butter Lima beans and herb chicken couscous. Can’t wait to make this again since there is no leftovers! Thanks for sharing!!
Thank you for sharing, Meagan, we’re so happy you enjoyed this! :)
Makes even the bachelor look like a great cook. Super recipe!
We’re so glad you enjoy it, Travis!
Are you supposed to turn around the chicken half way through? Maybe it’s common sense, so sorry for the silly question .. but I would appreciate a response!
You’re welcome to flip them halfway through if you’d like, but it’s not required. :) Enjoy!
This recipe rocks! The chicken was outrageously tender and delicious. Try it. I guarantee you will never go back. It will be hands down your favorite “plain ‘ol” boneless chicken breast recipe. PS- I followed the recipe to the letter. I would make no changes. Enjoy!
Awesome!! So happy to hear it! :D
I don’t usually leave comments, but I just have to tell you how great this recipe is. I’ve made it three or four times now and it’s my go-to for boneless, skinless chicken breasts. I always overcooked them in the past, leading to dry, flavorless yuck. These are SO juicy every time, even after microwaving the next day. I’ve made it both with olive oil and melted butter, and while both are good, you are right, the butter is better.
Awesome! So happy to hear it!!
Quick question- I use sea salt instead of kosher salt. Think the measurement would be the same for the brine? Or cut it back a bit? Thanks!
1 tablespoon (or just shy of 1 tablespoon) of sea salt should work great! :) Enjoy!
AMANZING! I’m a horrible cook and my husband actual said this was really good!!!
Yay, so glad you both enjoyed it!
Moistest chicken I ever made and very little effort. I only did the brine for 15 mins and I subbed cumin for the paprika because I never thought paprika had much flavor and was mostly just color. Even my 2 picky eaters 6 and 9 yrs old liked it and asked me to make it for dinner sometime. I chopped mine into bite size pieces and mixed with my homemade salsa for a very tasty low calorie lunch.
Awesome, sounds delicious!
I love chicken dinners, unfortunately my fiance don’t. I made this and added lemon pepper and it was a huge hit!! By far the best chicken I’ve ever had and my fiance loved it!
Awesome!!!
I’ve actually made this recipe several times and though I should comment! It is excellent I don’t change any of the directions and it turns out perfect Everytime. This is my go to delicious and quick chicken recipe. Thank you so much!!
Yay, I’m so happy to hear it! :)
Great recipe, comes out absolutely perfect every time!
Wonderful!!
I love this??? I wasn’t able to achieve the crust ? But still?everyone loved it! Thank you!
Yay, so glad you enjoyed it! :)
Hi Ali . how are you . I wanted to make a comment about your post for skinless chicken. It is awesome. My skinless chicken was moist, tasted great no leftovers.I BBRRR. Brime, brush, rub, roast , and rest. I brine chicken but I let it brine for 30 minutes in kosher salt and warm water. If frozen in freeze I put in bowl water for hour.bthen I brine with water and kosher salt . I use Morton kosher salt.
2. Brush chicken with oil or butter. I used gem olive oil from Walmart . I haven tried with melee butter. Question could I use olive oil then use butter?Like you do get turkey browser for thanksgiving.
R rub it with seasons. I use 1. Salt, 2. Pepper3. Garlic power, 4.onion power, 5.paprika, 6.poultry seasoning7. Old bay seasonings garlic and herb. Before I season chicken if you pat it dry with paper towel. Cut seven slits in chicken with knift. Cut it till goes tobother side chicken. Then turn over put knife in side. This gets favoring throughout whole chicken.
R cost chicken for 20 minutes on 450. I roastvten minutes one side. Then flip it over ten minutes on the other side. Then broil in oven for 4 minutes. 2 minutes one size. Two minutes other size. Believe me is with the extra steps.
R rest chicken 5 to ten minutes before you eat it.
Thanks Ali this is now my go to recipe for skinless chicken breast.. By way way you are beauty you could be model. Are people surprise you can cook . I usually get you can cook . then once eat my cooking. I get when are you cooking again. Lol. But thanks for your help . This recipe is simple and easy.
For single woman cook this baked chicken, baked potato, salad, biscuit, use Pillsbury or jiffy muffins, fruit,and cookies on Friday night date at home and dress up . Guy be so impressed with dinner. He want marry you or make you his lady.
Oh MY, this is the best, most tender & juicy boneless chicken breast I’ve ever had. I used a lot of spicy things on it, and it was wonderful. No more boring boiled chicken breasts ever again! TYSM!
Awesome!!! :)
The absolute best boneless chicken breast I’ve ever had. Never again boring, boiled chicken. I planned for leftovers, but we ate it all. TYSM for opening my eyes!!
Awesome!!! :)
Thank you, thank you, thank you! I struggle with chicken, and usually serve it sheepishly because I know how it comes out (not very good). However, I made this tonight, and it came out amazing! I was so proud to serve this to my family. My 7 year old told me she didn’t know I knew how to make chicken this good. I have to agree! This is my new chicken recipe.
Yay, so happy to hear it! :)
Did you use a regular bake setting or did you use a convection bake setting? Thanks for posting – will be cooking this tomorrow night!
I’ve always not liked chicken breast but this has turned me around and I am only 73 course I have only started cooking for myself recently. Thank you.
Wonderful, so glad you enjoyed it! Happy cooking! :)
I’ve also tried baking chicken so many different ways, and have never been thrilled with the outcome. This recipe nailed it! Seriously THE BEST! Thank you so much for sharing!
YAY, so glad to hear it!
love,love, my son love chicken another way to fix for him used for chicken taco
Awesome!
Super easy recipe and always turns out great.. every time I pull out chicken breasts this is the recipe they ask for!
YAY, so happy to hear it!
JUST made this and love it. Might omit some things of the salt tho next time.
Oh my goodness. This was amazing definitely my new go to.
Yessss!
I read through all sixteen pages of comments to glean some tips and I’m amazed after several years, you are still responding to the thousands of comments! I am looking forward to trying your brine and high temp method. Do you think after brining, this method would still work well for chicken breasts that marinate, or is it meant strictly for a dry breast with seasonings? Thanks so much!
Do you need to spray the pan before you put the chicken in???
I love love love this recipe though!! It’s the only chicken I never make anymore
I only did one 4oz breast and it came out exactly as your site stated, tender and tasty. I am on the nutrisystems diet and the chicken breast was one of the Flex-Meals…
Awesome, so glad you enjoyed the recipe!
I just made this chicken recipe for my husband. I asked him what he thought and all I get from him is “mmmmmm””. I think that is a 5 star!
YAY, thank you!
Juiciest, most delicious chicken breasts EVER! Thank you for the perfect recipe! Yum!
Yay!! So glad to hear it!
I’ve made this chicken twice and both times the chicken was delicious. The chicken was moist, tender, and flavorful. I intend to keep it as my go-to chicken recipe. Thanks for sharing this recipe.
Awesome!!!
Very easy to make and nice recipe
Thank you! :)
Doing every step did just what you said! Finally the Best juicy chicken baked method, oh man yummy!!! or woman its just an expression.
Ha, excellent! :)
This recipe yielded intensely succulent, flavorful chicken breasts! I view this more of a technique rather than a recipe. Follow this recipe exactly! No substitutions! Don’t cut corners! You will be rewarded with the most mouth watering chicken breasts you ever had!!
Awesome!!!
Ali, you should forward this recipe to ‘Cook’s Illustrated’ magazine, aka ‘America’s Test Kitchen/Cook’s Country’.
:)
I’ve made this twice now. Just great!
Excellent!!!
Thank you!!! Gmae changer.
Awesome!!
Wanted a boneless chicken recipe that wasnt fried. Used Italian seasoning instead of paprika. Husband’s reaction was “outstanding” and “yowzer” and I enjoyed it very much also, especially getting those reactions from him.
Fantastic, so glad to hear it!
This just might be the best chicken I’ve ever eaten. I’m usually not a big fan of chicken, but this is absolutely delicious! I didn’t deviate from the recipe at all and it came out tender, juicy, and flavorful. This is my new go-to weeknight dinner recipe!
Awesome!!!
Cant express how happy i am to have found this ! This recipe is sooooo easy and it delivers on everything it promises . PERFECT CHICKEN BREASTS!
Yay, so glad to hear it! :)
We will mention your name and think of you fondly every time we prepare chicken in this manner. How is that for a trade off? I just taught my adult sons how to make this dish as it is a keeper! Smoked paprika from Spain – simpatico. Thank you,
carolyn
Wonderful! Thanks, Carolyn!
Juicy as anything! Loved it and will make it again!
Yesss!
Do I cover the chicken while it’s baking in the over?
Nope, not for this recipe. :) Enjoy!
I will be making this tonight! If the chicken breast needs to be pounded to make it uniform thickness, should I do so before or after the brining?
You could pound it at either point. :) Enjoy!
I knew I was doing something wrong with the way I used to baked chicken. After using this recipe I will never cook chicken a different way. It was the most flavorful and juicy chicken breast I have ever done. I always use the cheap Aldi Frozen bagged chicken as well.
Awesome, so glad you enjoyed it!
Excellent recipe!! Chicken was moist and delicious.
So happy to hear it! :)
I use larger breasts than you, so have to add about ten extra minutes to cook time. Other than that, I followed your direction, generously using Italian Seasoning. Moist, delish. Thanks
Wonderful, glad it worked out! :)
I was skeptical but this was so moist and flavorful and all I did was baste with melted butter and seasoned with kosher salt. Perfect for soup, casserole or chicken salad.
Wonderful, so happy you enjoyed the recipe. :)
Yum!! Thank you. My picky kids raved about. My husband and I couldn’t believe how moist chicken breasts could be.
Yay!! Success! :)